The Big Trip!

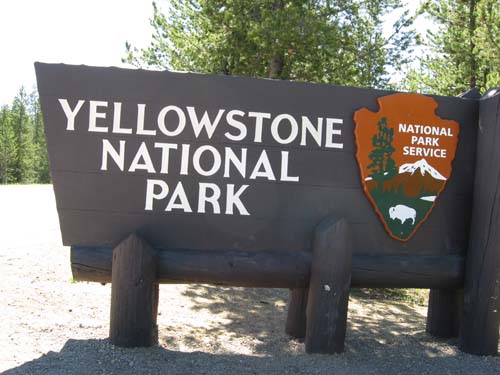
We finally went on a two week trip with the Ambassador. Everything went great. We left Northern California for Yellowstone National Park in Wyoming.
img_0688.jpg
We did have one overnight stay on the way. We found a $20 hookup site on the side of the freeway somewhere in Nevada. We arrived outside of Yellowstone about 5pm the second day. We did not have any plans on this trip. No reservations. The first campsite in West Yellowstone, MT was fully booked. They had turned away about 30 trailers before we got there. We had to settle for a site about seven miles from the park entrance.

img_0231.jpg

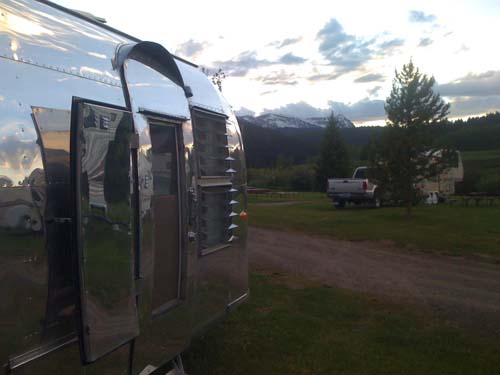
Not a bad site. They had a stream nearby. I think the stream and weather brought the millions of misquotes though! Our site did have a low voltage problem. When we turned on the microwave the lights would dim. I confirmed with a voltmeter and found the voltage drop to 90vac. That will kill your A/C. We found another plug on the pedestal to use that worked a little better. This turned out to be a temporary fix though. On the third night we returned to a dead trailer. The park power at our site dropped to 4 volts! I had to use my 30 amp extension cord to borrow power from the next site over. Always be prepared!

img_0617.jpg
img_0622.jpg

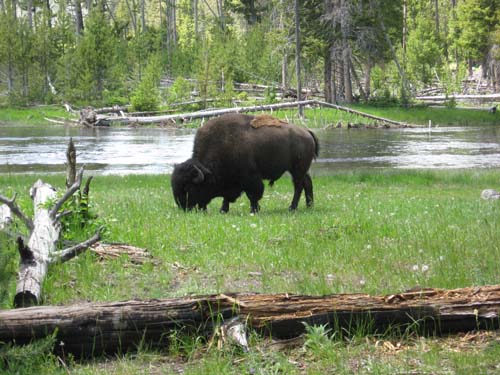
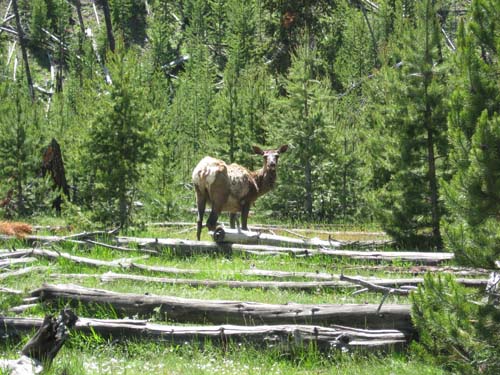
Immediately after pulling into the park we were stopped by bison. I’m not sure the difference between bison and buffalo, but they always called them bison. They would pretty much stop traffic. That was an easy indicator of something to see. We also saw moose, elk, bald eagles, and even a black bear.

img_0669.jpg
img_0674.jpg

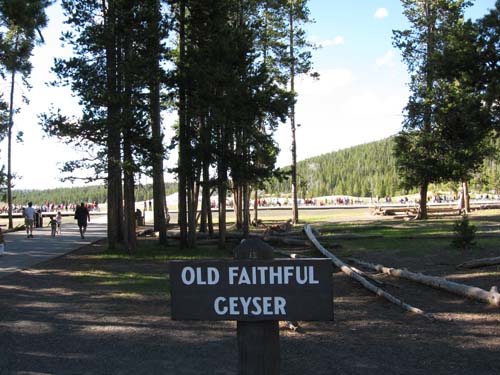
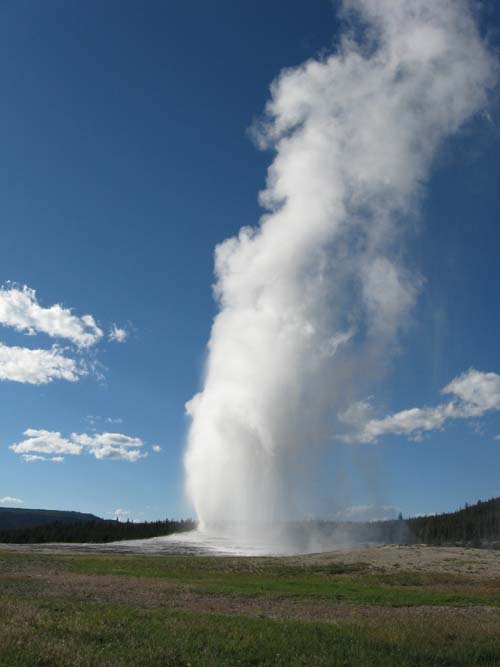
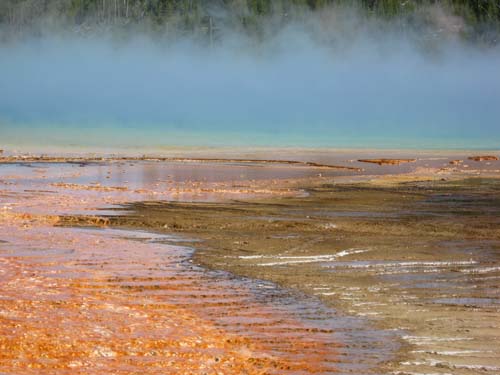
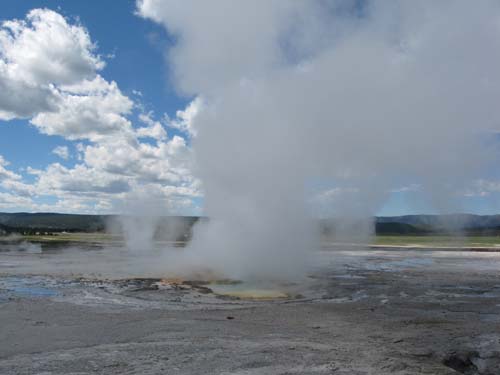
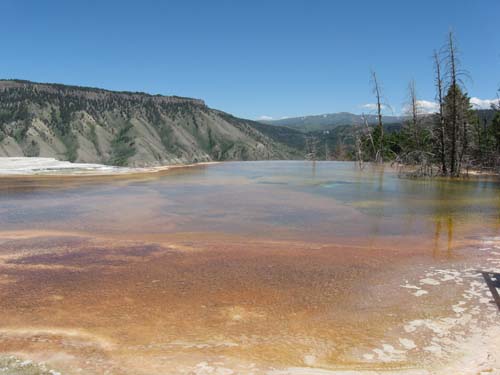
Of course the animals are not the only reason to go to Yellowstone. You have all the natural water features. The most famous is the geyser Old Faithful going off every 90 minutes. The family favorite were the many hot springs in the lower loop of the park.

img_0660.jpg
img_0641.jpg
img_0703.jpg

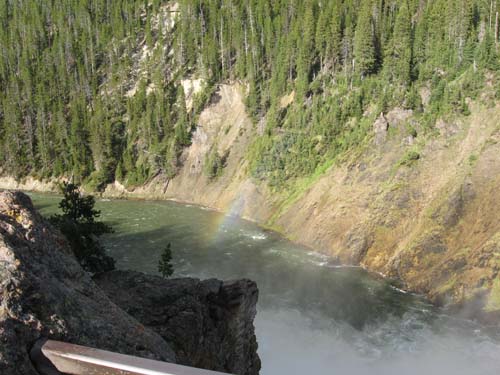
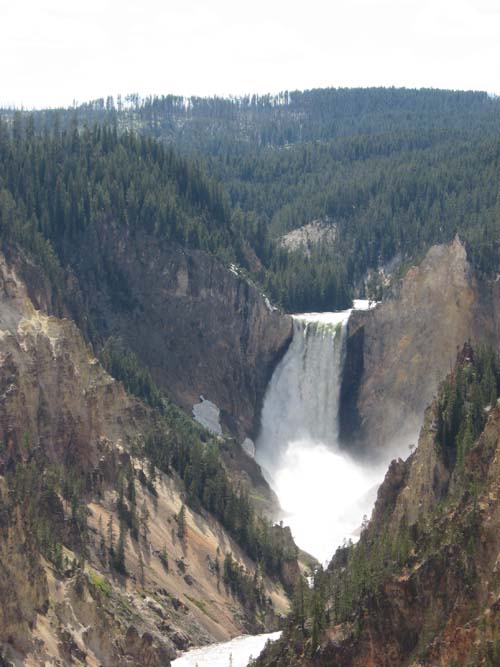
There was also the Grand Canyon of the Yellowstone. I caught this rainbow in the falls.

img_0725.jpg
img_0762.jpg

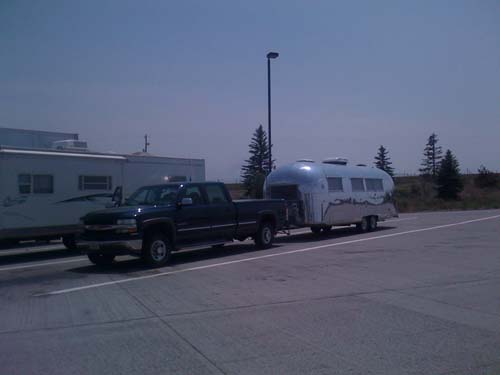
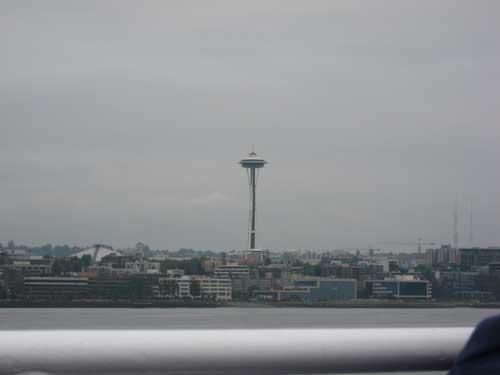
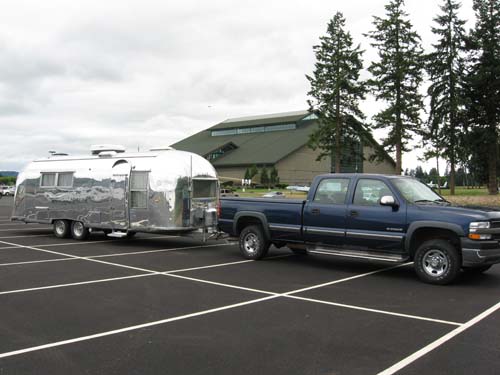
From Yellowstone we headed toward Seattle, WA to check out the Space Needle. Here is one of many typical rest stops for a driving break.

img_0230.jpg
img_0834.jpg

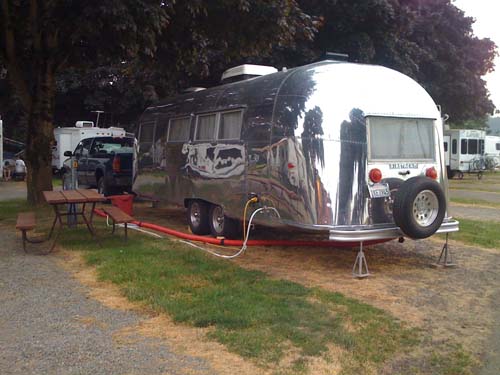
The Seattle campground was the most expensive, probably due to its location. This site actually had the sewer connection in front of the trailer! I had to use my 45 feet of sewer hose for the first time. Luckily I had it!

img_0298.jpg

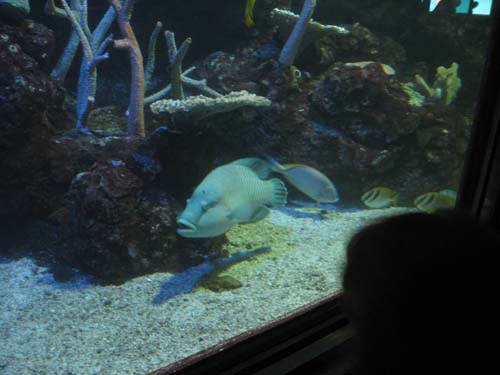
We picked up a city pass for $44/person that allowed for five events. These included the zoo, aquarium, boat tour, and a couple of museums. It was a good deal. The pass is good for 9 days, but we crammed it into two!

img_0804.jpg
img_0896.jpg

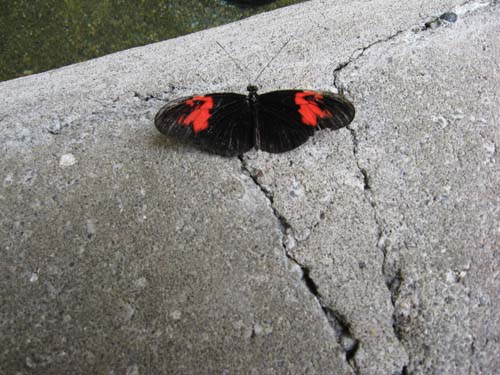
A couple of things it seems like everyone has is an iMax theater and a butterfly house. We kinda got tired of the iMax. In Yellowstone the free movies at the visitor centers were actually more informative.

After Seattle we made our way to McMinnivile, OR to the Evergreen Aviation Museum to see the Howard Hughes Flying Boat. Better known as the Spruce Goose. They had a nice parking lot we used for the midday stop.
img_0967.jpg
img_0954.jpg
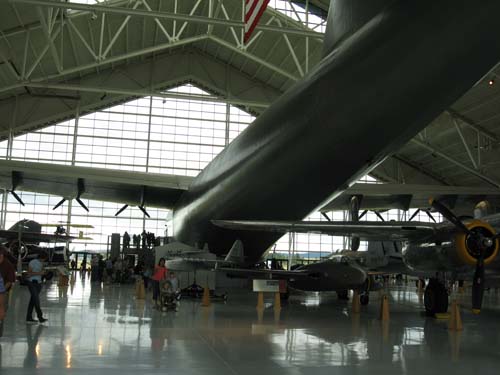
Evergreen is a really nice museum if you are into planes. They also just opened a space museum, but we did not go in it.

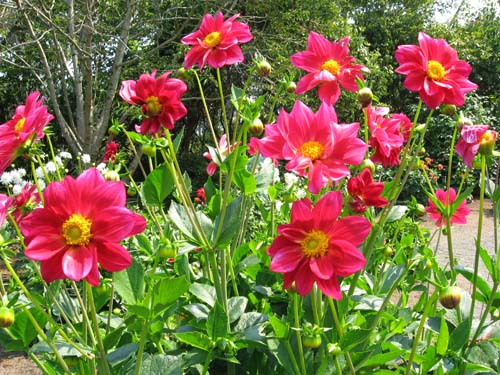
We headed down the coast through the California Redwoods and wound up in Fort Bragg. A really nice drive. Although the curvy road from Oregon on hwy 1 to Crescent City was pretty interesting. Fort Bragg is a great place to check out the Botanical Gardens.
img_1009.jpg
img_1012.jpg

I’m happy to say that the truck and trailer did great. We had gas mileage as high as 13.9 and as low as 10. All in all it was better than I thought it would be.

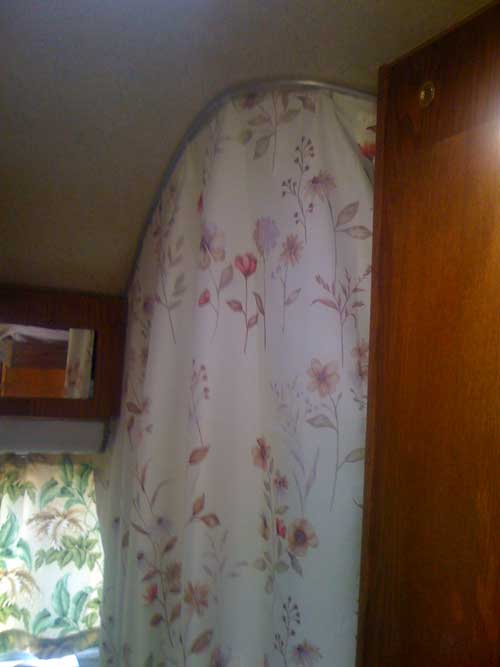
Only one small annoyance in the trailer was a slow tub drain. I’ll have to look into that one. It worked fine this spring when we used the trailer.

Fifteen nights in the 28 foot trailer with five people was a little bit of a challenge. But we got through it.

One thing we would do different is only pay for one night at a time. Some campgrounds were not as nice as advertised and others were better. We made the mistake of staying at a less than desirable campground for two nights just so we could have a catch up day on laundry and shopping. The campground advertised new laundry facilities which was nothing more that a new washer and dryer in the bathroom. We ended up going to a local laundry mat. Next time we’d continue on down the road to a better campground with proper facilities.

So thats the trip, not too shabby. Everyone enjoyed themselves and the kids handled the long driving days pretty well. Funny on non-camping trips its nice to get home. On camping trips, everyone always wants to stay longer.

Facebooktwitterredditpinterestlinkedinmailby feather

200 Amps!

Sorry no pictures. Tonight I added a second 100aH AGM Lifeline battery in the Ambassador.

Before I put the belllypan back on I ran two #6 wires to the street side closet. I put another battery box and got it wired up. I simply wired the batteries in parallel and put a 50 amp DC auto reseting breaker within 18″ from the positive terminal on each battery. This is important incase of a wire failure to protect each battery.

Next I increased the Tri-Metric amp-hour setting to 200 so it can track the % of battery left.

I purchased the battery from www.bestconverter.com. Best place online for power stuff for your trailer. Ask for Randy and tell him theVAP sent you!

Going to give the system a good test soon. I’ll report back then.

Facebooktwitterredditpinterestlinkedinmailby feather

Small Things

A few weeks ago when I was working in the Ambassador I stepped on the shower curtain and pulled three of the curtain tabs loose.

So today I took a few minutes to sew the tabs back on. You can get these tabs from Vintage Trailer Supply.

Here is a shot of the tabs I sewed on the curtain.
curtain.jpg

curtain2.jpg

curtain3.jpg

Here is the final product.

curtain4.jpg

Since I had the needle and thread out, I went ahead and fixed the room divider. It has metal rods that help form the curtain and they were all loose because the thread holding it together are missing.

divider.jpg

There were lots of bad spots on this divider. This took forever to fix by hand. We have one of those portable handheld sowing machines but I have no idea how to use it…. bad for me. At least its done and holding together.

divider1.jpg

Ya, its ugly,,, but done.

Last little job was the door stop. There was a dried up rubber door stop to keep the door handle from contacting the trailer skin. I had purchased a rubber plug and made a replacement but it did not last.

I happened to run across a rubber foot from an old piece of electronic equipment. It looked perfect for the job.

doorstop.jpg

doorstop2.jpg

doorstop1.jpg

That should do it. Nice to be down to such small repairs 😉

Facebooktwitterredditpinterestlinkedinmailby feather

Spare Tire and More

There were of course no keys that came with the Ambassador when I bought it almost 2 years ago. I have since gotten all the keys working by buying new lock cylinders or have the local locksmith make a key when I brought him the lock.

I had one key still missing to the storage compartment toward the back on the curb side. It is installed such a way as you cannot remove it easily. Colin had suspected that the key to his access door on his ’59 Ambassador would work. I had since been bugging him for over a year to get a copy to try. At the CBR he brought a copy of his key, and I found anyone with a similar hatch and borrowed their keys to make copies. I tried from a ’58 – ’61. Spent about $11 on keys.

When I returned home to California, one of the first things I tried was the hatch keys. Not one of them worked! I was bummed.

After polishing the trailer since it was all hooked up, I decided to tow it to the locksmith and see if he could make a key from a 50 year old lock. He had a small scope much like the doctor uses to check your ears. He looked in the lock for a couple of minutes and came back with a key, after a couple of tries, it worked! He fine tuned the key and for $21 and fifteen minutes, I had a perfect key…. finally.

Todays project was another long awaited one. I have been carrying the spare tire in the bed of the truck. There is a spare tire carrier on the trailer. Its pretty much rusted to the rear bumper, they are one now. A lot of people are scared to put a tire on the rear and if they don’t know their floor and frame are solid they are probably should be. Since I repaired my rear floor and the rear frame, I decided to go ahead and use it. I have seen a lot of photos and videos of these old trailers carrying even two spare tires on the rear bumper on those around the World caravans, so I’m not too worried.

I was missing the parts to secure the rim to the mount. I ended up re-purposing a floor flange used in electrical plumbing parts. Here are some photos.

tire3.jpg

Here is a close up of how its secured to the carrier. Since the wheel is aluminum I cut a piece of cork to help keep the metal from marring the wheel.

tire4.jpg

Some more close ups of the mount. The bottom bracket is actually supporting the tire weight. The nut is just keeping it from coming of the mount.

tire.jpg

This last shot shows the rear view. There are two holes in the mount. I’m going to run a cable lock through them and the wheel to keep it secure.

tire2.jpg

Facebooktwitterredditpinterestlinkedinmailby feather

Final polishing photos

final5.jpg

The moment you’ve been waiting for. I waxed half of the trailer with Nu Finish. I should be able to complete that tomorrow.

Overall I’m pretty happy with the job. But I do see the flaws. Check this close up and notice the compounding swirls. This is after compounding with C, cycloing with F7 then again with S.

final1.jpg

I think it will just take more cycloing with F7. Perhaps as much as 4 – 5 times. Maybe I’ll try again next year.

Here are some other photos. Street side close up.

final4.jpg

final3.jpg

final2.jpg

That’s it for now. I’ll move the trailer back to its place on the side of the house in the next couple of days.

Facebooktwitterredditpinterestlinkedinmailby feather

Add 9 and done…. for now

I put in three hours a day the last three days. That puts me at a total of 90 hours, or 20 hours for my polishing update.

I looked closed at the curbside and noted that even though I cyclo’d with F7 then again with S, there are still lots of compounding swirls. Like I said earlier I think you have to cyclo with F7 until the swirls are gone. I’m out of polishing steam…

On the street side I just cyclo’d once with F7 and left it at that. Its comparable to the curbside. So my advice is to not waste the S polish until you have the swirls gone from earlier work.

Anyway, I finished up the front of the trailer, including a quickie job on the propane tanks. So I’m done for the year.

Next is to hand polish a coat of Nu Finish on it. Then I’m done. I’ll take some decent photos then. I do have this one photo from my phone I took….

Enjoy.

streetside1.jpg

Facebooktwitterredditpinterestlinkedinmailby feather

4 more make 81

I put four more hours in today. Basically I now have the curb side finished save the wax.

I tried an experiment. On the rear end cap after compounding with C, I went straight to cycloing with S. Turned out pretty well. One thing is at night with headlights shinning on it you can still see the swirls from the compounding.

So the test was I did the rest of the side in two steps. I cyclo’d with F7 then again with S. Although I have not shinned a headlamp on it, the verdict….. direct to S is fine for me.

There are still swirls after the two steps. Basically its because you probably need to do the F7 cyclo about 3 – 4 times and only do a two-square foot area at a time and move the wrap cloth more often. I am not about to put that much time into it on a 28 foot trailer!

So the street side will get direct to cycloing with S after the compounding with C. Your mileage may very.

So as I type this I have a grand total of 81 hours into the polish job with an estimate of another 10 – 12 to complete this touch up. I need to compound the street side and front of the trailer and do the two propane tanks.

Here are some photos. Note, taking photos of polished trailers at dusk is cheating… they all look better that way.

polish_curb2.jpg

polish_curb1.jpg

polish_curb4.jpg

This last one is the street side and can be used as a before photo on the curb side..

polish_curb3.jpg

Thats it for now…. Compounding continues tomorrow….

Facebooktwitterredditpinterestlinkedinmailby feather

Keeping count

No photos today. Photos and black polish oxidation don’t go well together.

Since the last post I put another 5 hours into the compounding. I’m just going to add to my original polish count and call it 77 hours.

I have the curbside finished with the compounding. I’m going to start with the cyclo next before I start on the street side….

Facebooktwitterredditpinterestlinkedinmailby feather

For Frank & Anna

I see that Frank is polishing his Airstream Overlander. Poor chap. I can’t let him go through this alone. So I decided to give my trailer a once over again.

I pulled it out of the side yard yesterday, nearly ripping the street side off. Now there’s a story….

polishing1.jpg

It was about a year ago I did my first round of 70 hours of polishing. The temperatures got too high, 85-90 degrees around June. So I decided this time to get a head start. I figure I got a month before I can’t polish anymore.

Only this time I’m just going over once. I’m compounding with C and will follow up with cycloing with S. For those who use tool box polish, those letters refer to polishing grades of aircraft polish called Nuvite. Check it out at Perfect Polish and tell Tom, theVAP sent you.

Men at work….

Sitting down on the job…
polishing2.jpg

polishing3.jpg

Got two hours in today. About 2/3’s of the curbside compounded.

Facebooktwitterredditpinterestlinkedinmailby feather

CBR and Back!

Whirlwind weekend.

I flew out on the redeye at 12:15 am last Thursday for the Cherry Blossom Rally in Upper Marlboro, MD and arrived local time at 10:25 am. Rob and his family picked me up from the airport in Washington DC and told me they wanted to go to the mall.

I was wondering why they wanted to go to the mall, I just wanted to see the White House. Well, turns out that’s what they call the mall. It includes the White House, Washington Monument, Lincoln Memorial, etc….

Here is a photo at the White House. If you look close you might see Marine 1 in the air carrying the President back to the White House.

White House

Continuing on down the mall we went by the Washington Monument. It was huge. You can actually go inside of it if you get tickets early enough.

wash_monument.jpg

Next up is the Lincoln Memorial. This is cool. It is a 19 foot carving of the President.

lincoln1.jpg

Next we walked down to the Vietnam Memorial wall. This wall contains the names of those who died in that war. One thing I noticed is that all of the other memorials you can hear people talking and making noise. When walking the Vietnam Memorial there was a silence that was very distinct.

memorial.jpg

After what seemed like several miles of walking the mall in 90 degree heat after my being up over 30 hours, I was ready to crash. We drove on to the rally site at the Rogers farm and found many aluminum homes setup for the weekend.

cbr1.jpg

That picture was taken the last day of the rally when the rain clouds came around. The previous days were hot and muggy.

Colin arrived a day late so I had to find a room elsewhere. Luckily Dave Morrison had a nice spot on his gaucho which was just reupholstered. Nice and comfy. Thanks Dave!

After Colin showed up I moved my stuff in his trailer since he was there by himself. Colin had recently turned 50 and we teased him about needing a walker to get around. A fellow Airstreamer Steve brought a walker to hide in Colin’s trailer for a joke. Only Colin thought it was mine since I had just moved in. It was quite funny.

But I did happen to snap this photo…..

colin1.jpg

At the CBR they always have entertainment for Saturday night. Some how the scheduled band did not show up. So theVAP was fill in. We recorded a show in front of a live audience in the tent. Once again Dave Morrison to the rescue with his pro audio gear and had us sounding great. You can check it out in theVAP Episode 68.

Here we are setup doing the show.

cbr_live1.jpg

Here is a shot of all of us with Frank. Frank is a dedicated listener to theVAP. Frank was responsible for getting me to the CBR in the first place. He challenged Rob and Colin to see who would have the best bathroom restoration by the time of the rally.

group1.jpg

From left to right: Tim, Frank, Rob, and Colin.

Traveled 3000 miles and didn’t even win a t-shirt. Are you reading this Steve H.? !!!

I want to thank Rob and his family for the help with the flight out to Washington and the hospitality at the rally. I also want to thank Colin and everyone else at the CBR.

It was a fun time talking with everyone about their trailers. Lots of fun folks. If you have the opportunity to go to the CBR I highly recommend it. Too bad its so far for me. I’d love to have my family and trailer there.

Facebooktwitterredditpinterestlinkedinmailby feather