OK, its been a while….

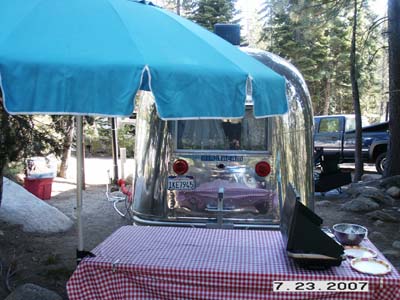
Since I don’t really have anything to add to the restoration portion of this blog apart from maintenance and repairs, I decided to update it with our camping trips.

We recently took our longest trip with the trailer to date, a full seven nights in the trailer. I think it went quite well. We covered a lot in those seven days.

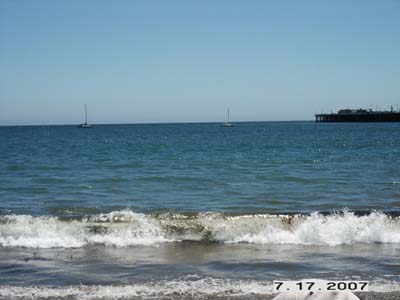
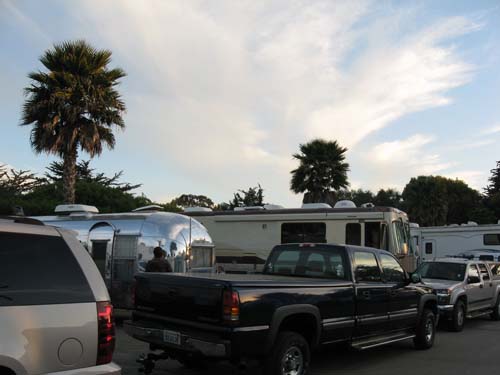
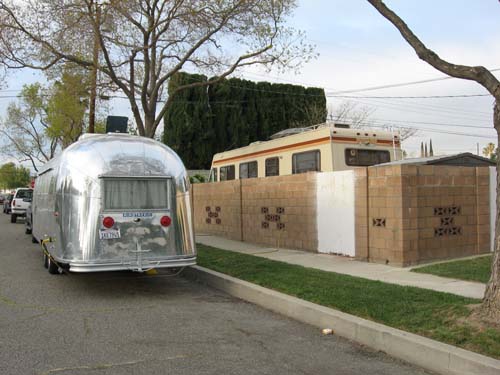
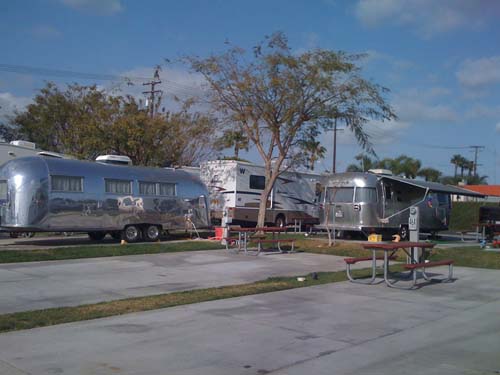
First stop was Pismo Beach in Central California. We found a nice full hookup campground right on the beach. The problem is about a million other people did to. Cramped sites, busy kids, it was a mad house.

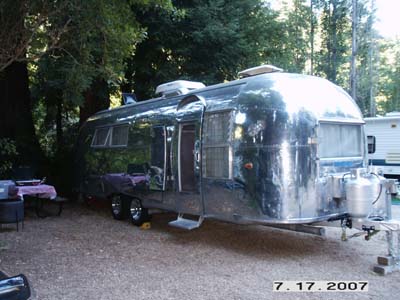
Here is a shot of our site. It was tight backing in. I found a nice audience in my attempts…

Pismo Beach camp site

This place was a good location despite it being crowded. It was just a 2 minute walk to the beach, and an hour drive to Hearst Castle.

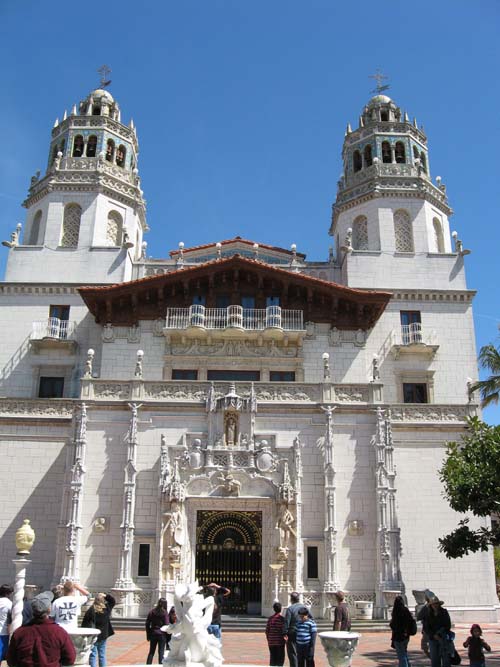
Hearst Castle is a beautiful place full of history. Nice location and a great place to visit. It’s a castle that was built by William Randolf Hearst starting around 1919 and it took the better part of 15 years.

Here is a shot of the main entrance.

Hearst Castle Entrance

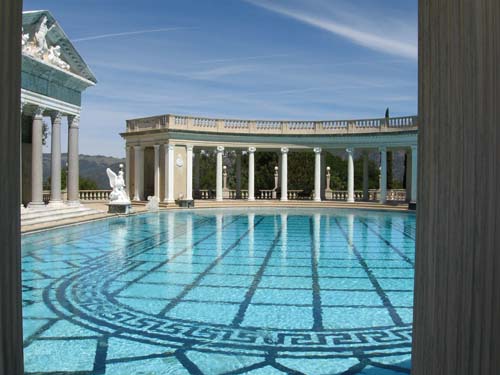
Another shot of one of the two pools. This one was built and torn down and rebuilt three times until they were satisfied.

Pool

Next stop was our first courtesy parking experience in Simi Valley. We stayed at the Bounder Buddies place! Thanks Bounder!

Courtesy parking

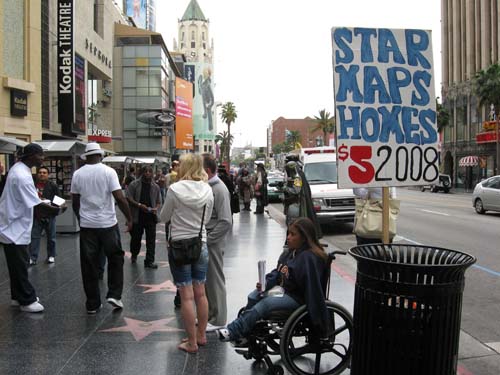
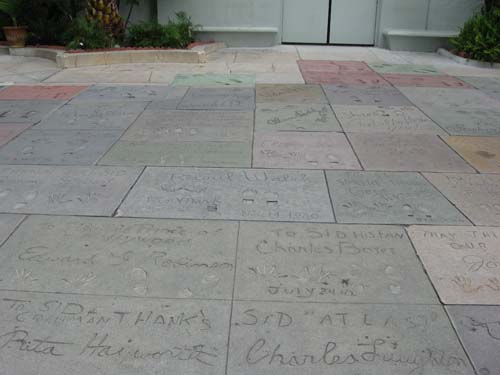
From the Bounder Buddies place we were close to Hollywood. We went to Grauman’s Chinese Theatre, home of the red carpet movie premiers, and walk of fame.

Hollywood walk of fame

Complete with hand and foot prints in cement.

Hollywood cement

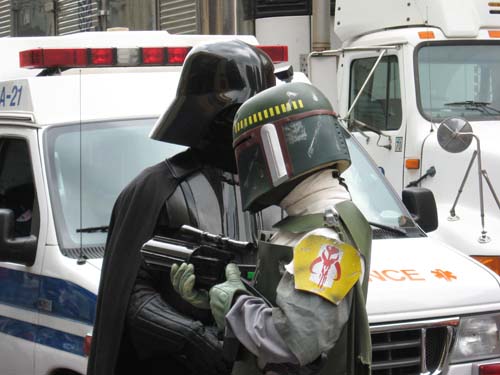
Lots of interesting characters all around. Mostly wanting a $1 to take your photo with them. And they were busy….

Darth Vader and Bobba Fett

Next stop was the Ronald Reagan Library. Very educational stop complete with replica’s of the Oval Office and the real Air Force One used by Reagan, Carter, Clinton, and Bush. You can even tour it!

Air Force One

We can’t get this close to Disneyland with making a stop. So we moved to a campground near the Magic Kingdom and paid the Mouse a visit.

We did see another Airstream nearby…

Anaheim

Goofy being… well… goofy.

goofy

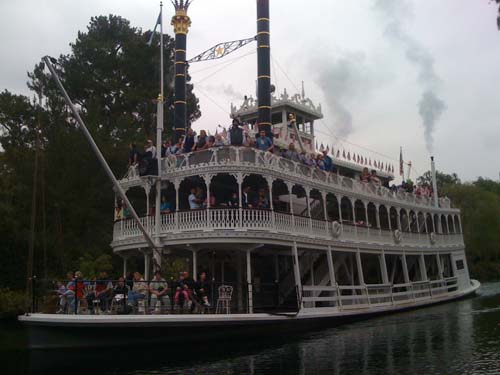
Here is a shot of the Mark Twain boat. This boat is original to the day Disneyland opened putting it just a few years older than my trailer. So its vintage!

Mark Twain

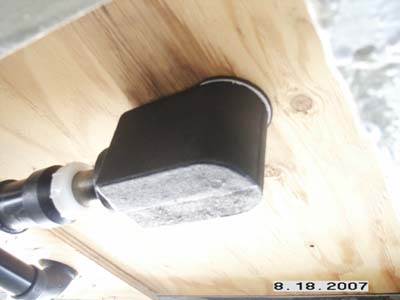
All in all the trailer did great. We did our first camping without hookups when we were courtesy parking. That is when we found our first little glitch. Its the first time we used the water pump extensively. The pump would intermittenly stop during a shower. Then without reason, it would startup again. I have not had a chance to check it out yet. I hope its the relay I’m using to power the pump. I’ll let you know.

Otherwise everything else ran great. We used the TwinTemp for a furnace for the first time as well. It worked great and we had nice quite heat. Can’t say enough good things about it!

So now we have an idea of what it may be like to camp without full hookups. Might be interesting if we find the right place. I think with the five of us we could make two nights with our tank capacities. Now battery power thats another issue….

Facebooktwitterredditpinterestlinkedinmailby feather

Back to the grindstone

Today I decided to work on a few odds and ends. And ended up putting in about 7 hours…

One of the items was sink covers. You never have enough counter space in a trailer and sink covers help out. I had saved the peice of countertop when I made the cut out for the sink so I could use it for the sink covers.

I cut them to size. The hard part was cutting the edges out so it could drop into the sink. Since I don’t have table saw I used my skill saw once again. I cut 1/8″ strips along the edges with the blade depth set to leave around an 1/8″ material on the top. Then I used my wood chisel to knock out the peices. It’s not perfect but it got the job done. Staining and poly coating was next.

I actually did the cutting and staining a while ago.

pict0004a.jpg

Here they are in place.

pict0018m.jpg

Next up was to hide some wiring that runs along the top of the fridge shelf. These wires are for the TV’s and stereo, etc…

pict0009f.jpg

I just used some left over oak and cut it fit and trimmed it out.

pict0010g.jpg

On our last couple of trips I noticed that the plywood under the trailer at the tub drain was wet. So I decided to pull the drain and seal it up again with more putty and then I found I did not used teflon tape on the part the screws into the trap. This always holds water since its below the floor line so thats probably where it was leaking.

pict0007d.jpg

Now that the drain was fixed it was time to start putting the belly pan back. First thing was to put some insulation in place.

pict0011h.jpg

Next it was time to unpack the aluminum. This was from www.airpartsinc.com, a Vintage Airstream Podcast contributor. The aluminum comes rolled up in four foot widths. Note the rope. You need to tie the rope around the roll before you cut the tape to control its expansion.

pict0006c.jpg

After laying it in place, I decided to just put it up in one peice and cut and trim as I went.

pict0012i.jpg

Its kind of hard to make these out since the aluminum is so reflective. I’m very happy with the results. I still have a few trim peices to do and a whole lot more rivets to keep it in place.

pict0013j.jpg

pict0014k.jpg

pict0016l.jpg

How’s that for an update? I didn’t expect to get so much done, but sometimes you get lucky.

See ya down the road…

Facebooktwitterredditpinterestlinkedinmailby feather

Trailer Park Troubadours

August 2nd we were invited to see Antsy McClain and the Trailer Park Troubadours at the San Francisco Great American Music Hall. The opening song on theVAP called Living in Aluminum is sung by Antsy and the Trailer Park Troubadours.

I inteviewed Antsy last Christmas about his music and his Chirstmas in the Trailer Park CD. It was a great show, available here.

The concert at the music hall was great. Very entertaining. If the Troubs are ever in your area you need to check them out.

Here is a shot of me, my lovely wife Debra, and Antsy after the show.

antsy_me_deb.jpg

Of course I had to get an autographed shirt!

antys_sig.jpg

Thanks to Antsy and his pal David for setting us up with the tickets!

Facebooktwitterredditpinterestlinkedinmailby feather

OK OK, here’s an update

There have been no updates because we’ve been camping! I decided to entertain you with some photos of our trips to Santa Cruz and South Lake Tahoe.

Here’s the campsite in Santa Cruz….

pict00974.jpg

And the standard beach shot from the Boardwalk…

pict00823.jpg

The next week we headed up to Lake Tahoe and got a nice campsite there. It had a nice stream that we backed up to and could hear it running all night.

pict00021.jpg

Tram ride up Squaw Valley…

pict00222.jpg

And the most photographed place in the country… Emerald Bay!

pict01065.jpg

This will have to do for now until I can get back to work!

Facebooktwitterredditpinterestlinkedinmailby feather

Updating the jack

When I purchased the trailer just over a year ago now, the coupler was old and the original jack was busted. So while in Ohio I stopped at the Mothership, Airstream, and had a new coupler put on.

At the time I also needed a jack so I picked the cheapest manual jack for $25. Always intended to replace it with an electric model. I had it on my ’71 Safari after all…

Barker Manufacturing decided to become an Ambassador Contributor by donating a Super Jack. Its the same model Airstream has been putting on for years. The model is a 12806 3500lb jack with light. The nice thing is the color matches the trailer nicely.

pict0100001.jpg

So that was my job today, replace the jack. Here is my manual one. Its nice, but hey, its manual labor.

pict0098001.jpg

So I put a jack stand under the A frame and removed the jack. That was the easy part.

pict0099001.jpg

Now, fitting the new jack in, well I ran into a problem. I figured it would fit perfectly since I had the Airstream factory put on the new coupler. Well, it turns out the coupler is only on the top part you see. On the bottom there is a plate welded to the A frame with another hole to accept the jack tube. That hole was too small for some reason.

So, out came the dremal. The only grinding tool I have. Fourty-five minutes and two bits later, the hole was just big enough. I slid the jack in place and bolted it back in nicely. I had already pre-wired 12vdc to the area knowing I’d be getting a power jack.

pict0101001.jpg

Well, there ya have it. Another job completed. And not nearly as tough as the ones I’ve been doing lately.

Looks good too.

Facebooktwitterredditpinterestlinkedinmailby feather

What’s stopping you?

Dexter disc brakes and a Tekonsha P3 brake controller is stopping me. Finally.

What a job. Everything I read about putting disc brakes on your trailer says its worth the trouble. I sure hope so. It was a lot of work.

I started around 9am and the first thing I did was install the P3. It was releatively easy as they supplied the OEM cable. It was a simple matter of mounting and plugging it in.

pict0097001.jpg

pict0096001.jpg

I replaced my Tekonsha Voyager brake controller. I don’t know if it would work the the Electric/Hydraulic Actuator or not. I do know the P3 does as it has a setting for it in the menu.

Next up. Hydraulic brake line installation. As you know I already had the E/H Actuator installed and stubbed out the hydraulic line under the trailer. So I needed to run the lines to the brake calipers. I ordered a tandom torsion brake line kit from BluDot. It has a lot of pre-determined brake lines lengths, tees, brackets etc…

pict0087001.jpg

I had to jack up the trailer to take the wheels off to get access to the wheel well. Mounting the 3/16 steel lines to the brackets that transition to a rubber line to the caliper was just a matter of laying it out and bending the lines with a tubing bender as needed. Of course since I was not flairing my own ends, I had to work with the lengths provided. This ment a lot of coils tucked under the trailer.

pict0092001.jpg

pict0093001.jpg

Here are some shots of the steel lines and rubber line transitions.

pict0090001.jpg

pict0094001.jpg

pict0095001.jpg

Care must be taken to not have too sharp a bend on the rubber lines. Although I must confess to a couple of U’s in my installation. If I was able to cut and flair my own hard lines that would have helped a lot. Of course I’ve never done this before either so thats a good excuse :-).

After all the lines were installed and secured. The next step was bleeding the lines. I had to enlist the help of my dad again.

The bleeder screws on the calipers are so hard to get to, you have to actually remove the wheel to get to it. So imagine, jacking up the trailer on one side, remove one wheel, apply the brake, and bleed the caliper. Put the wheel back on and remove the next one, add more fluid to the actuator, and bleed the caliper. Put that wheel back on and move to the other side and start the process all over.

When you’re finally done, you have to do it all over again. New installs require a minimum of two bleeds of the entire system…. very labor intensive.

Happy to say that its all done. Everything works. I have not done a test tow yet, but everything checks out.

So that was 11 hours on the trailer today. If I could have found someone at $60 an hour to do this, it would have cost $660 labor only for todays work.

If you have a vintage trailer, you’d better roll up you’re sleeves!

Facebooktwitterredditpinterestlinkedinmailby feather

Break from the brakes or building a table

I fully expected to install more brake lines. However, the parts did not arrive until noon, and by then I had other plans. So, hopefully back on the brakes tomorrow.

I purchased a table leg and wall bracket to build a table around. The wall bracket has a groove that fits the table piece. It allows the table to be positioned anywhere along the track.

I ended up building the table with the 3/4″ oak left over from the bunk bed project. Glad I didn’t through it out. Turned out OK so far. I need to finish staining it and put a polly acrylic coating on the top. Its supposed to turn into a hard protective coating. Let me know if you have used it.

Here is a shot of the wall bracket and the table in a stored position.

pict0081001.jpg

This next shot shows a dinning position. Two on the couch and two in chairs.

pict0082001.jpg

The nice thing of this design idea is the table can slide forward and become a computer desk. While still having access to the couch.

pict0083001.jpg

There is still plenty of room to get by when the table is out. Also I’m pretty sure the table can stay in this spot with the bed out.

pict0084001.jpg

I’m going to add a wall mount bracket to the end of the counter so I can put the table against the wall if I want.

We’ll thats what I got done today. Tomorrow… we’ll see…

Facebooktwitterredditpinterestlinkedinmailby feather

More plumbing

I thought I was done with plumbing. But alas, I am not.

Not only do I need to plumb the hydrolic lines for the brakes, but I needed to *plumb* some brake wires to the e/h actuator.

Turns out, lacking my proper instruction, my welder pulled the original brake wire out of the belly pan when he put on the new axles. Basicaly the bellypan fell down and he pulled the wires out before screwing the pan back.

So, I needed to string a new brake control wire and the seperate emergency brake away wire to the e/h actuator. Since I’m putting the actuator under the streetside bed, that means stringing the wire from the hitch to the middle of the axles. So I ran some grey plastic conduit.

pict0079001.jpg

That got my wires where I needed them. I mounted the actuator and wired it up. I also plumbed the hydrolic line to a tee under the belly pan. Now I have to wait for the rest of my plumbing kit from BluDot.

pict0080001.jpg

He is a shot from under the trailer. You can see the conduit going up with the wires and the side of the tee. The shot after is a bad one but shows the pipe coming out of the belly pan and into the tee.

pict0076001.jpg

pict0078001.jpg

Thats about all I could do with the brakes for now. I need the plumbing parts still. Should be here tomorrow.

This is not fun anymore….

Facebooktwitterredditpinterestlinkedinmailby feather

Let there be gas

I picked up the couple of fittings I needed today to hook up the regulator.

I’m a little disappointed as I purchased a new propane rack and a new regulator as well. You would think the regulator bracket and modern regulator would line up and mount nicely. Not! I had to drill mounting holes in the bracket and get self tapping #6 screws for the regulator as the holes in it weren’t even threaded. No big deal, just more trips to the hardware store and more time.

pict0071001.jpg

Like my new tank? I don’t have propane in my new Worthingtons so I used my BBQ grill tank as a supply. I shut off the valves leading to the appliances and turned on the gas armed with my leak detecton solution.

pict0072001.jpg

Back on my back again, under the trailer spraying each connection. You have to spray it really good and wait for 5 – 10 seconds, looking for bubbles. Don’t skip this step. I thought I had them all as tight as I could, but ended up with four small leaks on the flair nuts. They just needed to be tightened even more. ALWAYS use two wrenches! One to tighten the nut and the other to hold the part you’re tightening into.

Next I turned on one valve at a time and checked the connection on the valve output and the appliance connections inside the trailer. After about 15 minutes of checking and tightening. No more leaks. I’m still buying a propane alarm for the trailer though…

Proof is in the pudding as they say. Here is the cooktop with all three burners running.

pict0075001.jpg

I switched the fridge to gas only and it lit up fine, same with the TwinTemp Jr. So after filling the new tanks, the propane system is done.

Facebooktwitterredditpinterestlinkedinmailby feather