Monthly Archives: July 2007

Updating the jack

When I purchased the trailer just over a year ago now, the coupler was old and the original jack was busted. So while in Ohio I stopped at the Mothership, Airstream, and had a new coupler put on.

At the time I also needed a jack so I picked the cheapest manual jack for $25. Always intended to replace it with an electric model. I had it on my ’71 Safari after all…

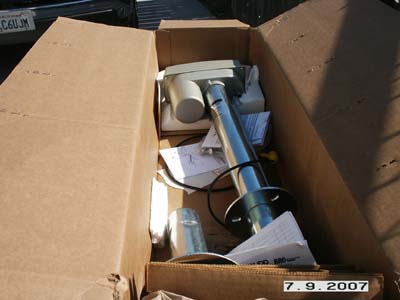
Barker Manufacturing decided to become an Ambassador Contributor by donating a Super Jack. Its the same model Airstream has been putting on for years. The model is a 12806 3500lb jack with light. The nice thing is the color matches the trailer nicely.

pict0100001.jpg

So that was my job today, replace the jack. Here is my manual one. Its nice, but hey, its manual labor.

pict0098001.jpg

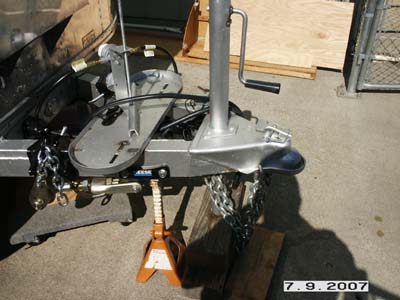
So I put a jack stand under the A frame and removed the jack. That was the easy part.

pict0099001.jpg

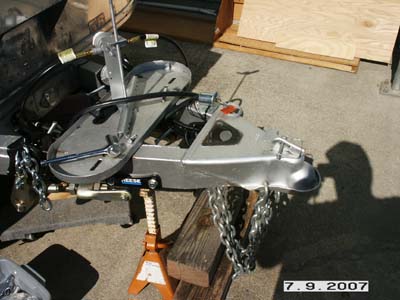
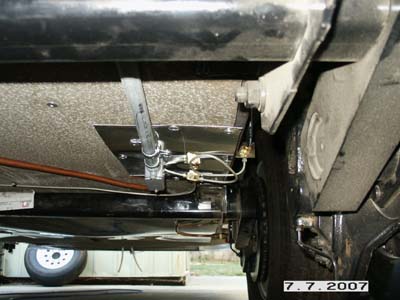
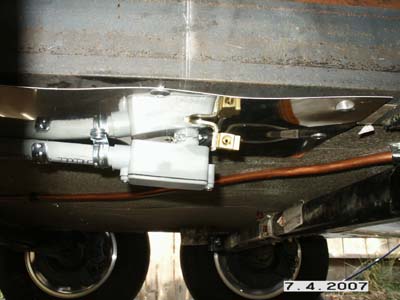
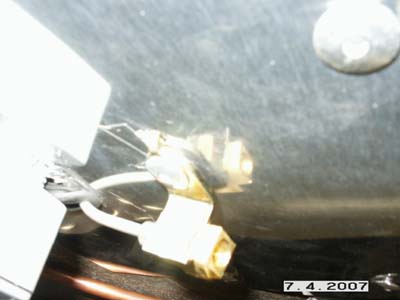
Now, fitting the new jack in, well I ran into a problem. I figured it would fit perfectly since I had the Airstream factory put on the new coupler. Well, it turns out the coupler is only on the top part you see. On the bottom there is a plate welded to the A frame with another hole to accept the jack tube. That hole was too small for some reason.

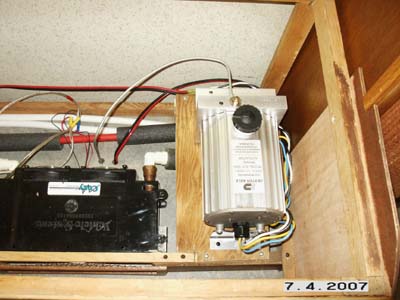
So, out came the dremal. The only grinding tool I have. Fourty-five minutes and two bits later, the hole was just big enough. I slid the jack in place and bolted it back in nicely. I had already pre-wired 12vdc to the area knowing I’d be getting a power jack.

pict0101001.jpg

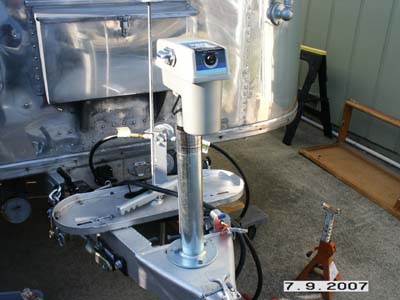
Well, there ya have it. Another job completed. And not nearly as tough as the ones I’ve been doing lately.

Looks good too.

Facebooktwitterredditpinterestlinkedinmailby feather

What’s stopping you?

Dexter disc brakes and a Tekonsha P3 brake controller is stopping me. Finally.

What a job. Everything I read about putting disc brakes on your trailer says its worth the trouble. I sure hope so. It was a lot of work.

I started around 9am and the first thing I did was install the P3. It was releatively easy as they supplied the OEM cable. It was a simple matter of mounting and plugging it in.

pict0097001.jpg

pict0096001.jpg

I replaced my Tekonsha Voyager brake controller. I don’t know if it would work the the Electric/Hydraulic Actuator or not. I do know the P3 does as it has a setting for it in the menu.

Next up. Hydraulic brake line installation. As you know I already had the E/H Actuator installed and stubbed out the hydraulic line under the trailer. So I needed to run the lines to the brake calipers. I ordered a tandom torsion brake line kit from BluDot. It has a lot of pre-determined brake lines lengths, tees, brackets etc…

pict0087001.jpg

I had to jack up the trailer to take the wheels off to get access to the wheel well. Mounting the 3/16 steel lines to the brackets that transition to a rubber line to the caliper was just a matter of laying it out and bending the lines with a tubing bender as needed. Of course since I was not flairing my own ends, I had to work with the lengths provided. This ment a lot of coils tucked under the trailer.

pict0092001.jpg

pict0093001.jpg

Here are some shots of the steel lines and rubber line transitions.

pict0090001.jpg

pict0094001.jpg

pict0095001.jpg

Care must be taken to not have too sharp a bend on the rubber lines. Although I must confess to a couple of U’s in my installation. If I was able to cut and flair my own hard lines that would have helped a lot. Of course I’ve never done this before either so thats a good excuse :-).

After all the lines were installed and secured. The next step was bleeding the lines. I had to enlist the help of my dad again.

The bleeder screws on the calipers are so hard to get to, you have to actually remove the wheel to get to it. So imagine, jacking up the trailer on one side, remove one wheel, apply the brake, and bleed the caliper. Put the wheel back on and remove the next one, add more fluid to the actuator, and bleed the caliper. Put that wheel back on and move to the other side and start the process all over.

When you’re finally done, you have to do it all over again. New installs require a minimum of two bleeds of the entire system…. very labor intensive.

Happy to say that its all done. Everything works. I have not done a test tow yet, but everything checks out.

So that was 11 hours on the trailer today. If I could have found someone at $60 an hour to do this, it would have cost $660 labor only for todays work.

If you have a vintage trailer, you’d better roll up you’re sleeves!

Facebooktwitterredditpinterestlinkedinmailby feather

Break from the brakes or building a table

I fully expected to install more brake lines. However, the parts did not arrive until noon, and by then I had other plans. So, hopefully back on the brakes tomorrow.

I purchased a table leg and wall bracket to build a table around. The wall bracket has a groove that fits the table piece. It allows the table to be positioned anywhere along the track.

I ended up building the table with the 3/4″ oak left over from the bunk bed project. Glad I didn’t through it out. Turned out OK so far. I need to finish staining it and put a polly acrylic coating on the top. Its supposed to turn into a hard protective coating. Let me know if you have used it.

Here is a shot of the wall bracket and the table in a stored position.

pict0081001.jpg

This next shot shows a dinning position. Two on the couch and two in chairs.

pict0082001.jpg

The nice thing of this design idea is the table can slide forward and become a computer desk. While still having access to the couch.

pict0083001.jpg

There is still plenty of room to get by when the table is out. Also I’m pretty sure the table can stay in this spot with the bed out.

pict0084001.jpg

I’m going to add a wall mount bracket to the end of the counter so I can put the table against the wall if I want.

We’ll thats what I got done today. Tomorrow… we’ll see…

Facebooktwitterredditpinterestlinkedinmailby feather

More plumbing

I thought I was done with plumbing. But alas, I am not.

Not only do I need to plumb the hydrolic lines for the brakes, but I needed to *plumb* some brake wires to the e/h actuator.

Turns out, lacking my proper instruction, my welder pulled the original brake wire out of the belly pan when he put on the new axles. Basicaly the bellypan fell down and he pulled the wires out before screwing the pan back.

So, I needed to string a new brake control wire and the seperate emergency brake away wire to the e/h actuator. Since I’m putting the actuator under the streetside bed, that means stringing the wire from the hitch to the middle of the axles. So I ran some grey plastic conduit.

pict0079001.jpg

That got my wires where I needed them. I mounted the actuator and wired it up. I also plumbed the hydrolic line to a tee under the belly pan. Now I have to wait for the rest of my plumbing kit from BluDot.

pict0080001.jpg

He is a shot from under the trailer. You can see the conduit going up with the wires and the side of the tee. The shot after is a bad one but shows the pipe coming out of the belly pan and into the tee.

pict0076001.jpg

pict0078001.jpg

Thats about all I could do with the brakes for now. I need the plumbing parts still. Should be here tomorrow.

This is not fun anymore….

Facebooktwitterredditpinterestlinkedinmailby feather

Let there be gas

I picked up the couple of fittings I needed today to hook up the regulator.

I’m a little disappointed as I purchased a new propane rack and a new regulator as well. You would think the regulator bracket and modern regulator would line up and mount nicely. Not! I had to drill mounting holes in the bracket and get self tapping #6 screws for the regulator as the holes in it weren’t even threaded. No big deal, just more trips to the hardware store and more time.

pict0071001.jpg

Like my new tank? I don’t have propane in my new Worthingtons so I used my BBQ grill tank as a supply. I shut off the valves leading to the appliances and turned on the gas armed with my leak detecton solution.

pict0072001.jpg

Back on my back again, under the trailer spraying each connection. You have to spray it really good and wait for 5 – 10 seconds, looking for bubbles. Don’t skip this step. I thought I had them all as tight as I could, but ended up with four small leaks on the flair nuts. They just needed to be tightened even more. ALWAYS use two wrenches! One to tighten the nut and the other to hold the part you’re tightening into.

Next I turned on one valve at a time and checked the connection on the valve output and the appliance connections inside the trailer. After about 15 minutes of checking and tightening. No more leaks. I’m still buying a propane alarm for the trailer though…

Proof is in the pudding as they say. Here is the cooktop with all three burners running.

pict0075001.jpg

I switched the fridge to gas only and it lit up fine, same with the TwinTemp Jr. So after filling the new tanks, the propane system is done.

Facebooktwitterredditpinterestlinkedinmailby feather