Monthly Archives: May 2007

Just say no to clearcoat

Supposedly this old 1960 Airstream was not going to have a clearcoat. At least thats what my Panel Pros told me before I bought it.

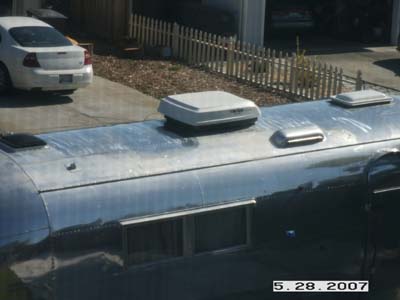
Well…. someone went back in the 60’s and got the option. Might have sounded good back then, but its not good now. Not only do you have to strip the clearcoat to polish, but the failing clearcoat leaves room for corrosion.

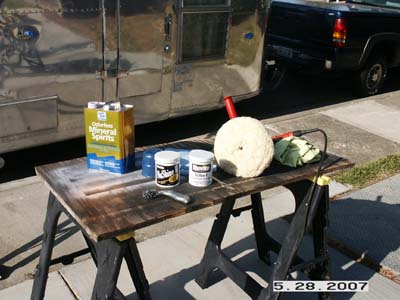
This trailer is full of corosion. It has filform, the worst kind, and a milky white corrosion that is tough to get off. This means 7-10 passes of F7 Nuvite on every inch of trailer. I simply don’t have the time. Perfectpolish.com, a sponsor of theVAP project, is going to send me some course grades to see if that can speed the process.

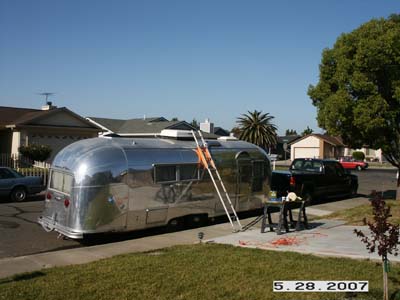
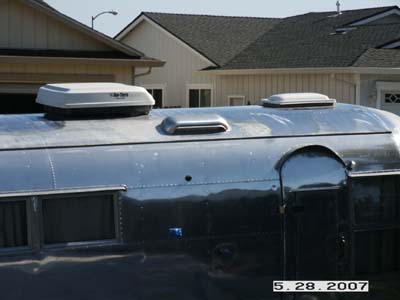
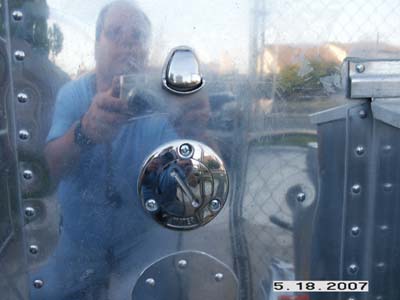
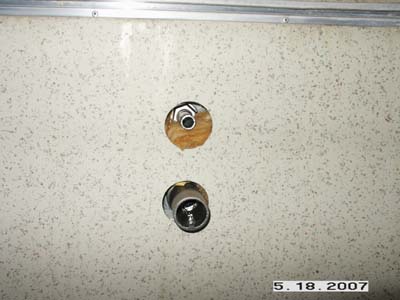
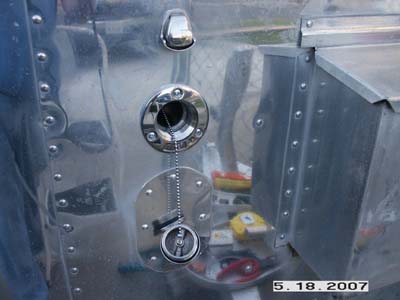
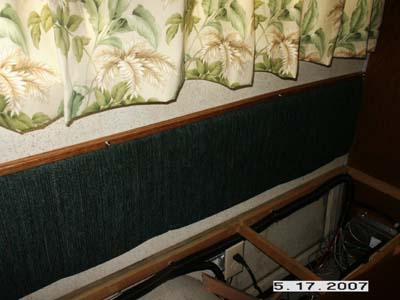
Here are some shots of the 15 hours of *progress*.

pict0012001.jpg

pict0013001.jpg

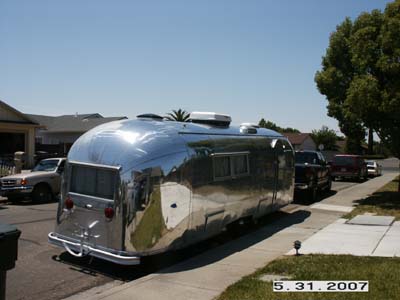
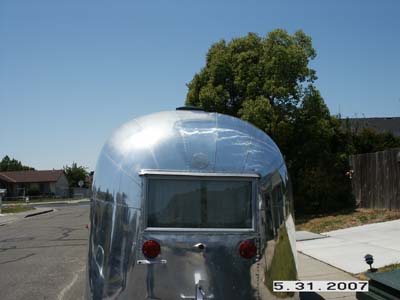
And the funhouse mirror effect….

pict0014001.jpg

Time to run. I need to clean all this back oxidation from my computer keyboard! 🙂

Facebooktwitterredditpinterestlinkedinmailby feather

Start the insanity

Polishing. It’s insane. No normal person should attempt it. If you do, it will drive you mad.

Here’s the setup. Nuvite products, wool pad, half inch drill, mineral spirits, and microfiber towels.

pict0005001.jpg

Fully aware from experience that the wool pad flings pieces of black soiled fibers everywhere, and the dog either eats it, or walks in it then tracks it all over your carpet. Not good.

So, this time I moved to the street. Neighbors may give me a look but, hey it saves my carpet.

pict0004001.jpg

I got up this morning with a full intension of getting as far along as I could with the compounding. The thing with these vintage trailers is how low they set on the ground. Making it quite easy to see the top.

So, I decided to start at the top with some compounding. Just enough to bring a shine, but not taking the time to remove every blemish. The work still took about four hours. Then it got too hot and I got too tired.

The tough thing around here is the temperature. This stuff only works from 60F – 80F. When you have to work outside in direct sunlight its a challenge. Expecially after polishing a spot and then the sun reflects into it and blinds you.

Here is an after shot from our upstairs window. And a second shot from next to it.

pict0009001.jpg

pict0011001.jpg

As I vowed this would be my last trailer I’d polish, I remember that same comment I made on the last one.

I’ll never learn.

Facebooktwitterredditpinterestlinkedinmailby feather

Front end done…. ready for couch

Today I put a lot of time in getting the tank hidden.

A couple of things I may have done differently now that I’ve gotten this far. For one, the couch I ordered is a magic bed. Its sort of a hide-a-bed but with some minor differences. The reason I chose this couch is because its supposed to be the most comfortable bed when opened up. Only problem is this type cannot have anything put underneath it. So the tank had to set behind.

In this case, I should have made the tank taller and more narrow to take up less floor space. I made it this size because the tank sensor I had on hand limited the height to 13″. I could have gotten a second sensor and stacked them. The SeeLevel gauges lets you do that. In hindsight, I wish I would have made the tank more narrow. I could have gained about 6″ or so of floor space.

So now you know, the reason I ended up with this rather large cabinet in the front. As they say hindsight is 20/20. I’ll do the next one better :-).

I ended up laminating a top to match the rest of the trailer, and left an opening in the middle for storage.

pict0001001.jpg

To access the plumbing valves and the fuse holder, I made these small acess panels.

pict0002001.jpg

The entire counter top comes off with four screws from the top side. So If I really need access its not that difficult.

That’s it for today. Enough really. Tomorrow I plan on cleaning out the trailer all its tools and boxes and getting it ready for Monday….. …the polishing begins….

Facebooktwitterredditpinterestlinkedinmailby feather

Hiding the tank

Nothing glamorous today in the art of vintage restoration.

Just trying to frame in the fresh water tank to hide everything, yet provide access when needed to the pump and fuse box.

Here’s what I came up with so far.

pict0357.jpg

You’re probably saying interesting… I wonder how it will turn out.

I’m saying the same thing :-).

Facebooktwitterredditpinterestlinkedinmailby feather

Fresh water tank…. DONE!

It took all day, but its done. Three trips to the hardware store for pluming parts…. which is in-line with my average.

First off I filled the tank to check for leaks.

pict0345001.jpg

Looks ok, so on to the inside. Here is the completed shot.

pict0349001.jpg

Now we’ll zoom in on the fill side. I thought this 1-1/2″ ID poly pipe would be the best for the fill side. It turns out it won’t bend w/o completely kinking. So I ended up with a couple of extra right angles. I really don’t like this for a solution. So I’ll keep my eye out for some more flexible pipe so I can have a straight shot. If you know of something better let me know.

The smaller hose is the air vent for the tank.

pict0350001.jpg

Next is the output side. There is a lot going on here. I added two 3-way selector valves so I can do a couple of things. First off, I can fill the tank from the city water input side. All I have to do when we are hooked up to city water is turn the selector knob on the wall and it will divert city water into the top tank connection.

The second selector chooses the pump input. In the normal position the pump input is connected the the tank. Pumping water on demand. The other position goes to a stubbed out connection where I can hook up a short hose that will go in a RV antifreeze bottle for winterizing.

And finally there is the standard drain valve for draining the tank.

pict0351001.jpg

Amazing how this took all day. But such is the life with vintage trailers.

Next up, hiding this mess behind a shelf before the couch gets here….

Facebooktwitterredditpinterestlinkedinmailby feather

More water holes…

I don’t mean leaks…. I’m talking about a water fill for the fresh water tank.

I was trying to find a nice way to add this since I removed the original spigot used in the presureized system of 1960.

Since I’m using an on-demand pump, I also need an air vent for the tank. My research found marine parts to be the right fit. They are stainless steel and polished so they match the trailer great.

The picture below shows the water filler. Its called a marine deck fill and it is actually labled *Water* on the face. They also make them for fuel and waste as well.

pict0339001.jpg

The air vent is a stainless steel marine fuel tank vent. Its a screened vent with a splash gaurd. And it looks cool too.

Both items I found on eBay, but you can also find them a good marine supply houses.

Next came drilling the holes. Of course both pieces are different sizes than anything else I installed so I ended up having to buy two new hole saws. The lower hole just missed a cross support :-). Note to self… keep a better eye on those rivet lines….

pict0341001.jpg

Here they are installed and ready to go.

pict0342001.jpg

pict0343001.jpg

Here’s the final shot with the fill cover off. It uses a special *key* to open it. However a nice pair of needle nose pliers works in a pinch. Still it will keep those pesky trouble makers out.

pict0344001.jpg

Tomorrow I hope to finish up the fresh water tank installation. I need to find a 1-1/2″ male pipe thread to barb fitting so I can use a 1-1/2″ I.D. fill hose.

Those hardware store folks should know me by name….

Facebooktwitterredditpinterestlinkedinmailby feather

We do it right…. cuz we do it twice!

Once again I didn’t like the way something turned out so I ripped it out and started over.

I thought the foam was too thick and I did not like the way it finished off toward the top. So I picked up some thinner foam and some oak trim and started again.

I’m much happier with this look.

pict0337001.jpg

pict0336001.jpg

Here is a shot of the new fresh water tank from All-Rite, an Ambassador Contributor. I’m still waiting on the fresh water fill I purchased on eBay before I can get this thing installed. It just over 30 gallons.

pict0338001.jpg

That’s it for now. Stay tuned…

Facebooktwitterredditpinterestlinkedinmailby feather

Bringing back the International

One of the International options was padded material on the walls near the twin beds. These helped you keep away from the cold wall at night. They also added a touch of class only the International trim package could offer.

Again, I’m doing this in matching fabric. I cut a backer board 13″ and added some foam and fabric and there ya go.

pict0330001.jpg

pict0332001.jpg

One minor miss calculation. How to attach it to the wall.

pict0333001.jpg

I ended up pulling the bottom half of the material off. Then I directly screwed the backer board to the wall and then pulled the material tight and screwed it in at the bottom. The bottom half will be covered by the twin mattress.

pict0334001.jpg

Turned out pretty good. Just one more to go…

Facebooktwitterredditpinterestlinkedinmailby feather

Restoring the Lego-O-Matics

I picked up four leg-o-matic chairs that are from the 50’s. They suit the trailer well. The seats are pretty well worn as is the wood. Time to get to work.

pict0309001.jpg

pict0310001.jpg

I was able to get some new foam and I also ordered matching fabric for the gaucho we purchased. Cutting foam is a difficult chore until you learn the secret. An electric carving knife. I picked this one up from Walmart for $3. Worth it for sure. Cuts foam like butter.

pict0325001.jpg

Next was just removing the old and installing the new. Here is the seat going together.

pict0326001.jpg

I also restored the wood with Howards Restore-A-Finish. Same stuff I used on the cabinetry in the trailer.

pict0328001.jpg

And the final glamor shot in the trailer….

pict0329001.jpg

Thats all I had time for today. I have enough material to go against the wall near the twin beds, just like the Internationals came with…. Sorry Rob… 🙂

Facebooktwitterredditpinterestlinkedinmailby feather

Curtains are here!

The custom made curtains for the trailer arrived today. Of course I could not wait to hang them to see how they look. And they look great!

These were made for us by Silver Threads Custom RV Interiors on the forums. She did a great job.

The green curtains pictured are the originals from 1960, and the others were made by someone along the way. They were ill fitting and not our first color choice.

pict0302001.jpg

pict0298.jpg

pict0299.jpg

Here are the new ones. They all fit perfectly. I still need to put up one more set, but they look great.

pict0304001.jpg

pict0305001.jpg

pict0306001.jpg

pict0307001.jpg

Great job from Silver Threads!

Facebooktwitterredditpinterestlinkedinmailby feather