Well, I’m still pretty sick so I really should not have done anything today. Its supposed to rain the next few days so I did some light weight testing of the tanks.
The first thing I did was repair the short drain pipe from the tub under the trailer. Works great now.
Next quest was to see how much water my grey tank would hold. It was calculated at around 27 gallons when I ordered it.
I found a sink and half in the kitchen equals 5 gallons. I wanted to see how much water would go in before the water started coming back up in the tub. After 25 gallons, it started backing up in the tub. And even though all the plumbing lines are new it was still nasty because of the rust in the cast iron tub trap that I reused. Even though I back flushed it while I had it out.
Anyway, I’m sure its the 27 gallon capacity like I designed, since my sink method is not scientifically approved :-).  So I’m happy about that. I was a little worried on how it would work because of my wierd grey tank design. Maybe we should talk about that for a minute.
You’re looking at a side view of the trailer. The kitchen sink, bath sink, tub, plywood sub floor, and grey tank.

Basically I had to go with this tank layout because the tub sat on the floor. I suppose I could have build a platform but that could have caused further complications. Remember, this design in 1960 was not meant for a grey tank. The grey water was to be dumped straight on the ground as you used it.
The kitchen sink is pretty straight forward. Its vented and drains right into the top of the tank. Tank gets full and your done. The vent also acts as the tank vent so it can fill completely (lets the air escape), and drain quicker.
The draining of the tub and bath sink together into the side of the tank was some what of a different idea. In theory, as long as the vent would allow the air to escape, the drain into the side of the grey tank would continue to take in water even after the inlet itself was under water. ie. when the tank is half full.
It appears to work fine.  After I filled the tank until it overflowed the tub, I started emptying the grey tank. After the water left the tub, I ran the shower to clean it out and it went down the drain w/o backing up even with the inlet on the tank clearly under water.
But there is one side effect. After the grey tank gets to the point where its full to the side water inlet, the water line in the tub drain raises to within a couple of inches from the top of the drain. Even though there is still plenty of tank capacity left. The water just seeks its level in those connecting drain pipes. It never rises out of the drain until the tank is over full and backs up.  So it works.  You could put a one way valve if you did not want to see water in the drain or backup into the tub at all if you wanted. But the tub is a good place to have an overflow. Just don’t keep stuff in it like some people do!
Short version if you skipped all that above. Grey tank works, I’m happy with it.
Next was to overfill the black tank. I wanted to see how it handled it and if there would be any leaks on the toilet base or the vent base in the closet, or the outlet flange on the bottom of the tank.
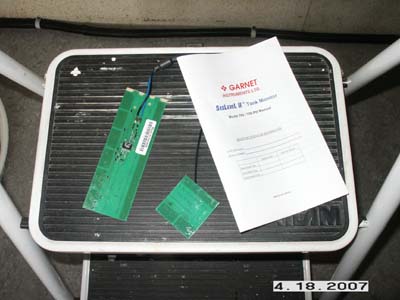
For fun, I taped on a See Level gauge on the side of the black tank to see how it worked. The sensors a flexible circuit boards that you cut to lengh at specificed marks. These sensors read from the OUTSIDE of the tank. Therefore nothing to get dirty or stuck to in the inside, which causes most probe failures.
Here’s a shot of a sensor and the cut portion I removed.

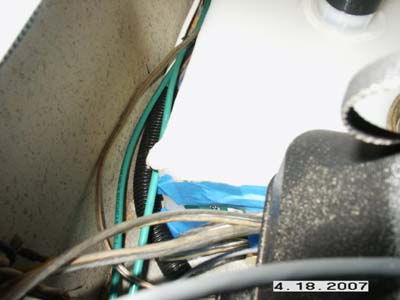
Next I taped it temporarily to the side of the black tank for testing. You can see it there among all that blue tape.

The sensors have a self adhesive once you are sure where you want them. Next thing I did was just started filling the toilet. I kept my foot on the petal and let the tank fill up. As it filled I kept checking the See Level to see how it was doing.
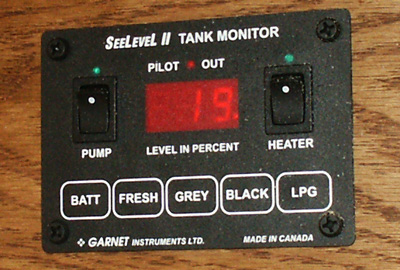
I was quite impressed as it matched what I was seeing in the side of the tank with my flash light. Here is a shot of the tank monitor when it was 19% full.

But I just kept going and going unil the monitor said 100%.  Then I looked at the tank, it was dead on. But, I wanted to see how my setup would handle an overflow condition! :-) Literally just about 15 seconds more of water and the toilet started filling… As it got this full there was an audible expansion noise from the plastic tank. It grunted! 🙂
The display still showed 100%. I checked for leaks around the toilet base, and vent outlet in the closest. All good. Went outside and checked the flange connection on the tanks output… again good.
So I pulled the black tank valve. I did have my valterra cap on the drain with a 5/8″ garden hose attached to drain it out away from the trailer. So it took a bit. I was able to watch the tank start to relax then the tank monitor started dropping, 94%, 88%, etc… And visual idication on the tank matched what the monitor was showing.
This system is really great if you have plastic tanks. The sensors won’t work on metal tanks. If you have a system thats not working, this is easy to retro fit. You can use the existing sensor wiring, just stick this one on the side of the tank and you are good to go. If you do buy one, tell them you heard about it on theVAP!
