Author Archives: Tim

VAP Flag

Here it is, theVAP Flag! 3 foot x 5 foot digitally printed flag designed by a collaboration of myself and Antsy McClain of the Trailer Park Troubadours. Image features a flamingo recording the show with a vintage Airstream siloute driving to see what’s over the hill and the next one after that! Click for info.

vapflag

VAP 4-1

Facebooktwitterredditpinterestlinkedinmailby feather

Replacing the door gaskets

We had one day a few weeks ago with a crazy rainfall. After the vent leak last year that damaged my bulkhead wall, I decided to check out the trailer for water leaks. To my disappointment, I found a lot of water on the floor just inside the door. After examining the door gasket, I found it had lots of cracks and was pretty dried out. I had replaced this gasket about five years ago. Hoping this was the source of my leak, I ordered replacement gaskets.

20131012-193958.jpg

20131012-194146.jpg

First job was to remove the old gasket and clean the area. I used a putty knife for the big stuff, and a dremel with a sanding disk. It worked pretty quickly and did a good job getting the area prepped.

20131012-194425.jpg

20131012-194437.jpg

The next step is to do a final wipe down with isopropyl alcohol. This removes any residue and preps the area for the best possible adhesion.

20131012-194647.jpg

One particular issue with my door is that it’s bent just enough that any gaskets will not seal the door completely. The left side of the door has less of a gap than the right side. Over the years I tried all kinds of methods to fix this problem. I tried the 2×4 in the door trick, I even removed the door completely and cut a curved jig for the door and applied pressure to restore the original shape. In the end nothing worked. So I dealt with the problem by adding an extra gasket on the right side to make up for the extra gap. In the photo you may notice a white, ya I know, white gasket on the door first. The home center didn’t have black. I applied the standard door gasket to the filler gasket.

20131012-195425.jpg

20131012-195442.jpg

The trick to installing the gasket is to remember not to stretch it as you apply it to the door. In fact, just the opposite is true. Especially for the curves, you want to slightly compress the gasket it as you apply it so it’s totally relaxed. It’s best to start at the bottom of the door and work you way around. This will make the joint at the bottom. By the way, they seem to know exactly how much to give you. As you can see in the photo, there is not much to spare. If you intend to replace the gaskets on the door-within-a-door, and the inner door jamb, better order two additional gaskets.

20131012-200445.jpg

20131012-200453.jpg

In all I like the way it turned out. The door is a little tight to close, but it was before. The gasket appears to be making good contact all around. Now I just have to wait for the next rain.

20131012-200939.jpg

20131012-200948.jpg

Facebooktwitterredditpinterestlinkedinmailby feather

theVAP Store Online!

We’ve just launched theVAP Store online! Check it out here.

Often times I get asked how someone can get a specific episode from our archives. Finally there is an easy and convenient way to make them available. Check it out and let me know what you think. Use the contact form in the store to send me your feedback.

Check out the “Specials”, there is a free episode in there right now!

Screen Shot 2013-08-26 at 6.59.41 AM

Facebooktwitterredditpinterestlinkedinmailby feather

A/C Shroud Repair

I repaired the Air Conditioner shroud that had some cracks in it. I also repaired the inside air box which was cracked in two. In both cases I used a plastics adhesive called Q-Bond. Check out my videos below.

Facebooktwitterredditpinterestlinkedinmailby feather

Quack Stacks Revisited

You may recall several posts back that my vent was leaking and caused some water damage on the closet wall inside the trailer. The leak was from several cracks in the plumbing system vent cover. These are reproductions made out of formed plastic. They’ve been on for about six years. I’m not sure why they cracked, Colin thinks it maybe because I installed them with rivets, putting too much pressure on them. This time I decided to install the with stainless pan head screws.

IMG_2829

The vent covers were back ordered for quite a while so I loaded up the cracks with vulkem to stop the leak.

IMG_2828

Finally the new vent covers showed up last week. They come primer gray, so I had to hit them with my trusty rustoleum silver.

IMG_2830

I gathered up my supplies and went to work. You need new screen material, stainless screws, 1/8″ drill bit equipped drill, putty tape, and Vulkem for good measure.

IMG_2832

While the paint was drying I removed the old vents and cleaned up the area as best I could. Man they were tough to get off. Basically still glued on with the original Vulkem. Here it is prepped with a new screen. I decided to use putty tape around the pipe base and vent cover instead of Vulkem.

IMG_2836

IMG_2839

I did both black tank vent, and the grey tank vent. While they’re not pretty, at least they won’t leak!

————–

Bonus Tip!

I have few popped rivets inside my zolatone-painted interior. To make the new rivets match up better, simply place them in some cardboard and hit them with some Almond spray paint. As you rivet them in the trailer, they blend in fairly well.

IMG_2834

IMG_2835

Facebooktwitterredditpinterestlinkedinmailby feather

Hard-wired backup camera

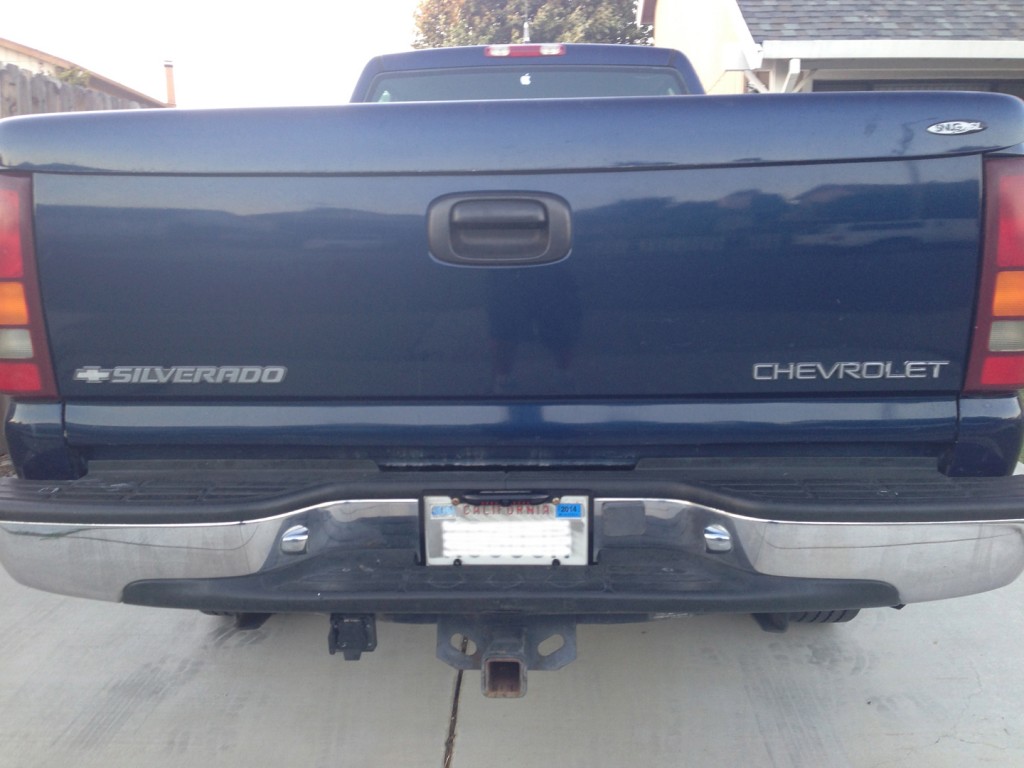
Not exactly RV related, but I thought you might find it interesting. I recently installed a new radio in my truck that allows for a hardwired backup camera. A lot of new cars and trucks come with these installed, but my poor 2001 Silverado was born too early to enjoy these options.

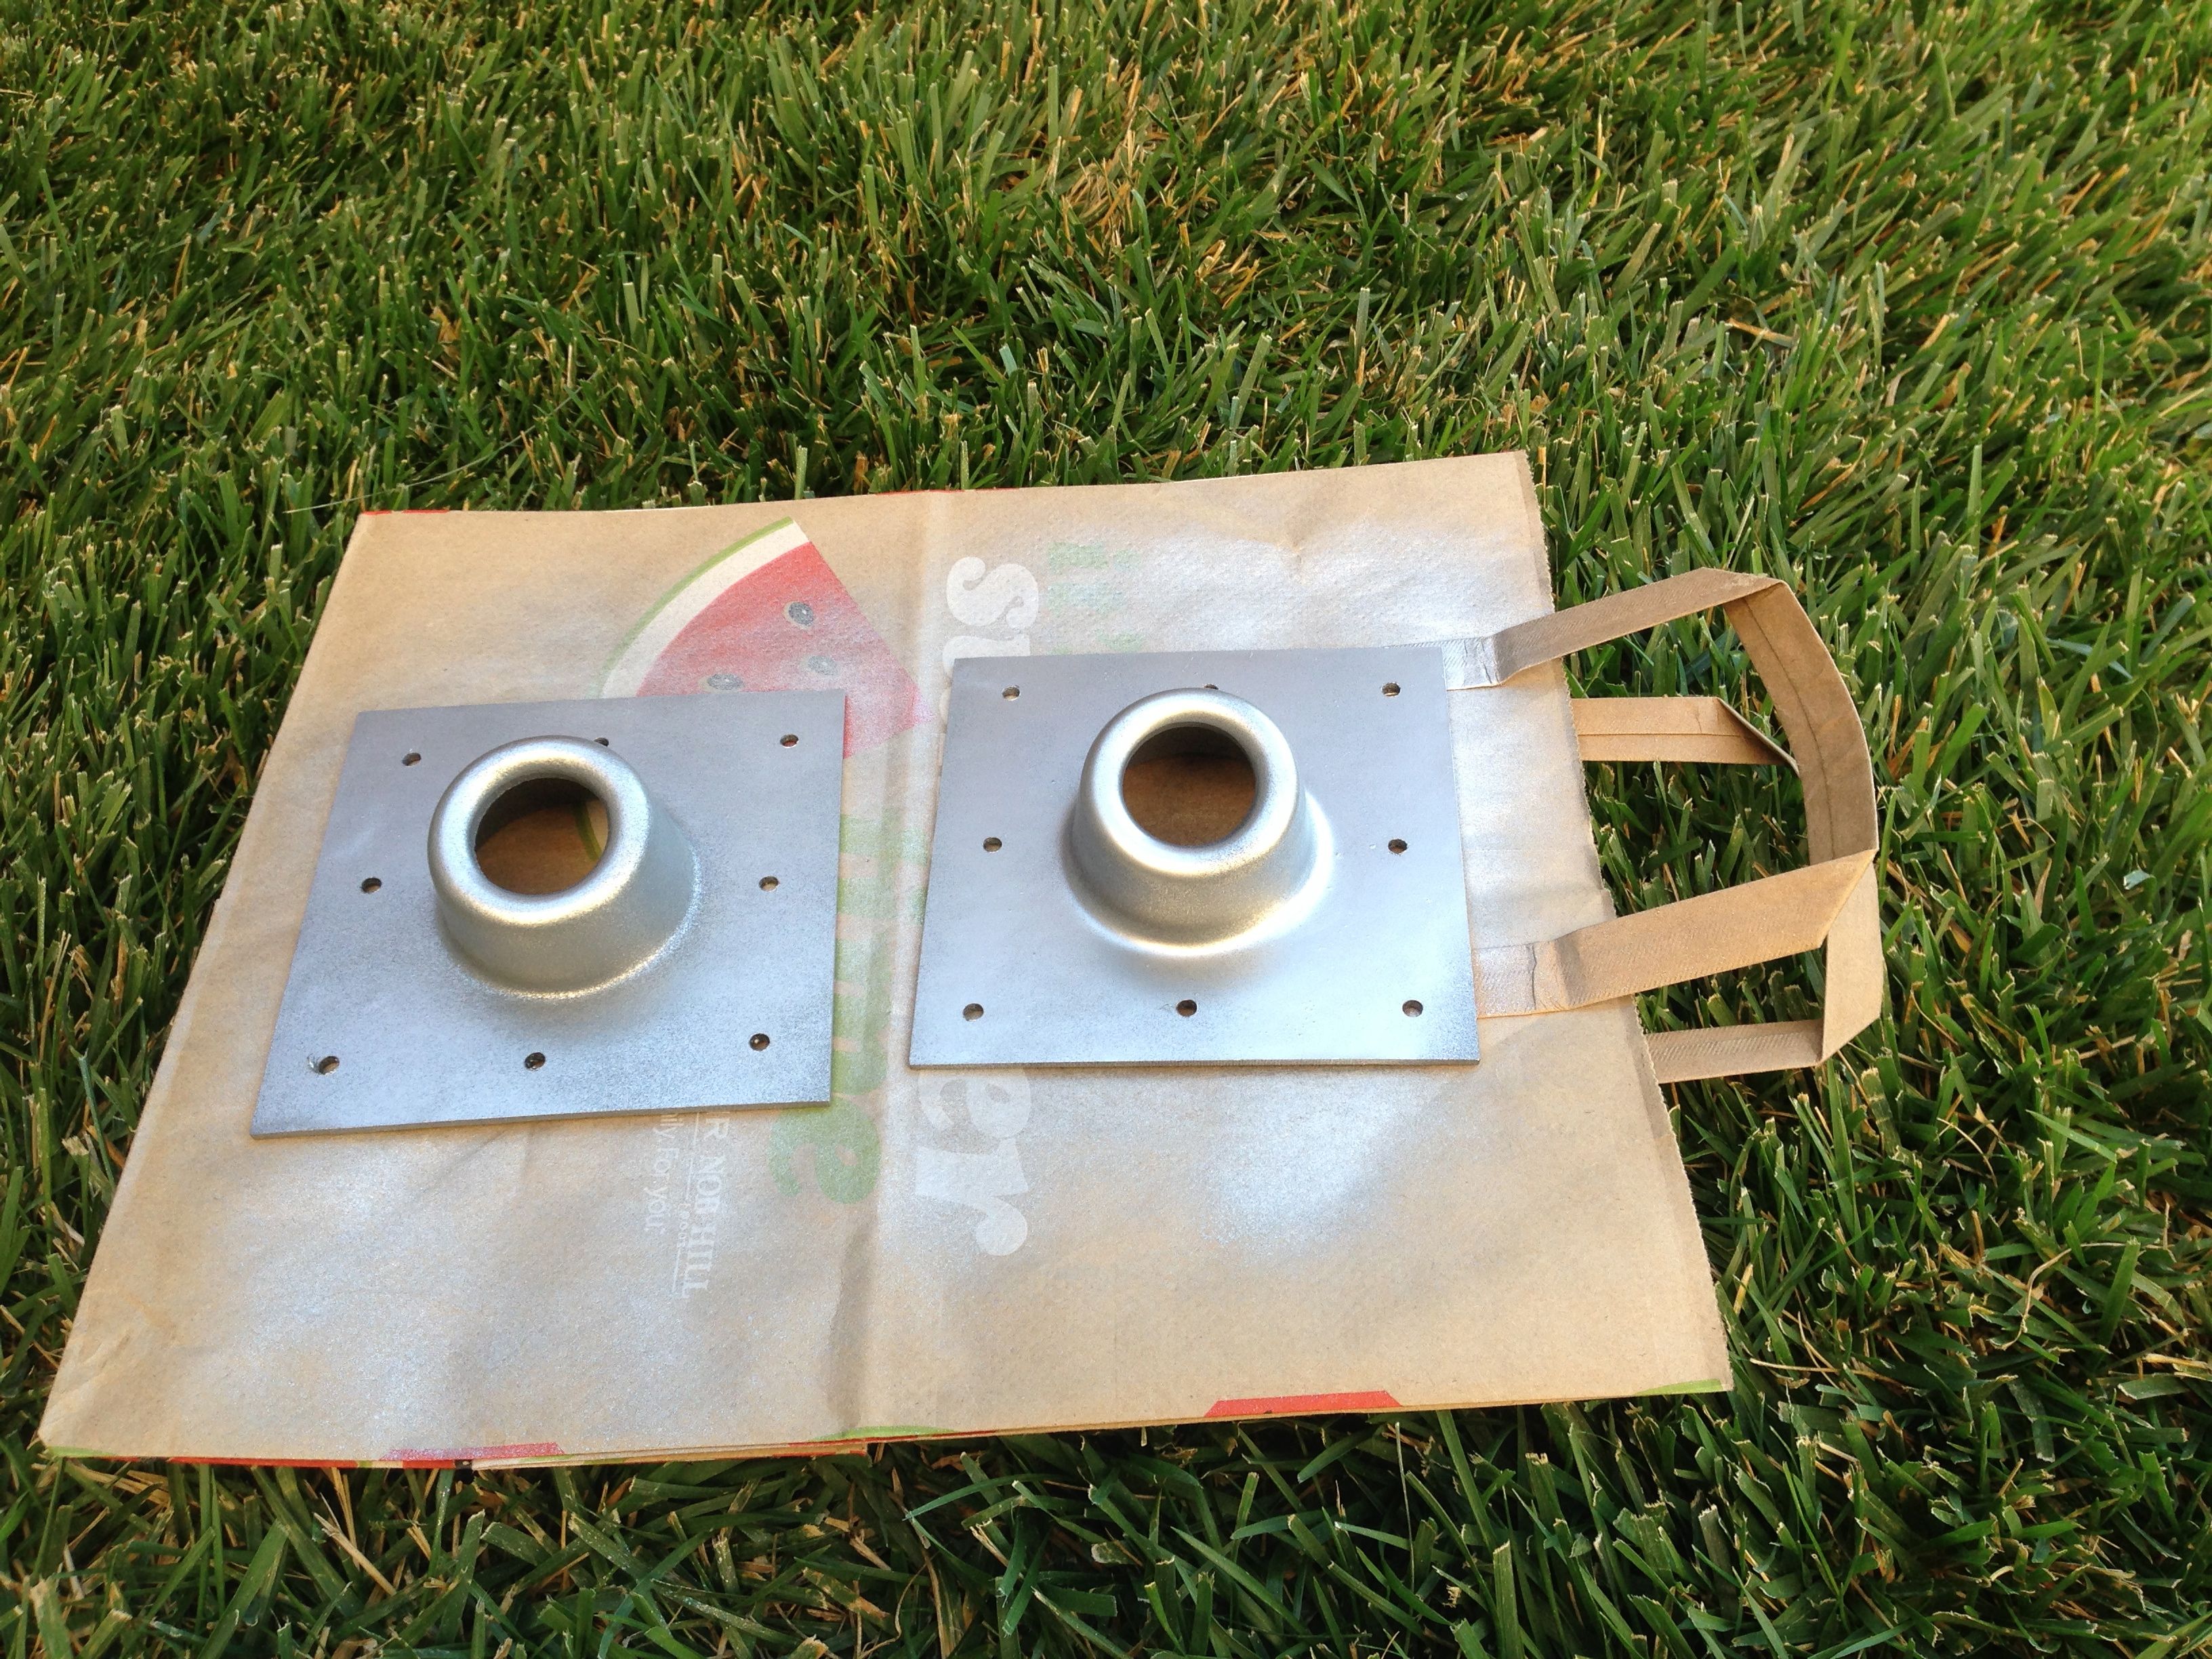
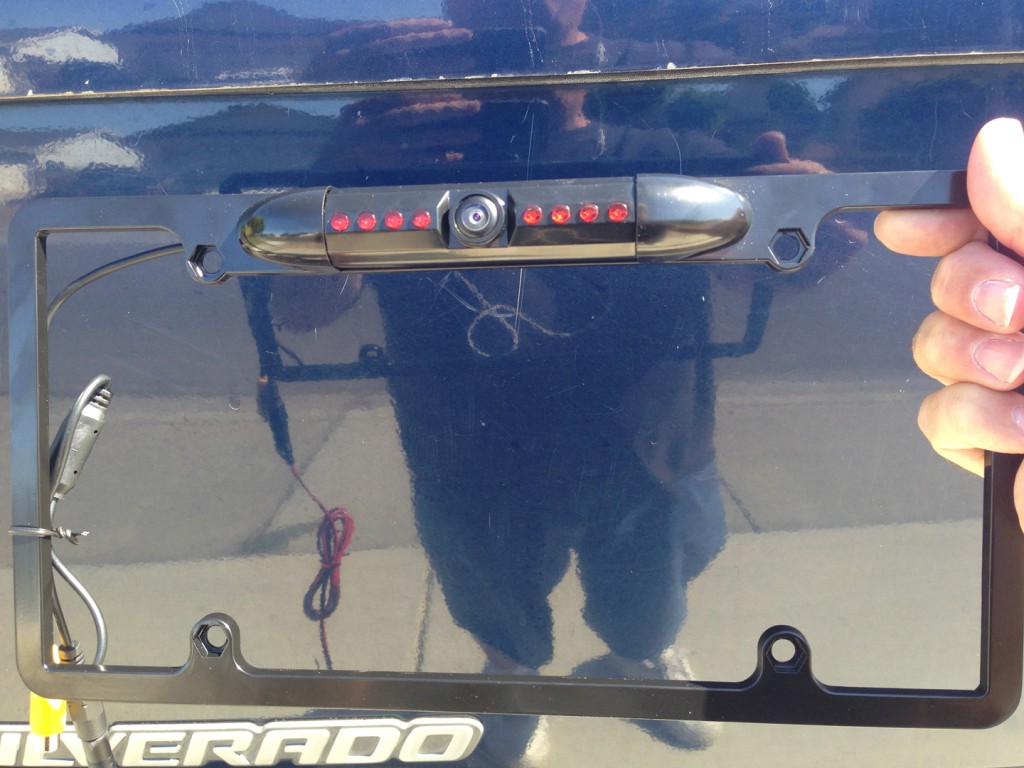
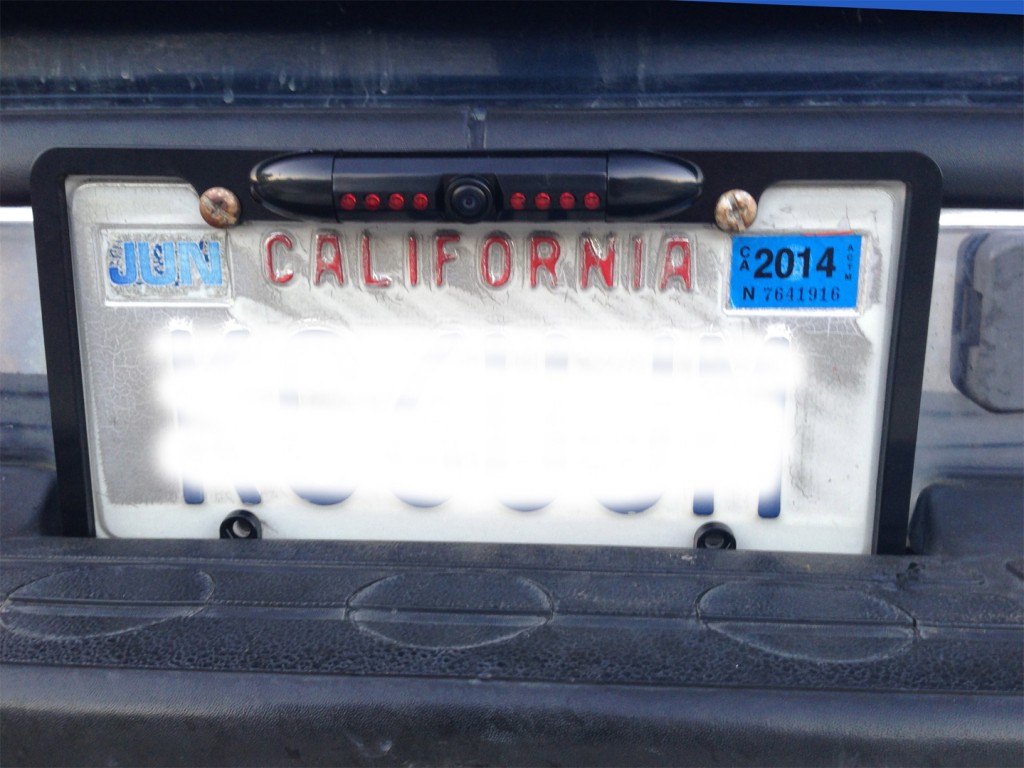
After installing the new radio, a JVC KW-AV61BT, I started my looking for an aftermarket backup camera. I found one that is mounted to a license plate frame. It’s pretty nice construction, all metal, infrared LED’s, and an adjustable camera angle.

cameraframe

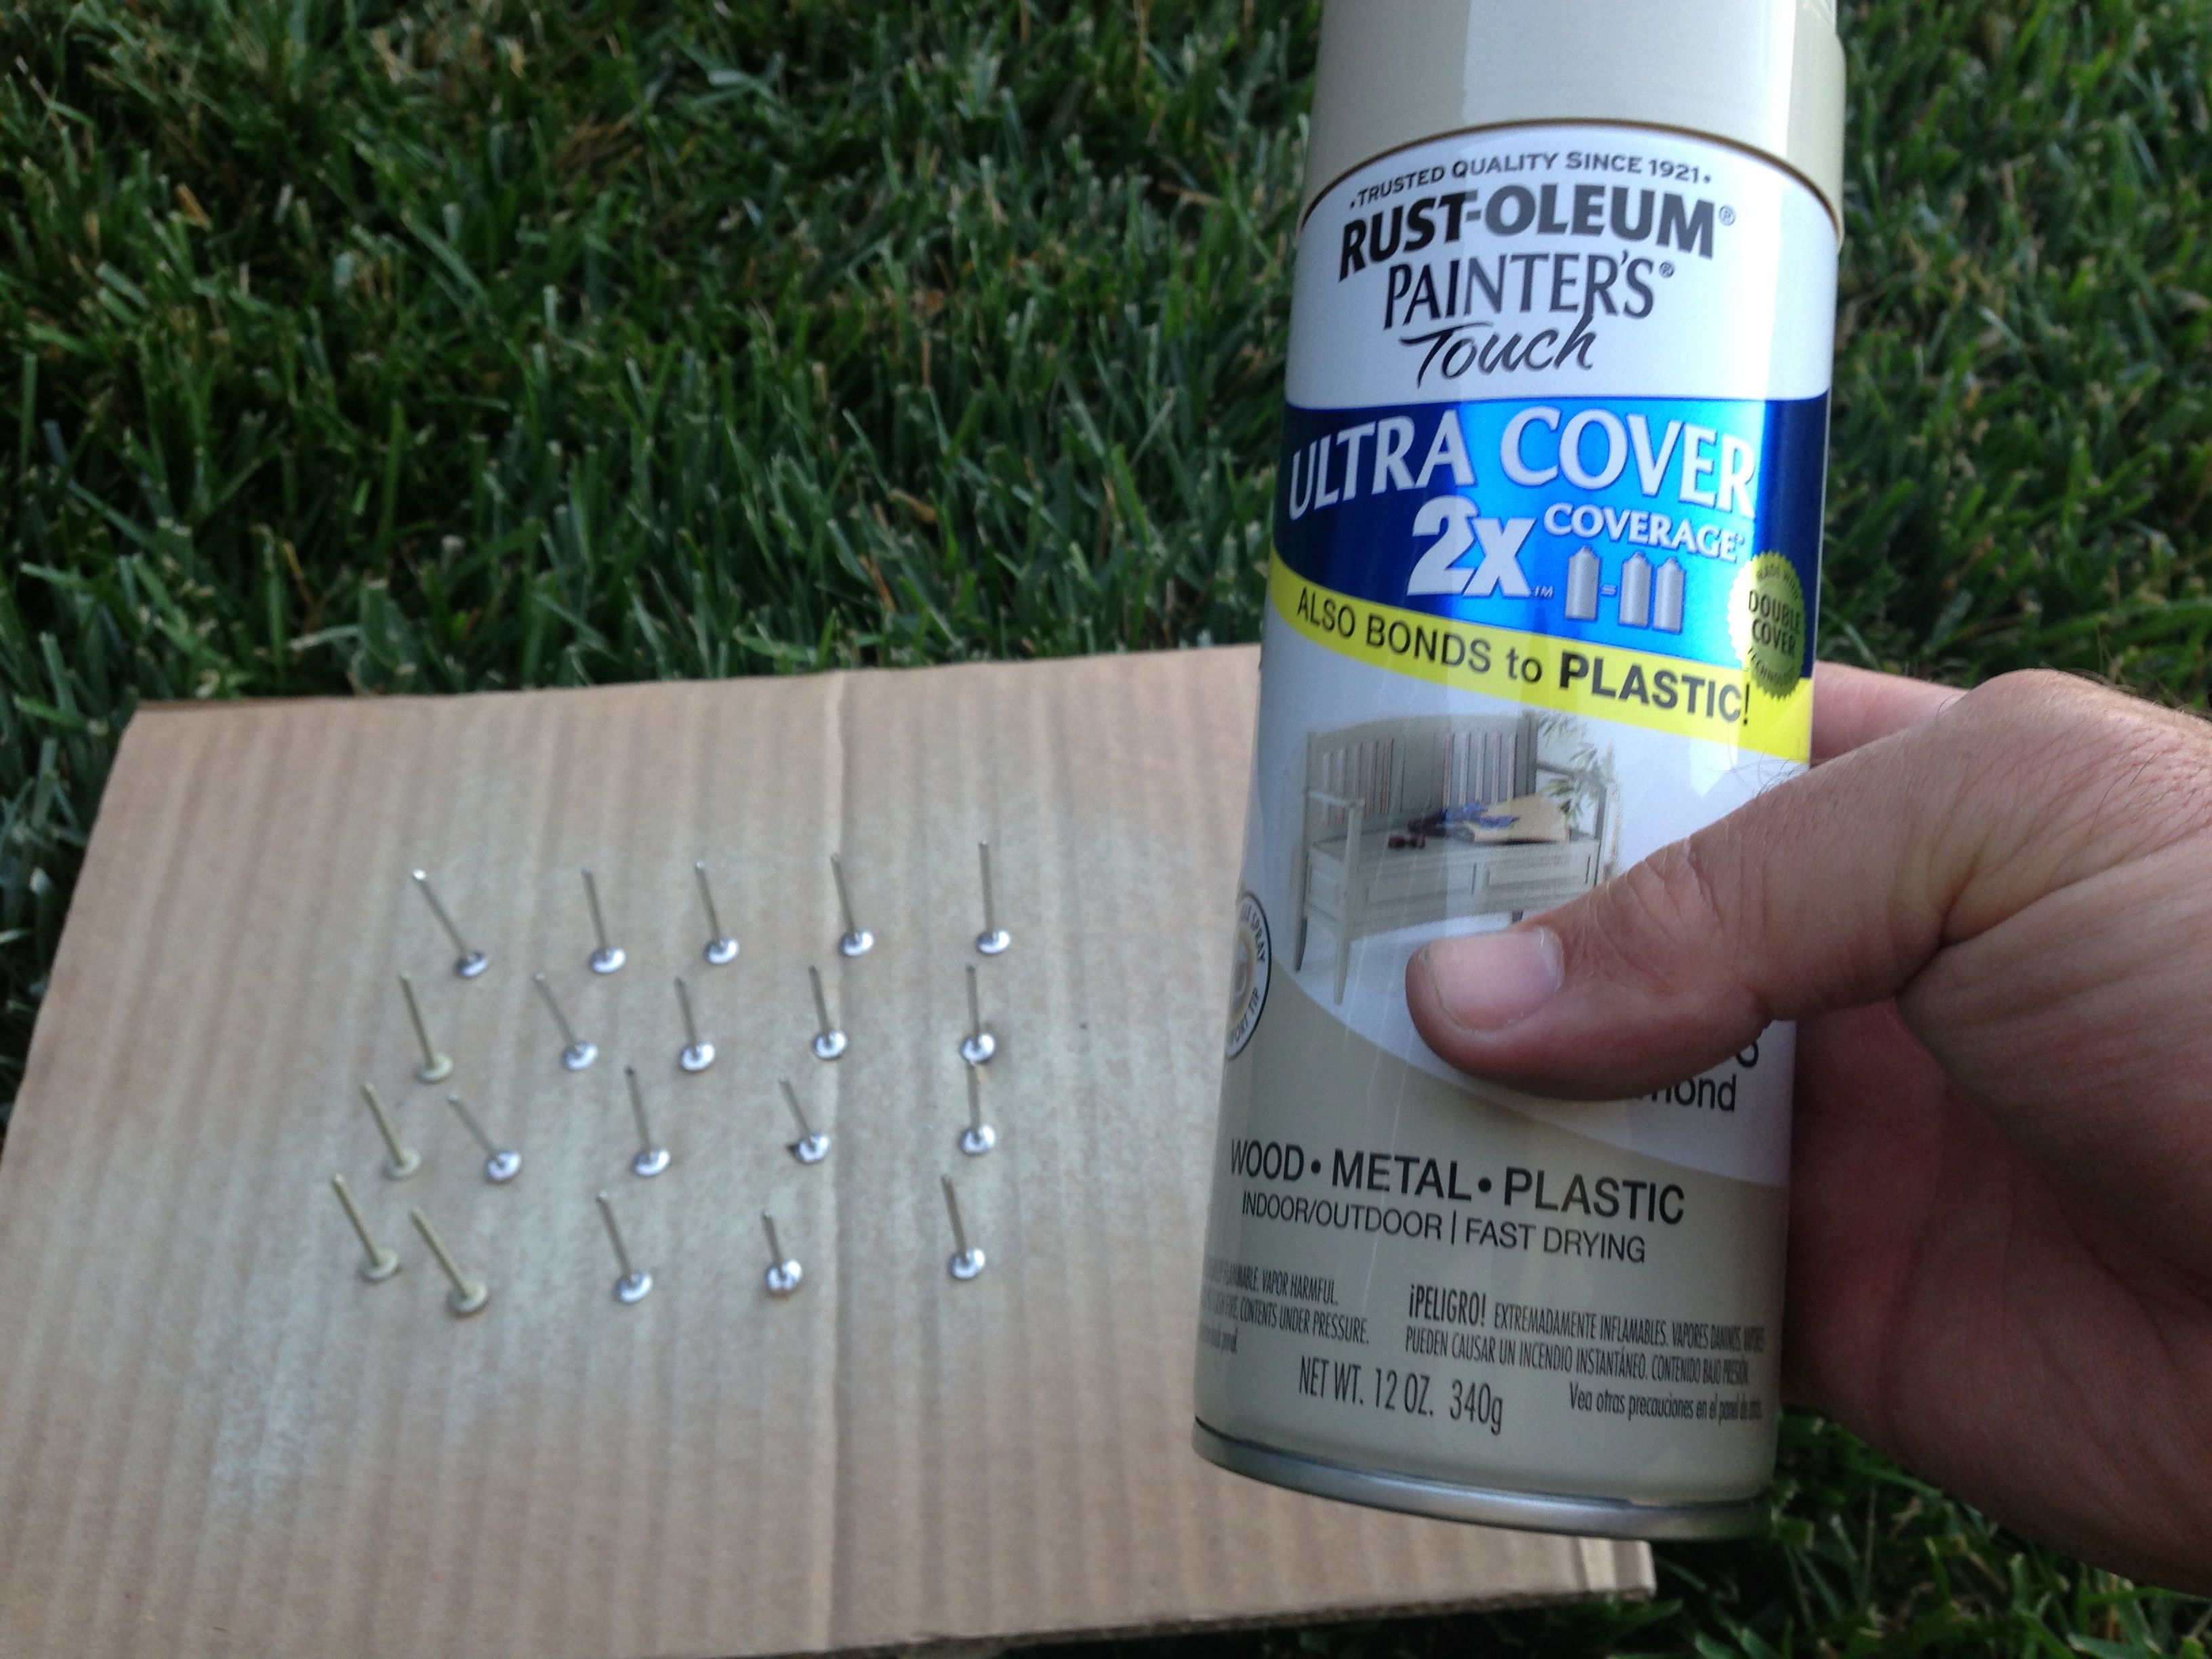
The kit comes with the waterproof camera, and a 20′ RCA video cable to connect to your monitor/radio. You’re supposed to power the camera from your backup lights so the camera powers up when you go into reverse. I had a slight issue with that because my radio has a button to view the camera whenever you want. So if it was only powered up via the backup lamps, that feature would not work. So I decided to power the radio with the ignition. Whenever the car is running, power is applied to the camera. So I had to run a another wire from inside the cab to the rear of the truck.

There was one final wire needed. The radio uses the reverse lamp power to switch to the camera to the screen when you go into reverse automatically. So I needed to run this third wire as well. I ended up making a small wiring harness and put it inside split-loom.

wiring

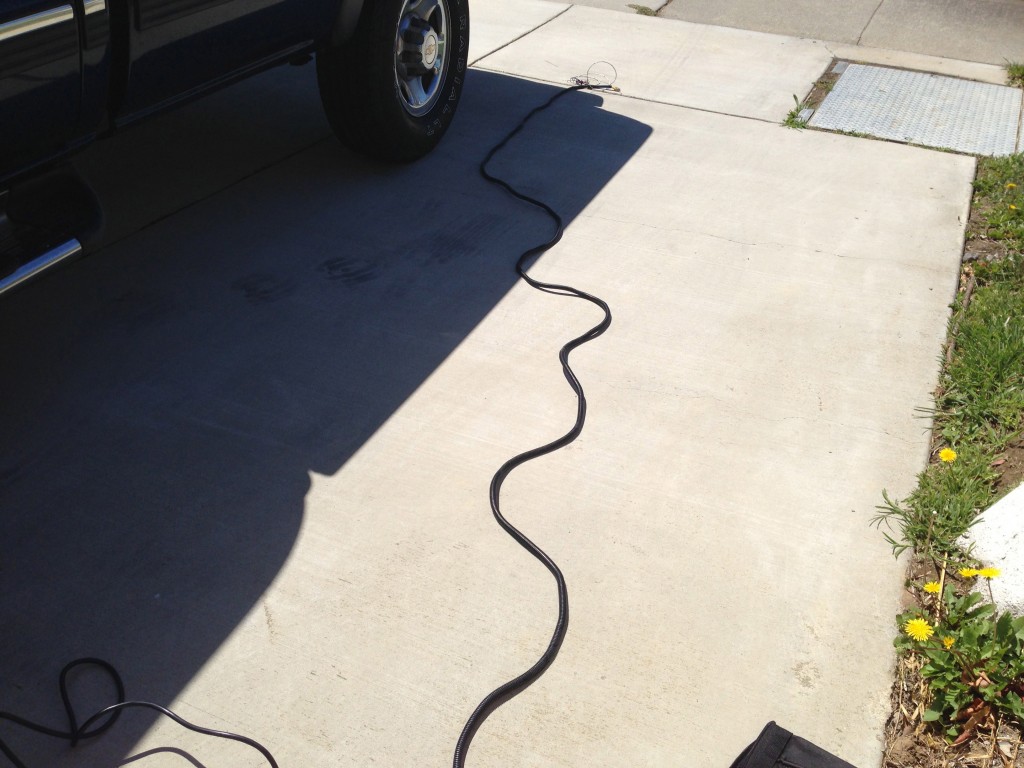
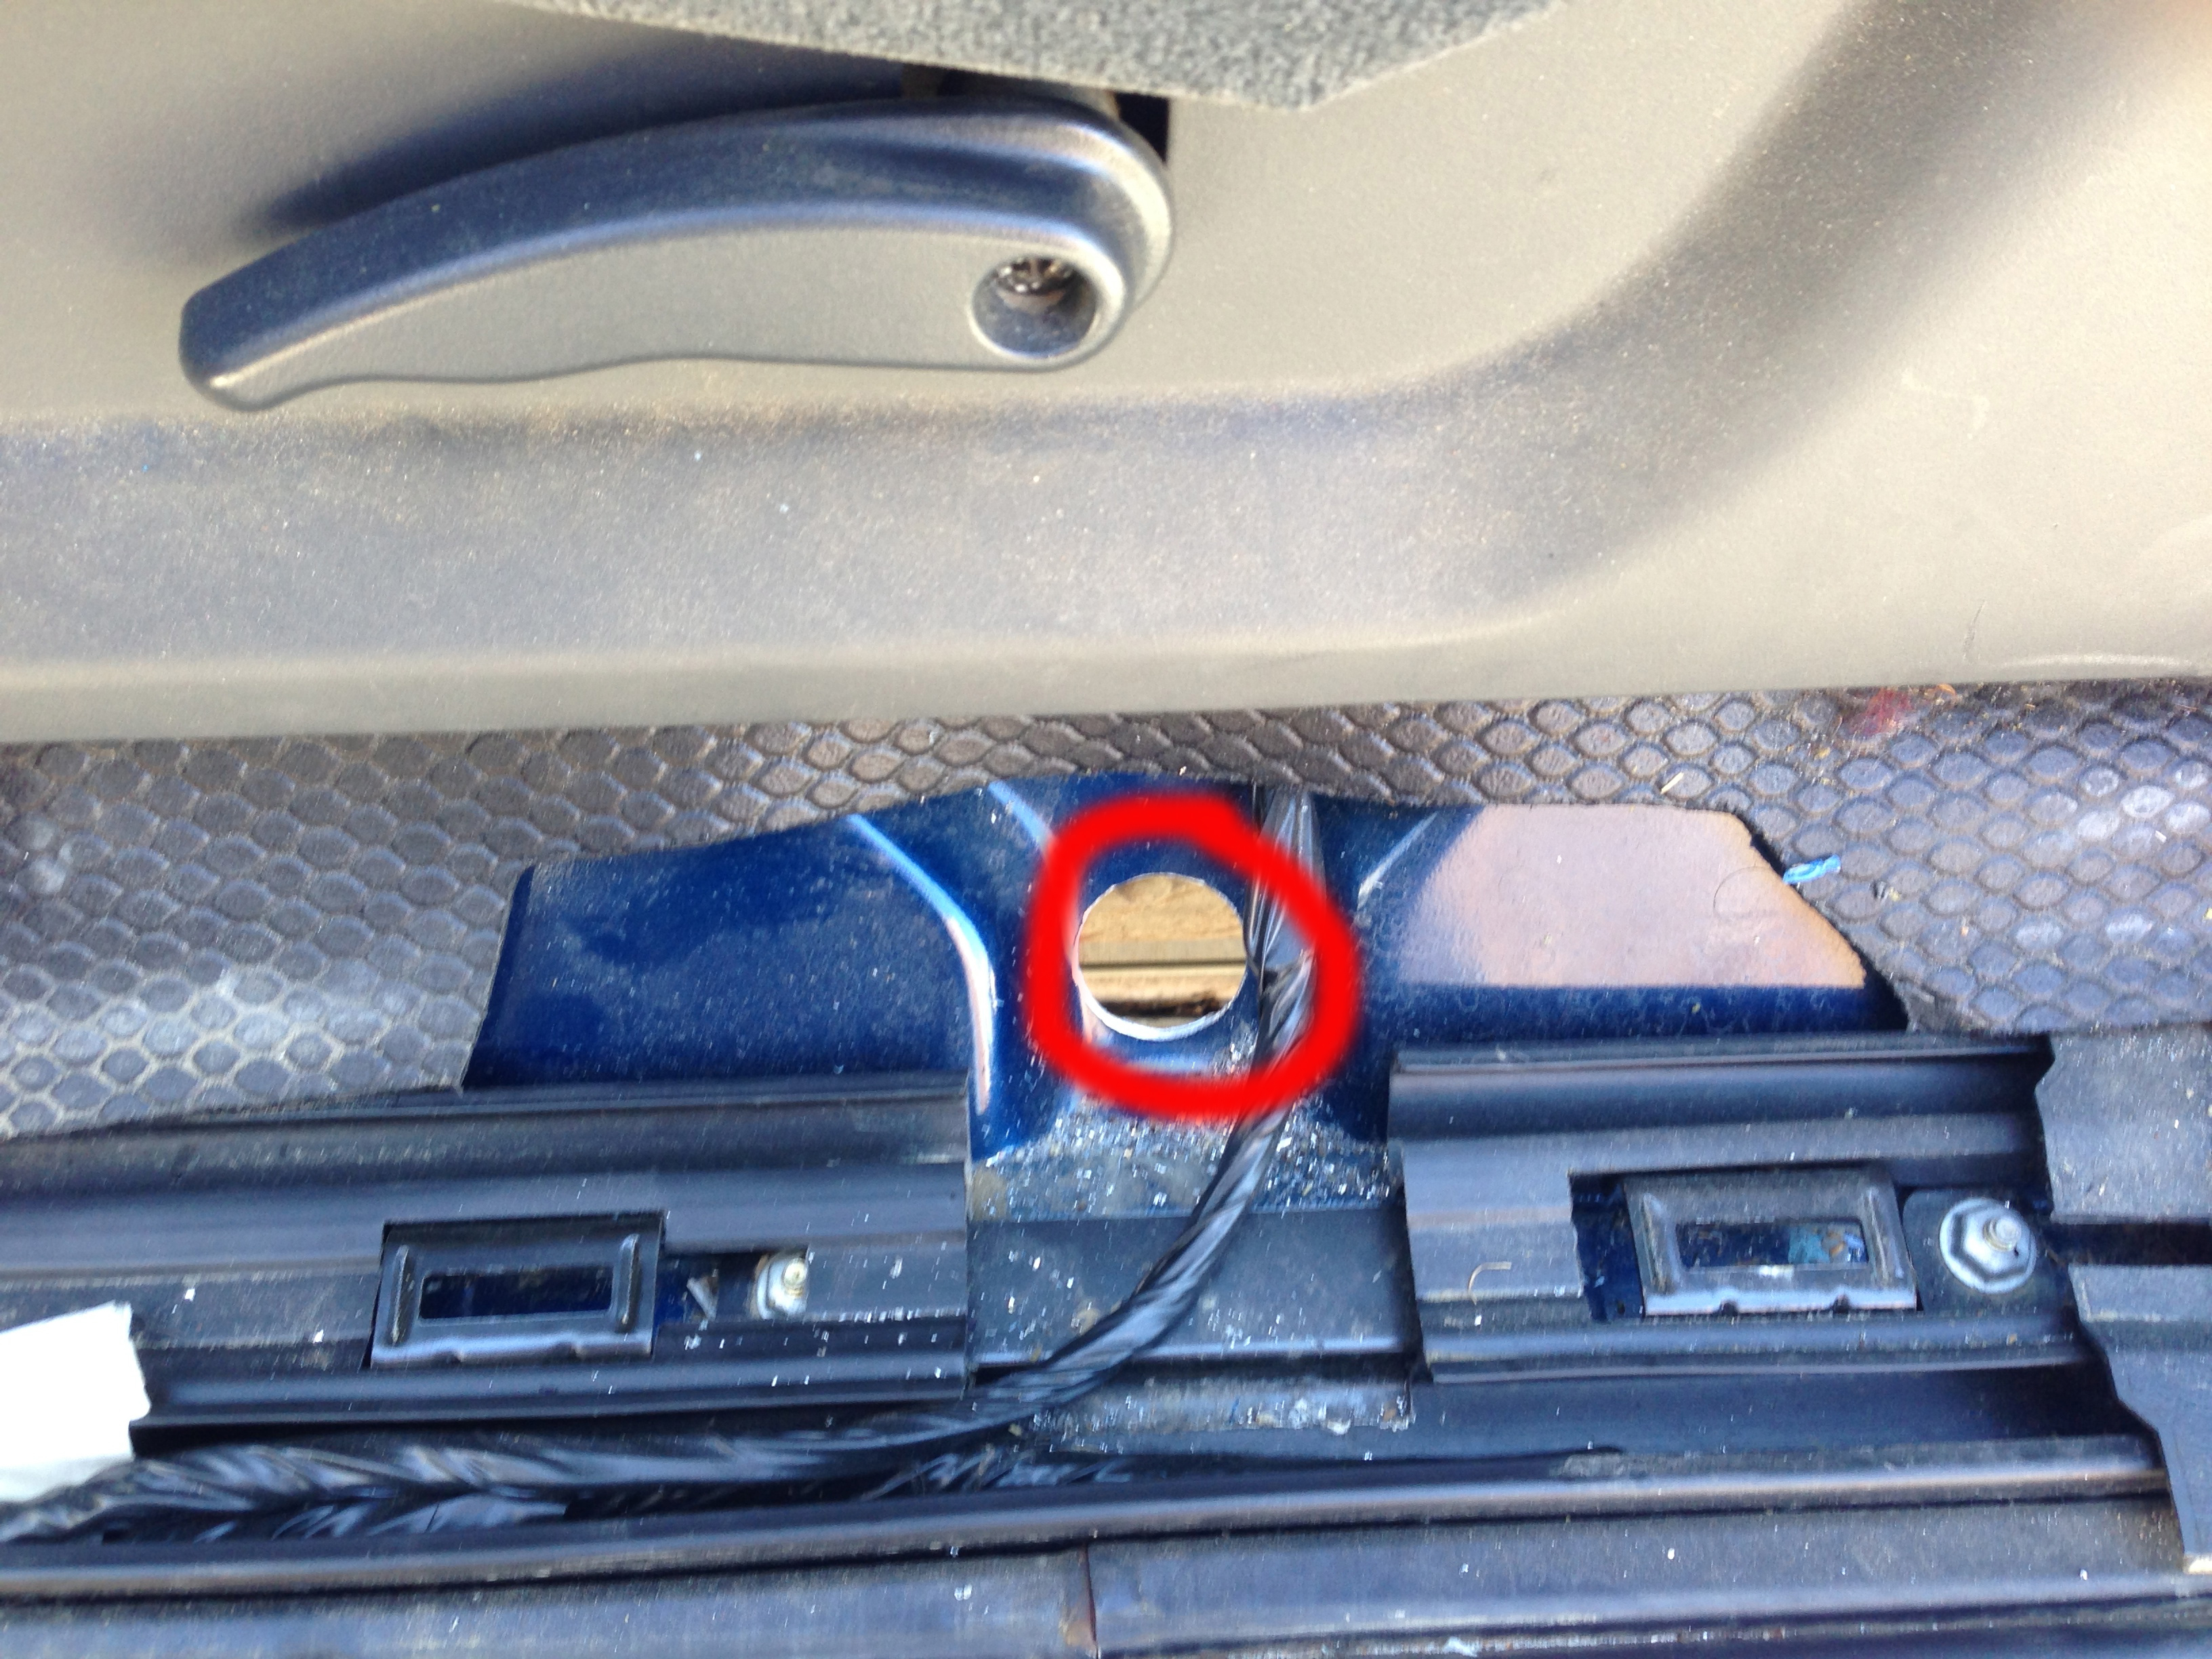
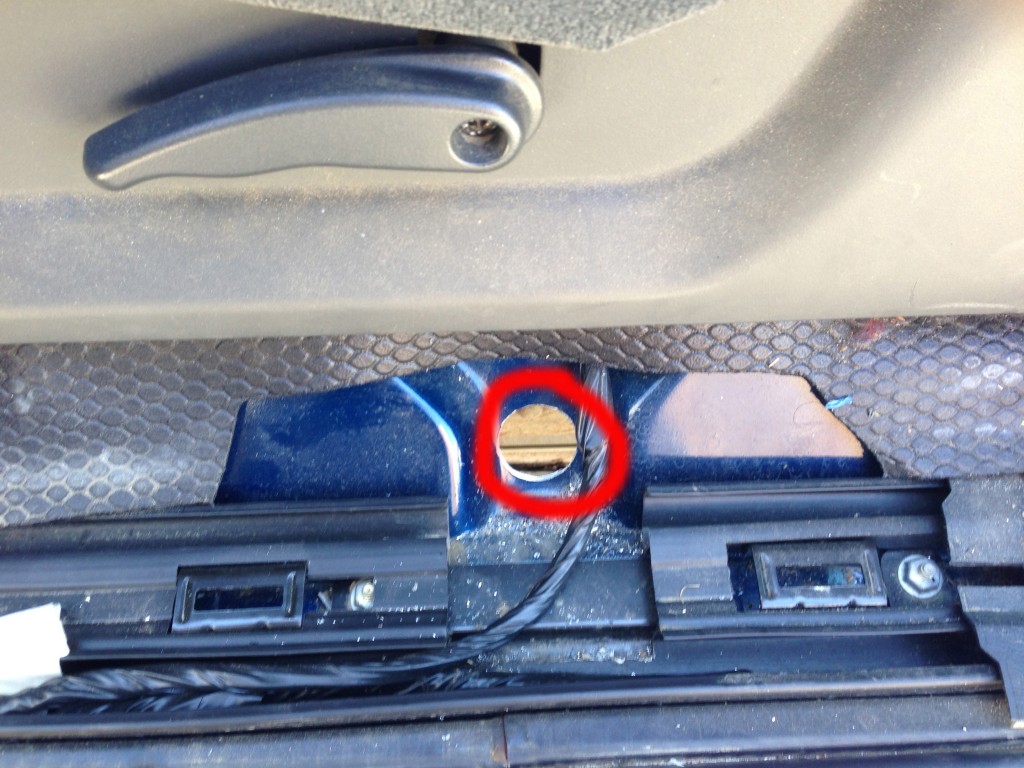
After crawling under the truck and securing the harness, I needed a way to get the wires inside the truck cab. I removed the trim at the door and found a good place to drill a hole for the wires. I secured them with a rubber grommet.

hole

The wiring to the radio was straight forward. I just needed to hookup the video-in from the camera and the rear-trigger from the backup lights. Finished with wiring the power to the ignition via small in-line fuse.

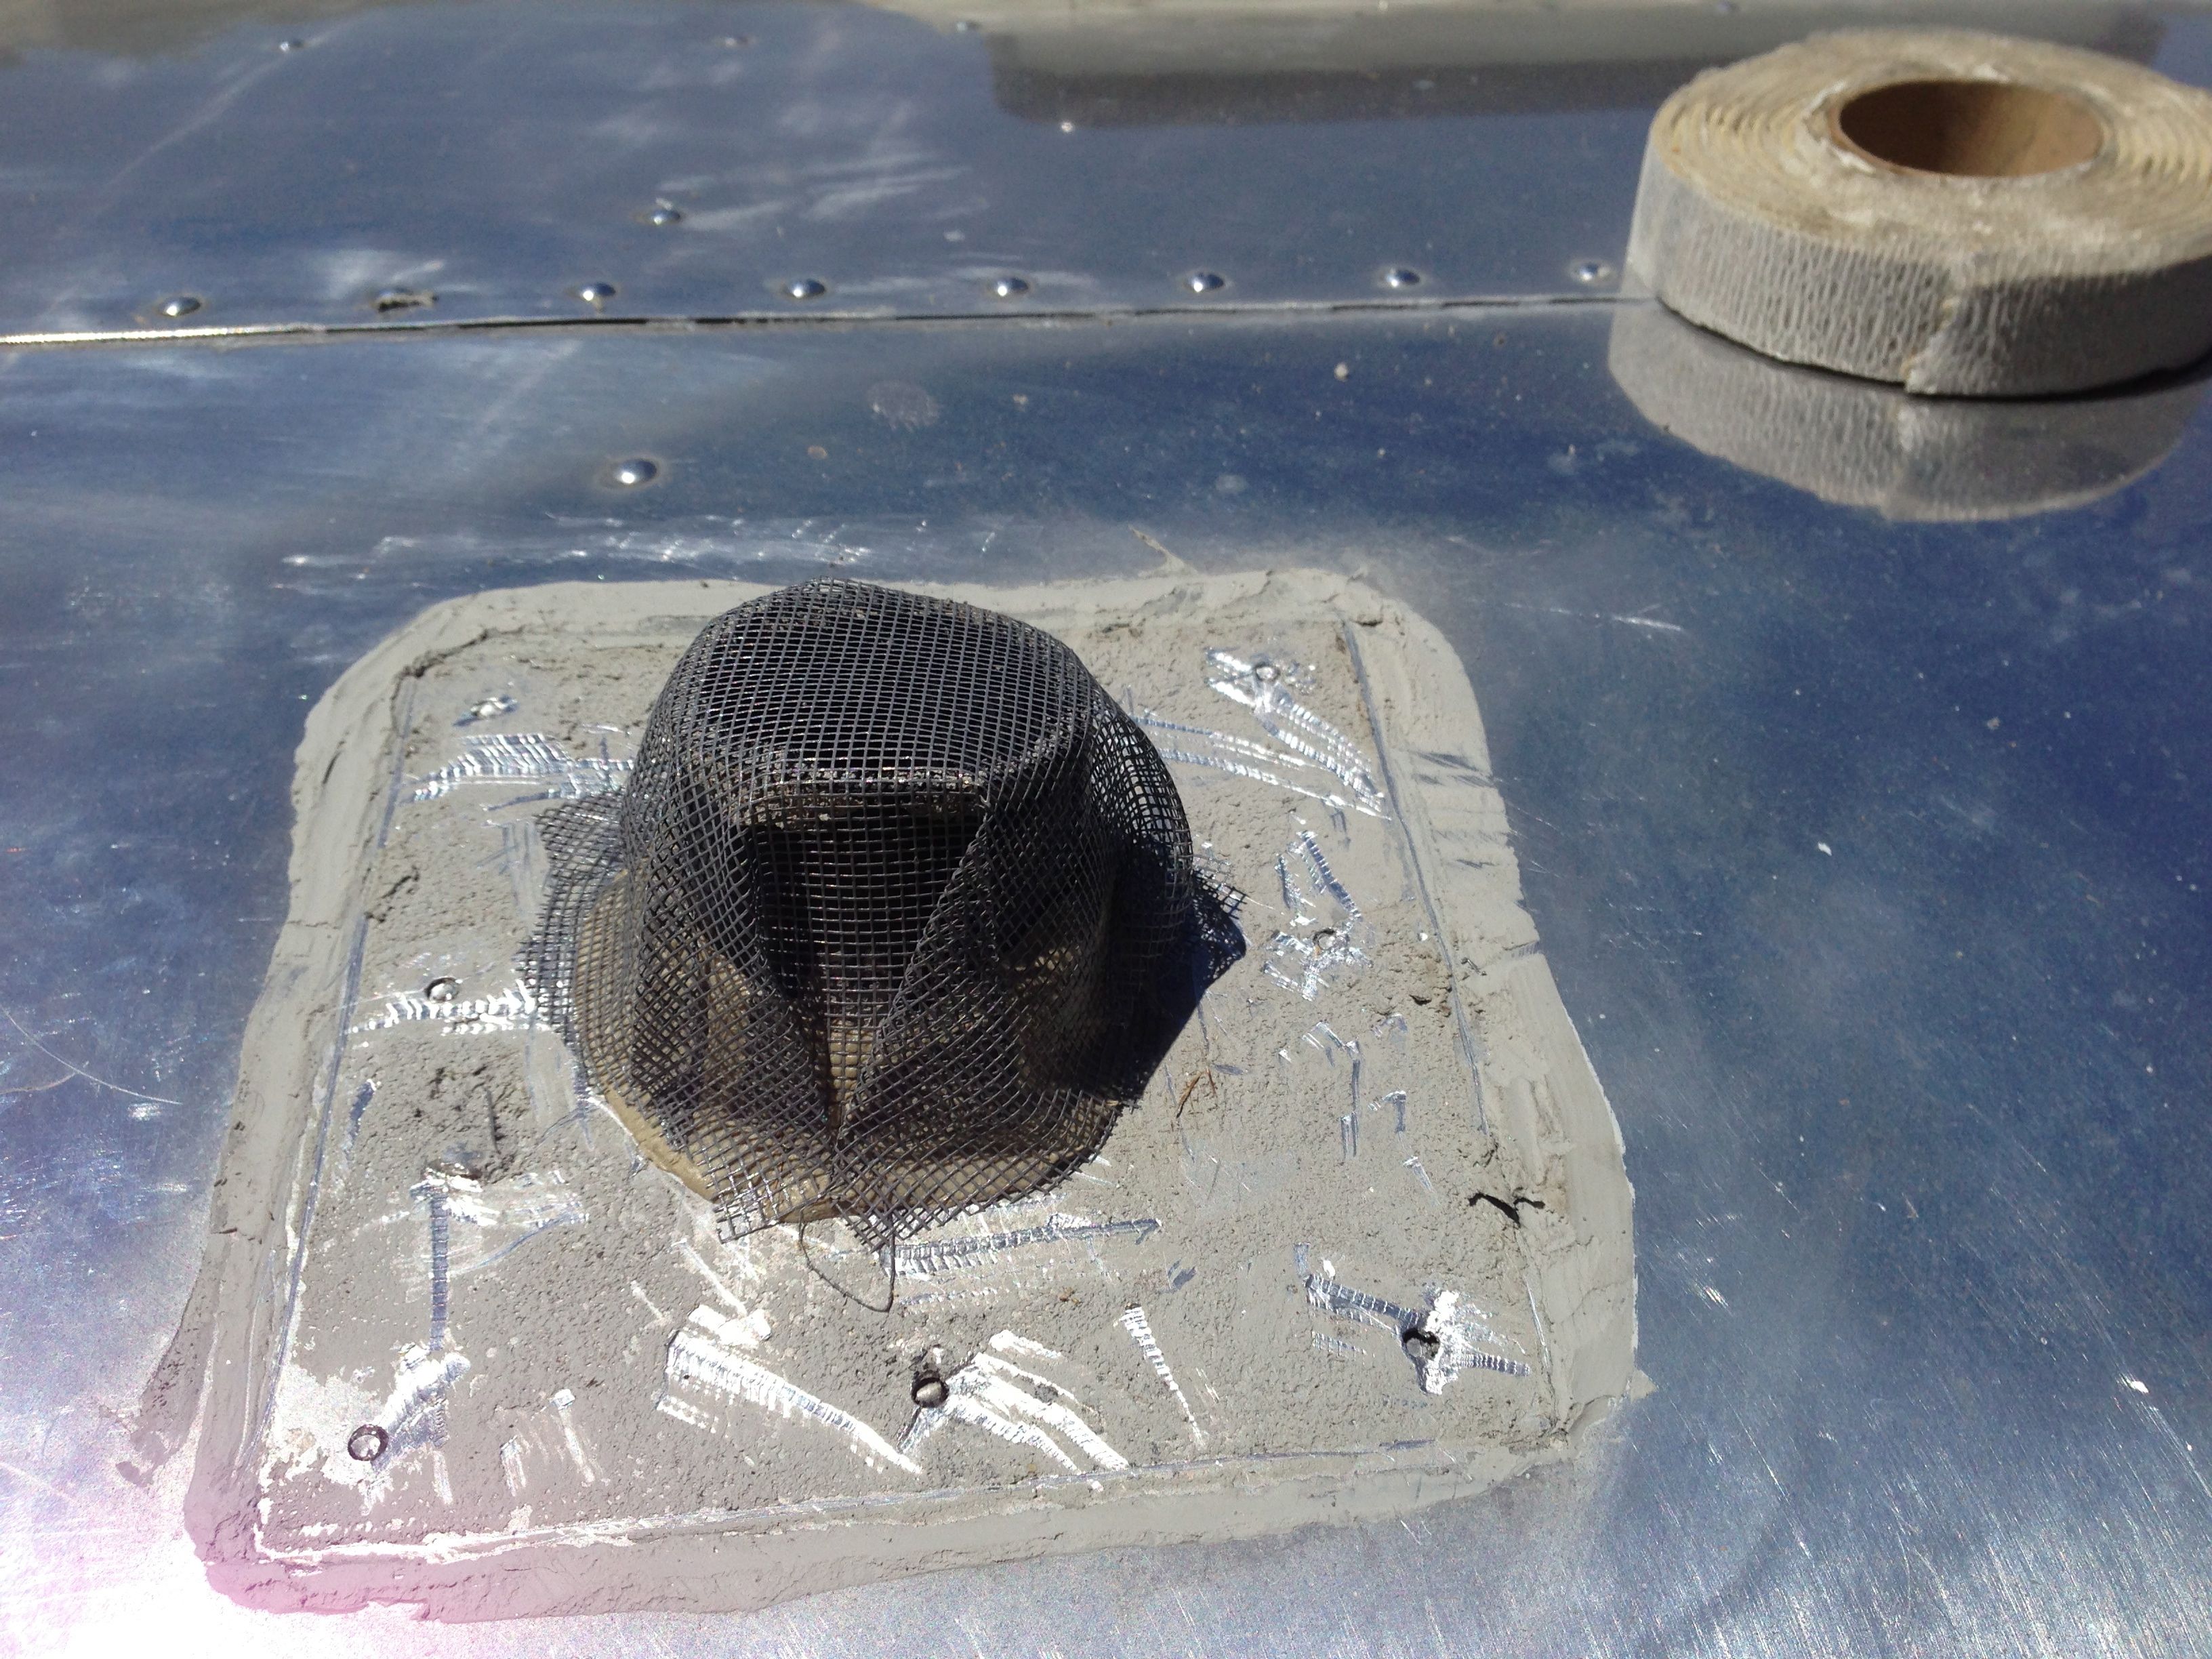
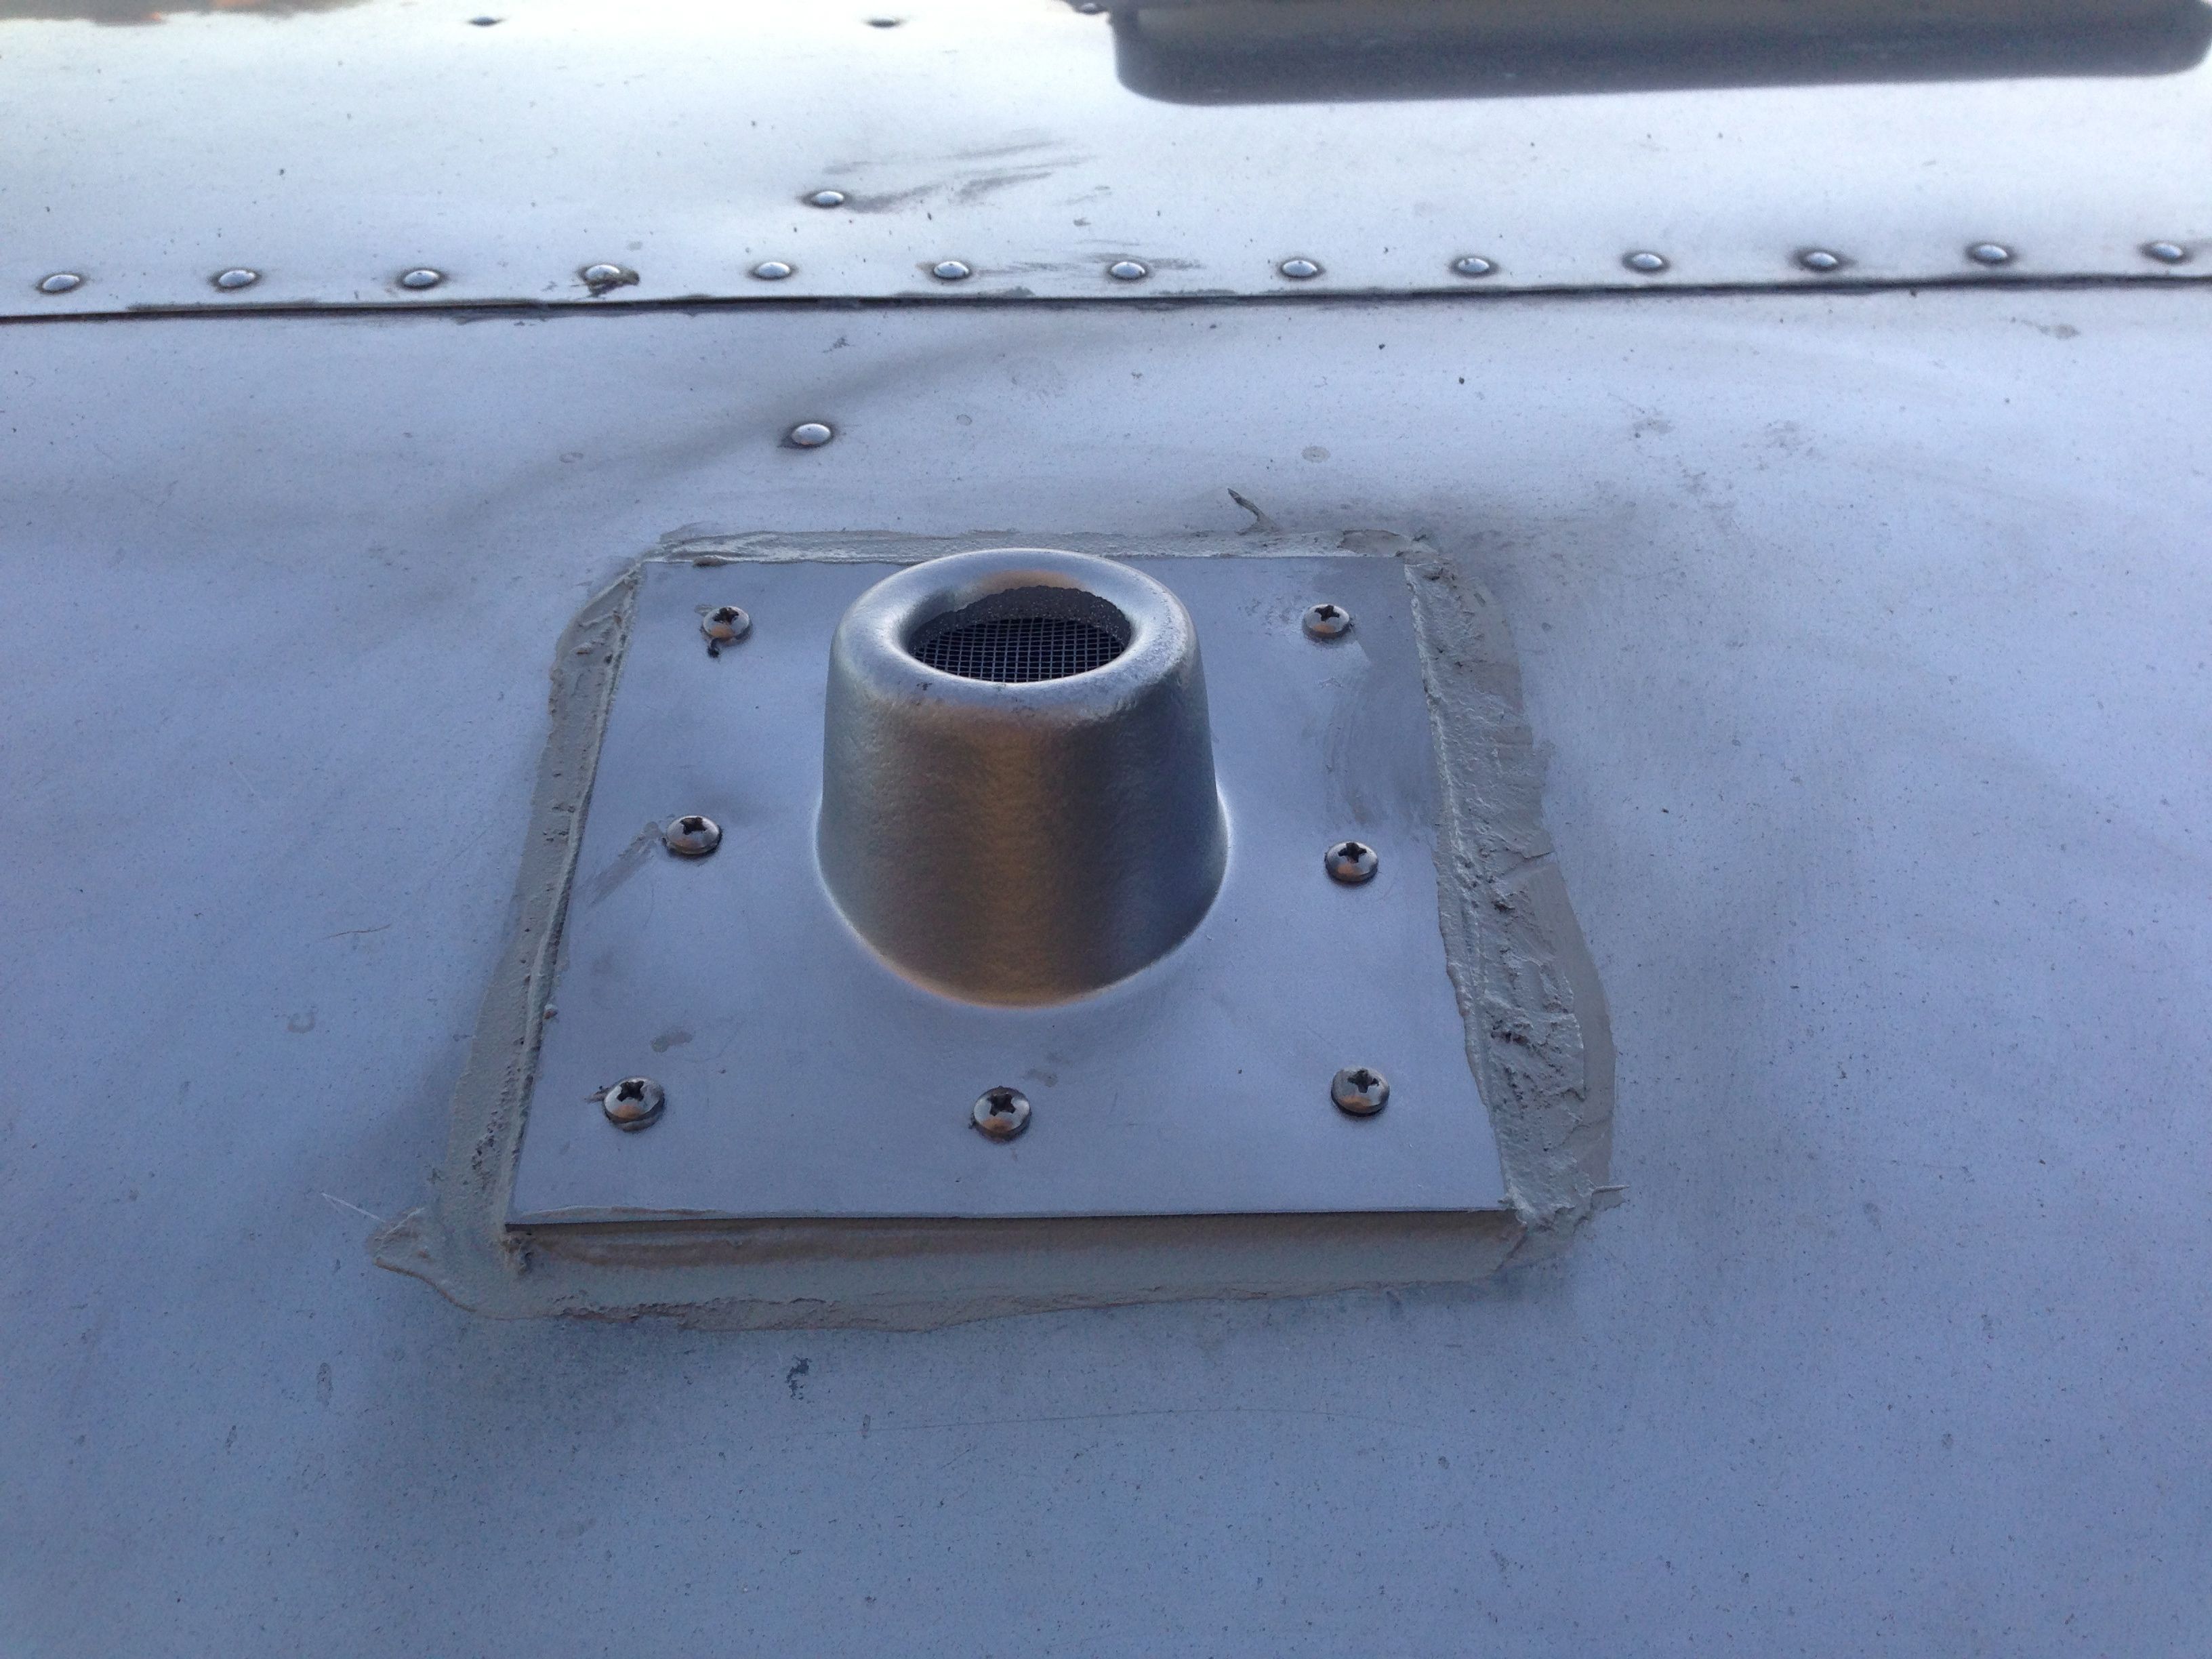
Here are a couple of photos of the camera mounted.

rear

closeup

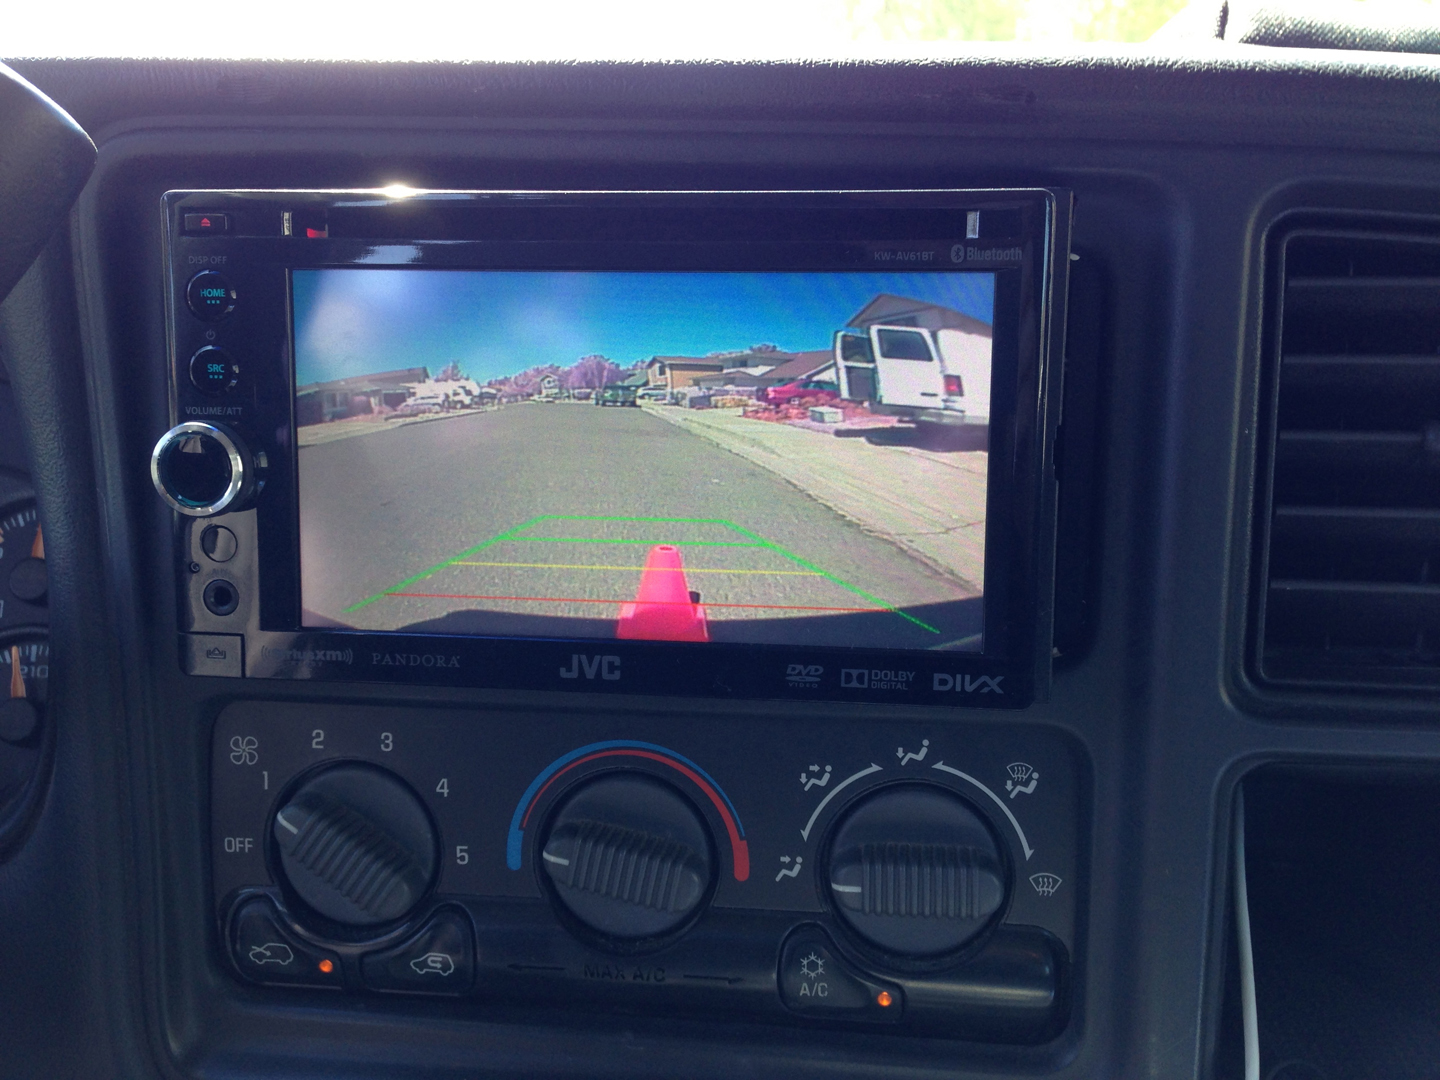
Here is how the the radio looks with the camera view. The camera puts the red, yellow, green line overlays. You can adjust the camera angle up or down to get the red line adjusted to your preference. I actually lowered it a little more after this photo. I like to see the bumper in the view.

radio

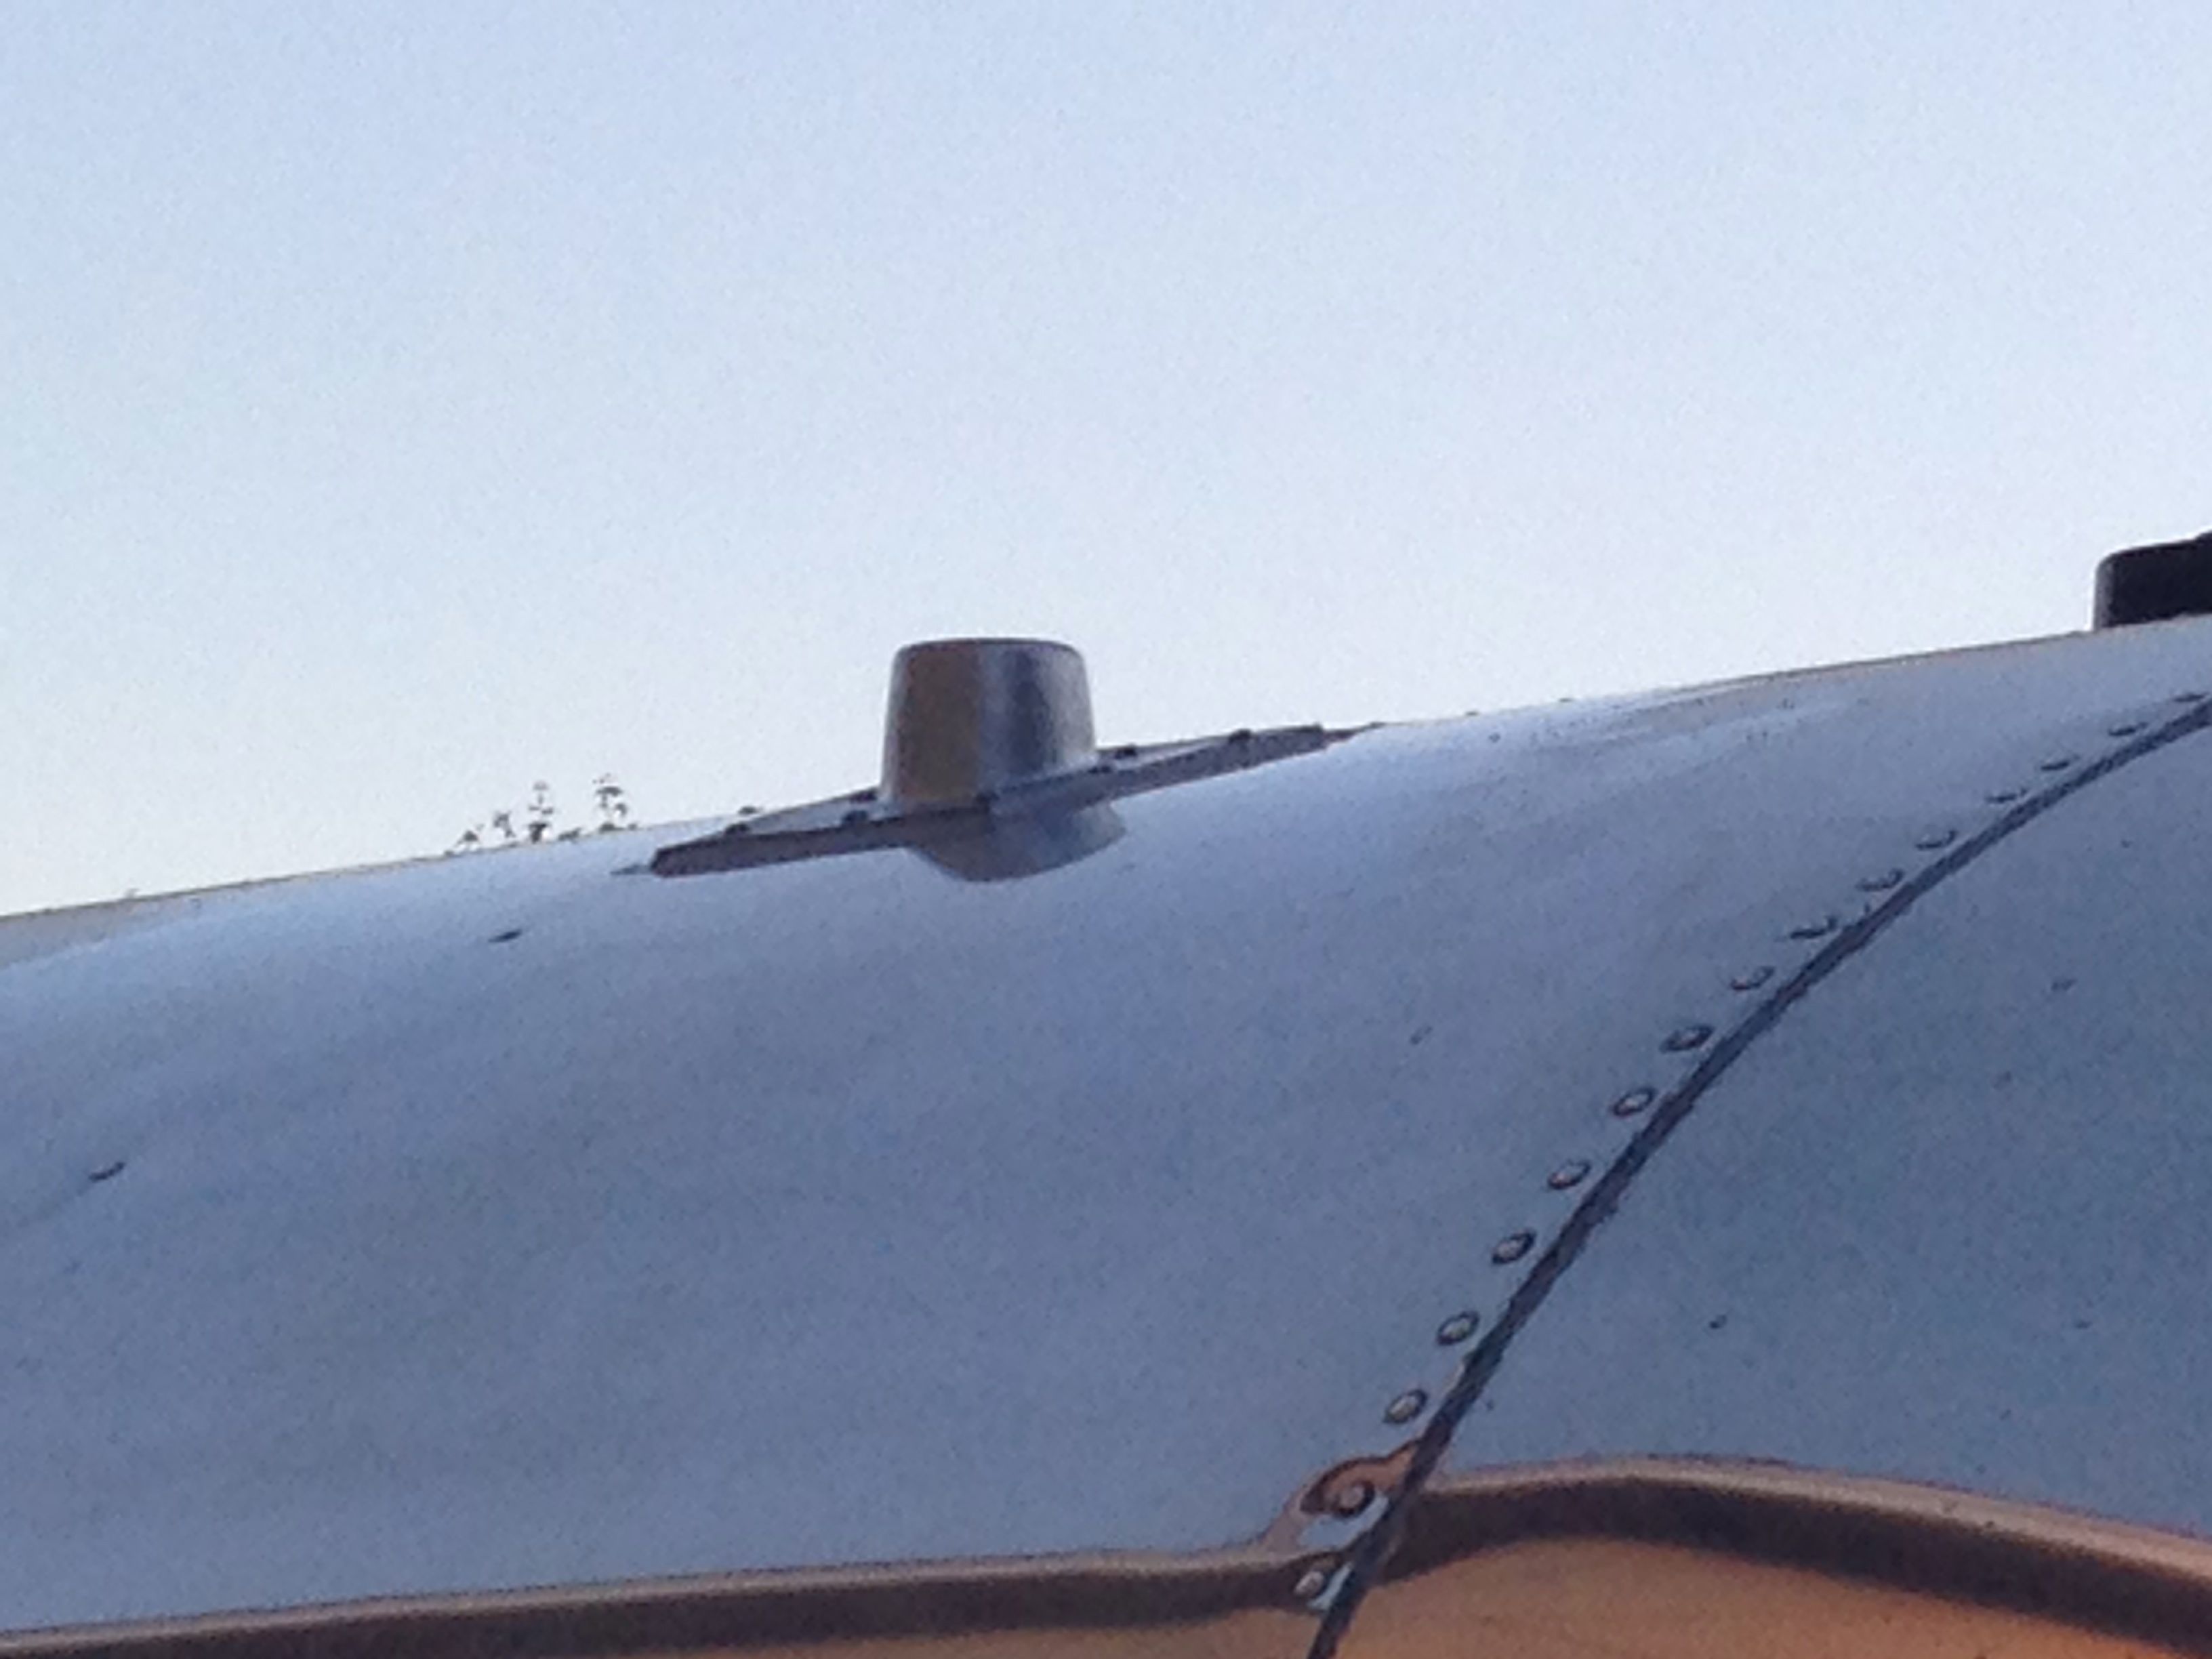
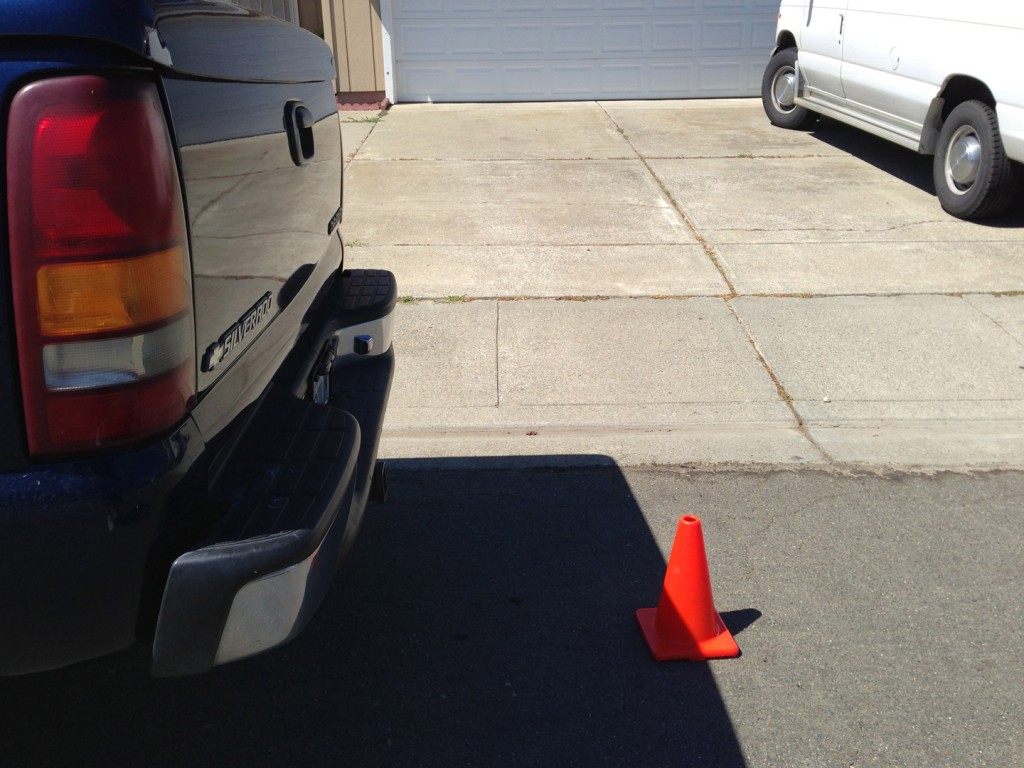
This is a side view of the cone placement so you can get an idea of the distance.

cone

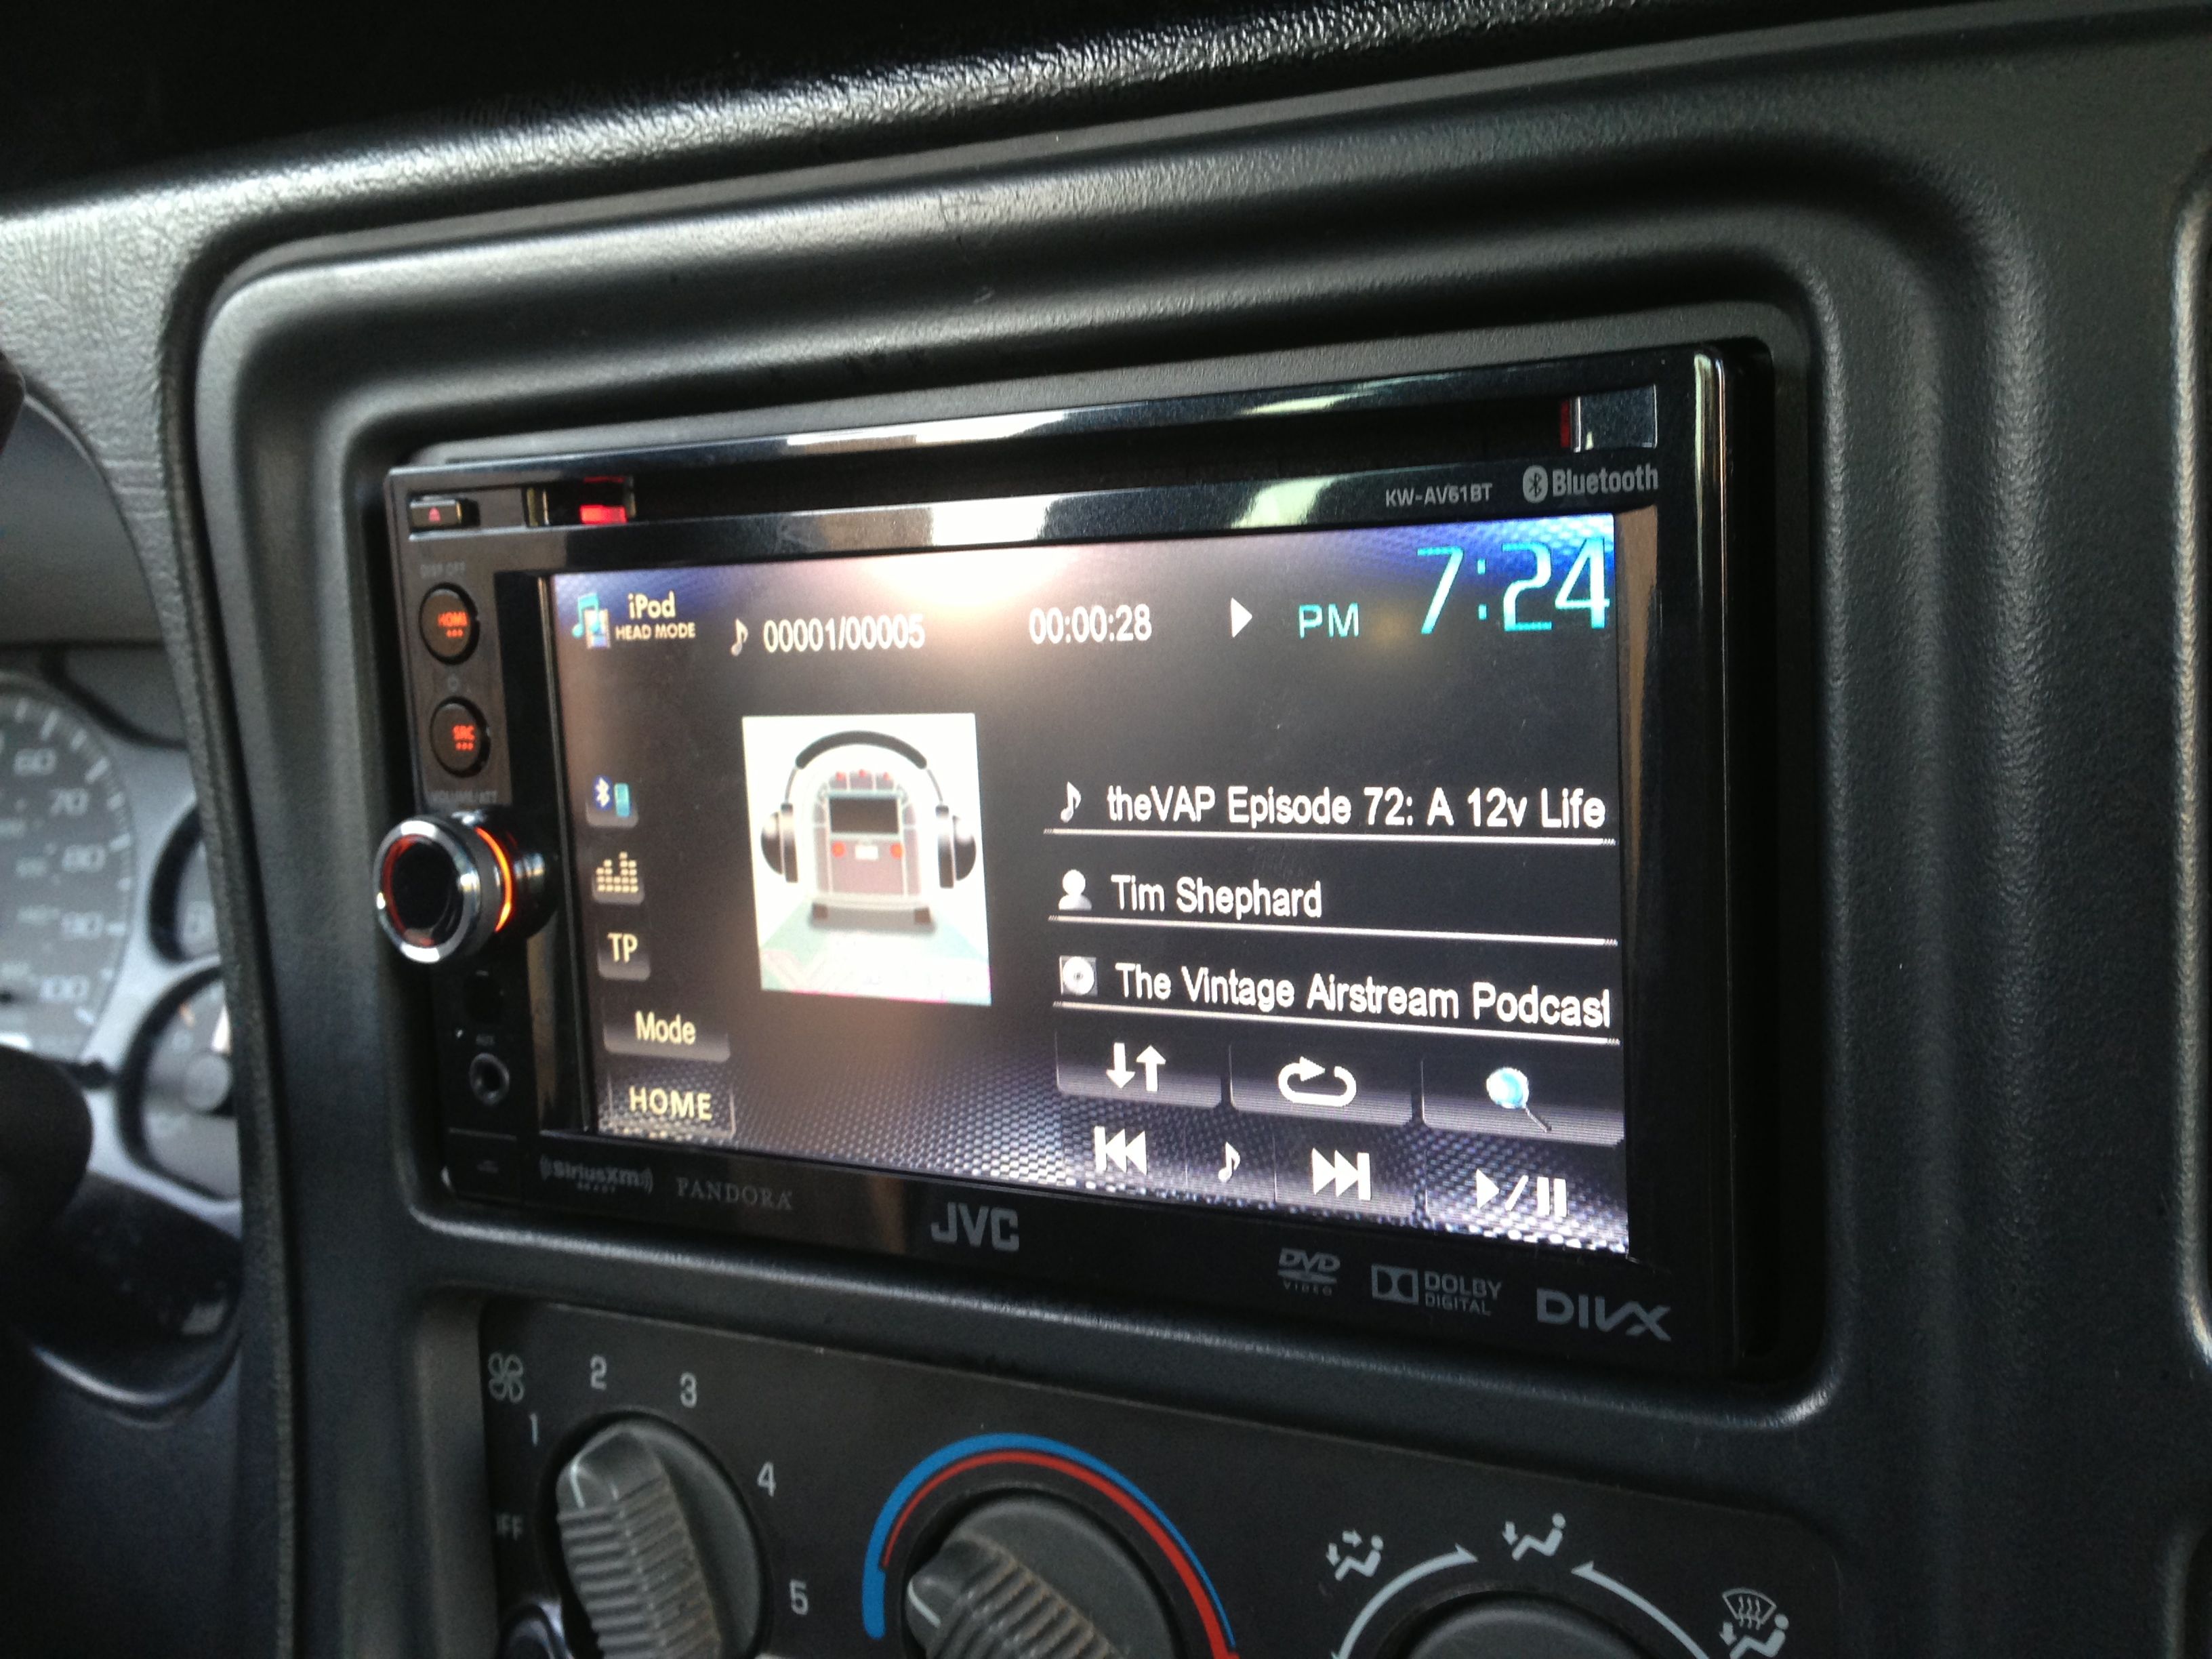
I like the way it turned out. The radio switches to the camera input automatically when I go into reverse. I can also select the camera input on the radio while driving, which is a very strange view to watch while your in motion (only viewing as a passenger of course!). There is one issue that you may have noticed. The colors are off, way off on the camera. The trees in the far background in the photo above are pink instead of green! I didn’t order the “Rose-colored glasses version”. I’ve already filed for an exchange. Luckily the swap out will be a lot easier than the initial install!

I can’t wait to see how this will help when hitching the trailer… There’s your RV connection!

As I mentioned on Episode 190, I wasn’t happy with the initial look of modifying the original dash. I was able to locate a 2005 dash bezel with the proper opening as well as the radio bracket from the 2005. Results are much nicer!

radio1

Facebooktwitterredditpinterestlinkedinmailby feather

New propane regulator

On our last trip I noticed our auto-switching propane regulator always indicated an empty tank. In case you don’t know, auto-switching regulators typically have a red/green indicator, which turns red when the tank is empty. There is a dial or knob of some kind to switch the indicator to the opposite tank. The propane itself auto-switches to keep your appliances supplied with propane without interruption. When turning the dial, you are only setting the indicator’s source. That said, my seven year old regulator always showed empty.

20130714-170317.jpg

20130714-170327.jpg

I decided to replace the regulator and hoses. These new stainless braided hoses are a nice addition.

20130714-170429.jpg

The new hoses match the regulators reversed-flair gas fittings perfectly. Always use two wrenches to tighten fittings. The connection to the trailer is a pipe fitting that I was able to reuse. Pipe fittings need some sealant on the treads since it does not seal gas like a flair connection. Always be sure to use a sealant rated for gas. Typically, it’s yellow as opposed to white, which is used for water.

20130714-170754.jpg

After all the connections were completed I checked for leaks with my gas leak detection spray. Everything checked out fine.

20130714-170912.jpg

20130714-170923.jpg

Time to light up and give it a good test. I lite all three burners and the water heater. Then with both tanks open, I closed one tank and watched the indicator turn to red. I checked and all of my gas appliances were still running, meaning the regulator did its job and switched to the opposite tank.

20130714-171118.jpg

After rotating the regulator’s indicator selector, it turned green again. All systems go!

20130714-171331.jpg

One more trailer project off my list!

Facebooktwitterredditpinterestlinkedinmailby feather