When I originally wired my Ambassador during the restoration, I wired it with one battery in mind. I put a 100Ah AGM Group 27 battery in the curbside closet. It fit perfectly next to the black tank that I had extended into that very closet. I built a false floor to cover the battery and tank. All was well….
Then, just before I put the belly pan back on, I threw a couple of #6 stranded wire through the floor. This linked each closet space with #6 wire. When we did our cross county trip a couple of years ago, I added the second AGM to the street side closet and used the #6 to connect the two.
With our full-hookup camping and light loads, it was fine. Now that I’m adding 400w of solar, I decided that I should put the batteries together. When you parallel batteries, you should use bigger wire than #6. You should also draw your power off the bank, not just one of the batteries. What that means is you pull the positive off of one battery, and the negative from the other. The batteries prefer this, be nice to them.
Moving the batteries was easy. However, once I moved them I had to move my inverter, transfer switch, trimetric, remote inverter switch, this was a big job.
You can see how this all was before I started in this post. I ended up with both AGM’s under the street side bed. Here they are sitting in their new homes.
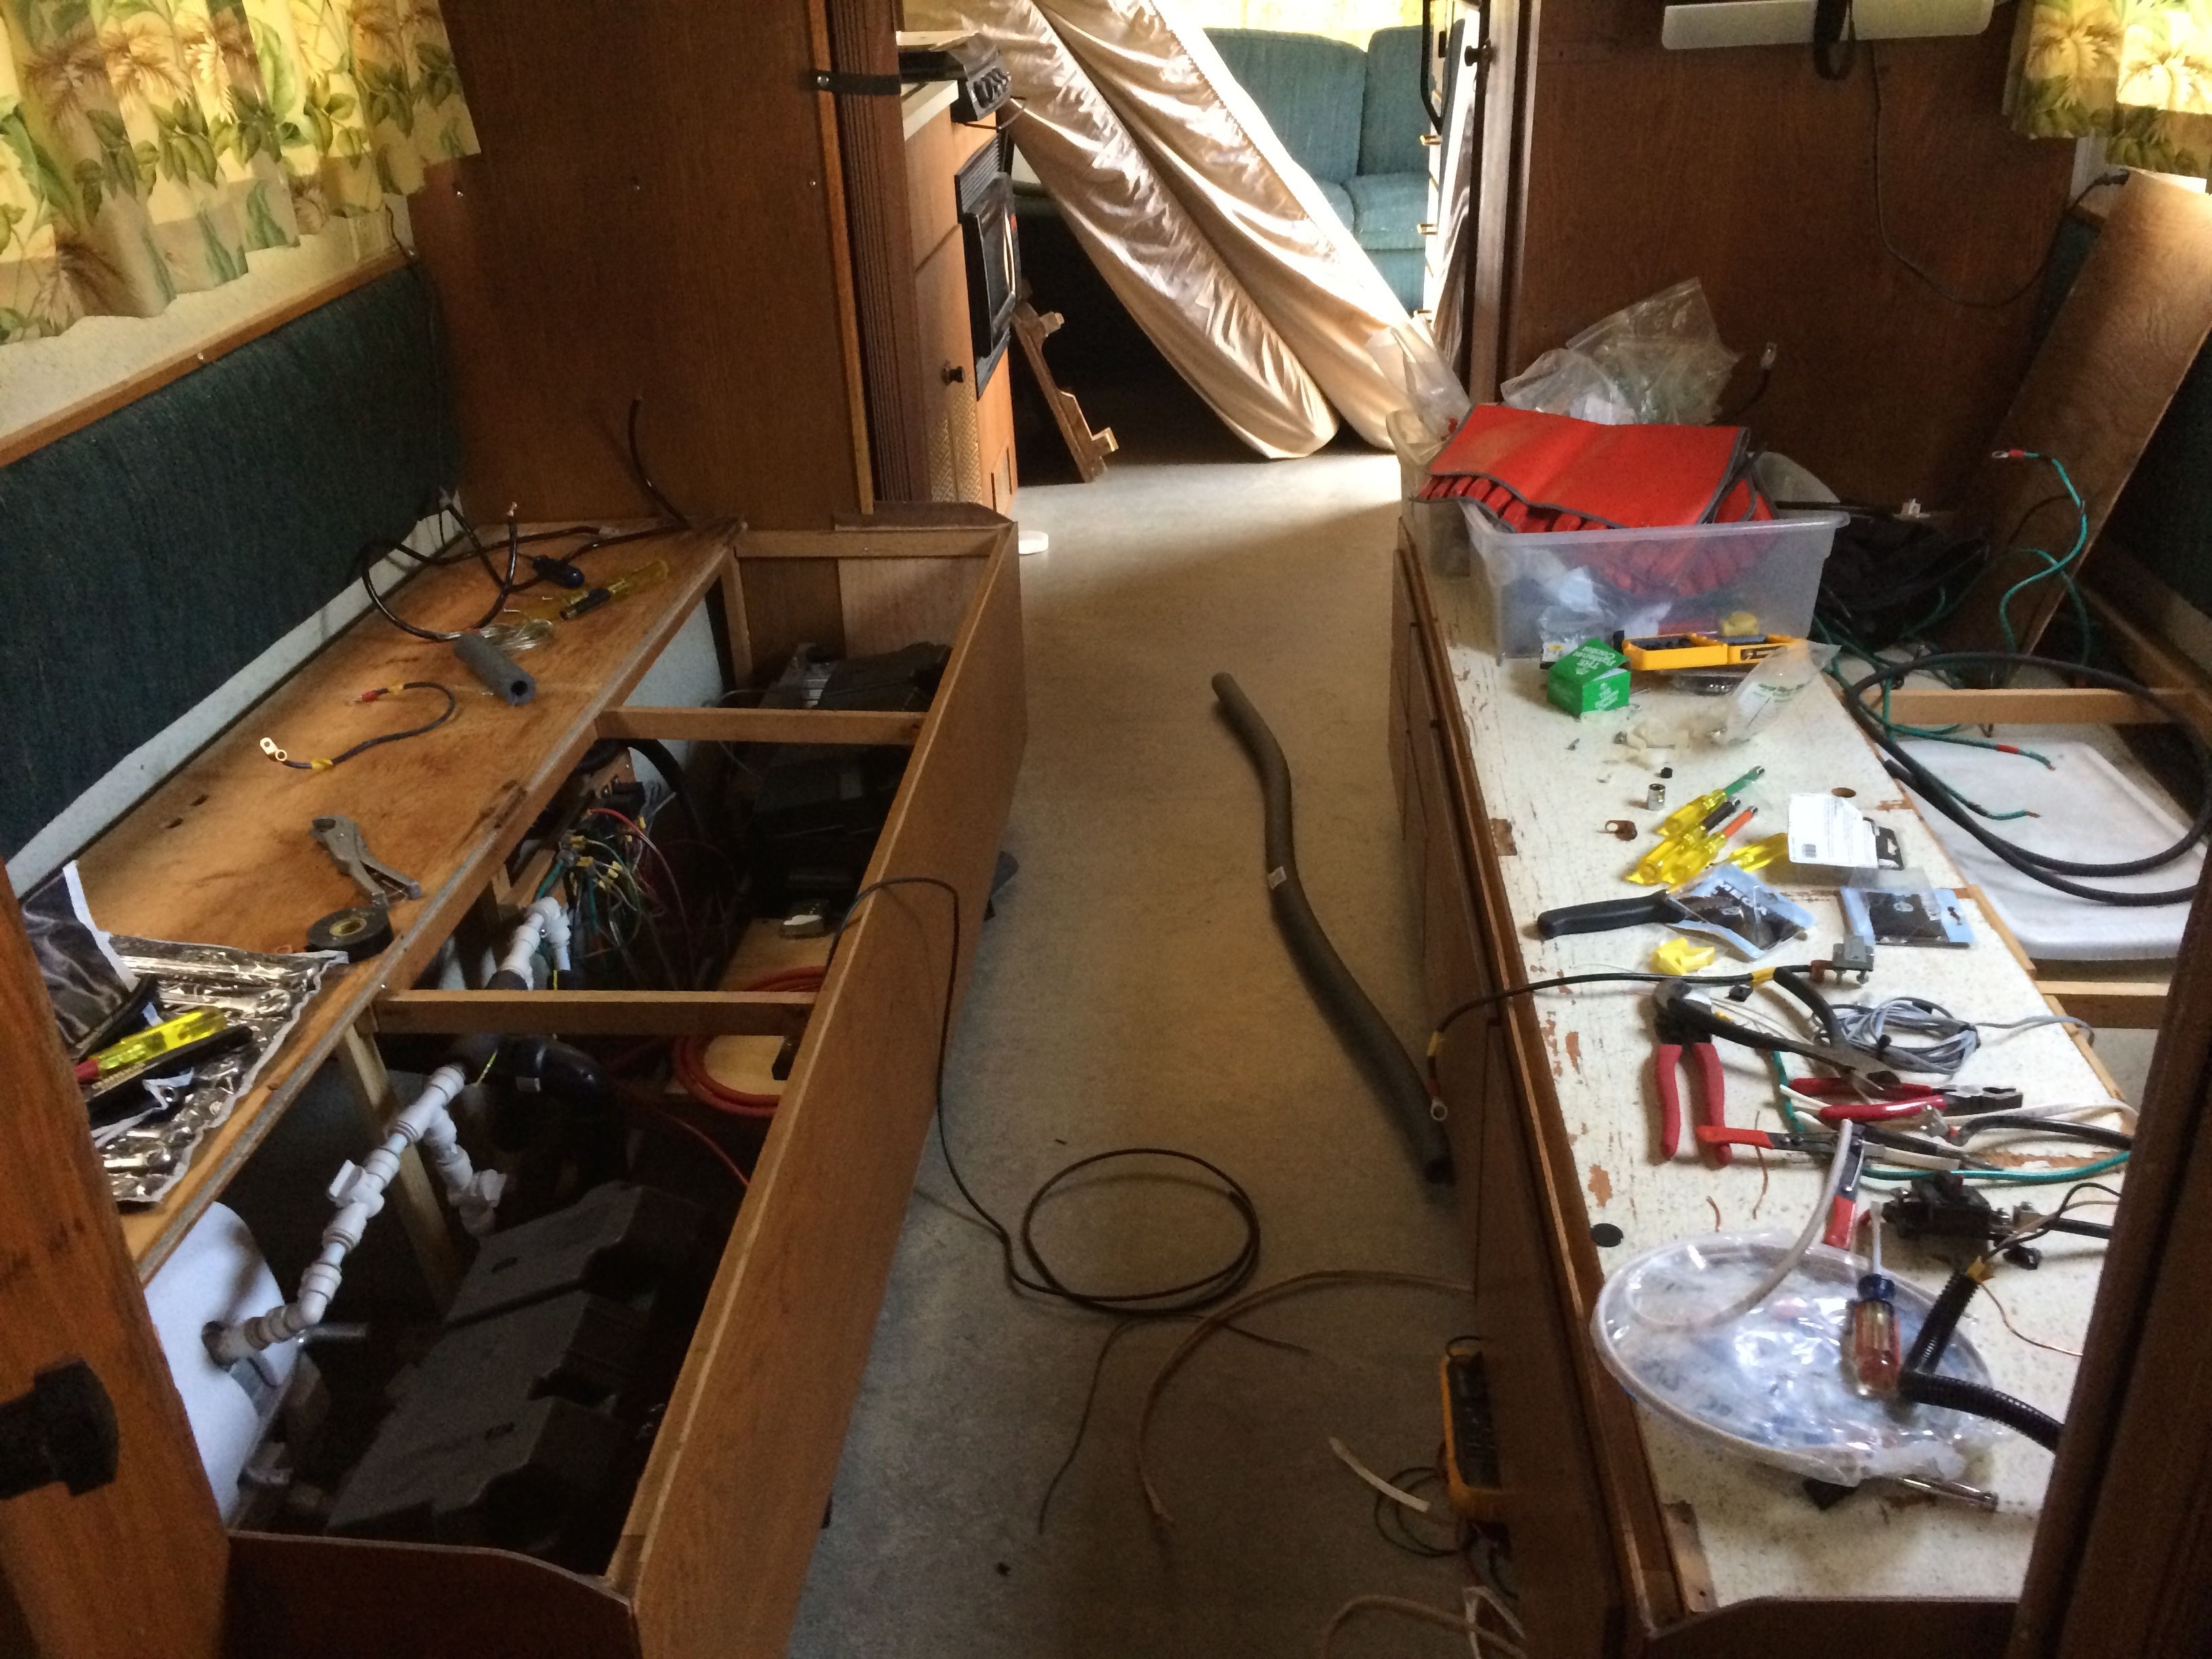
Pardon my mess
Lovely wires everywhere. Goto love it. NOT!
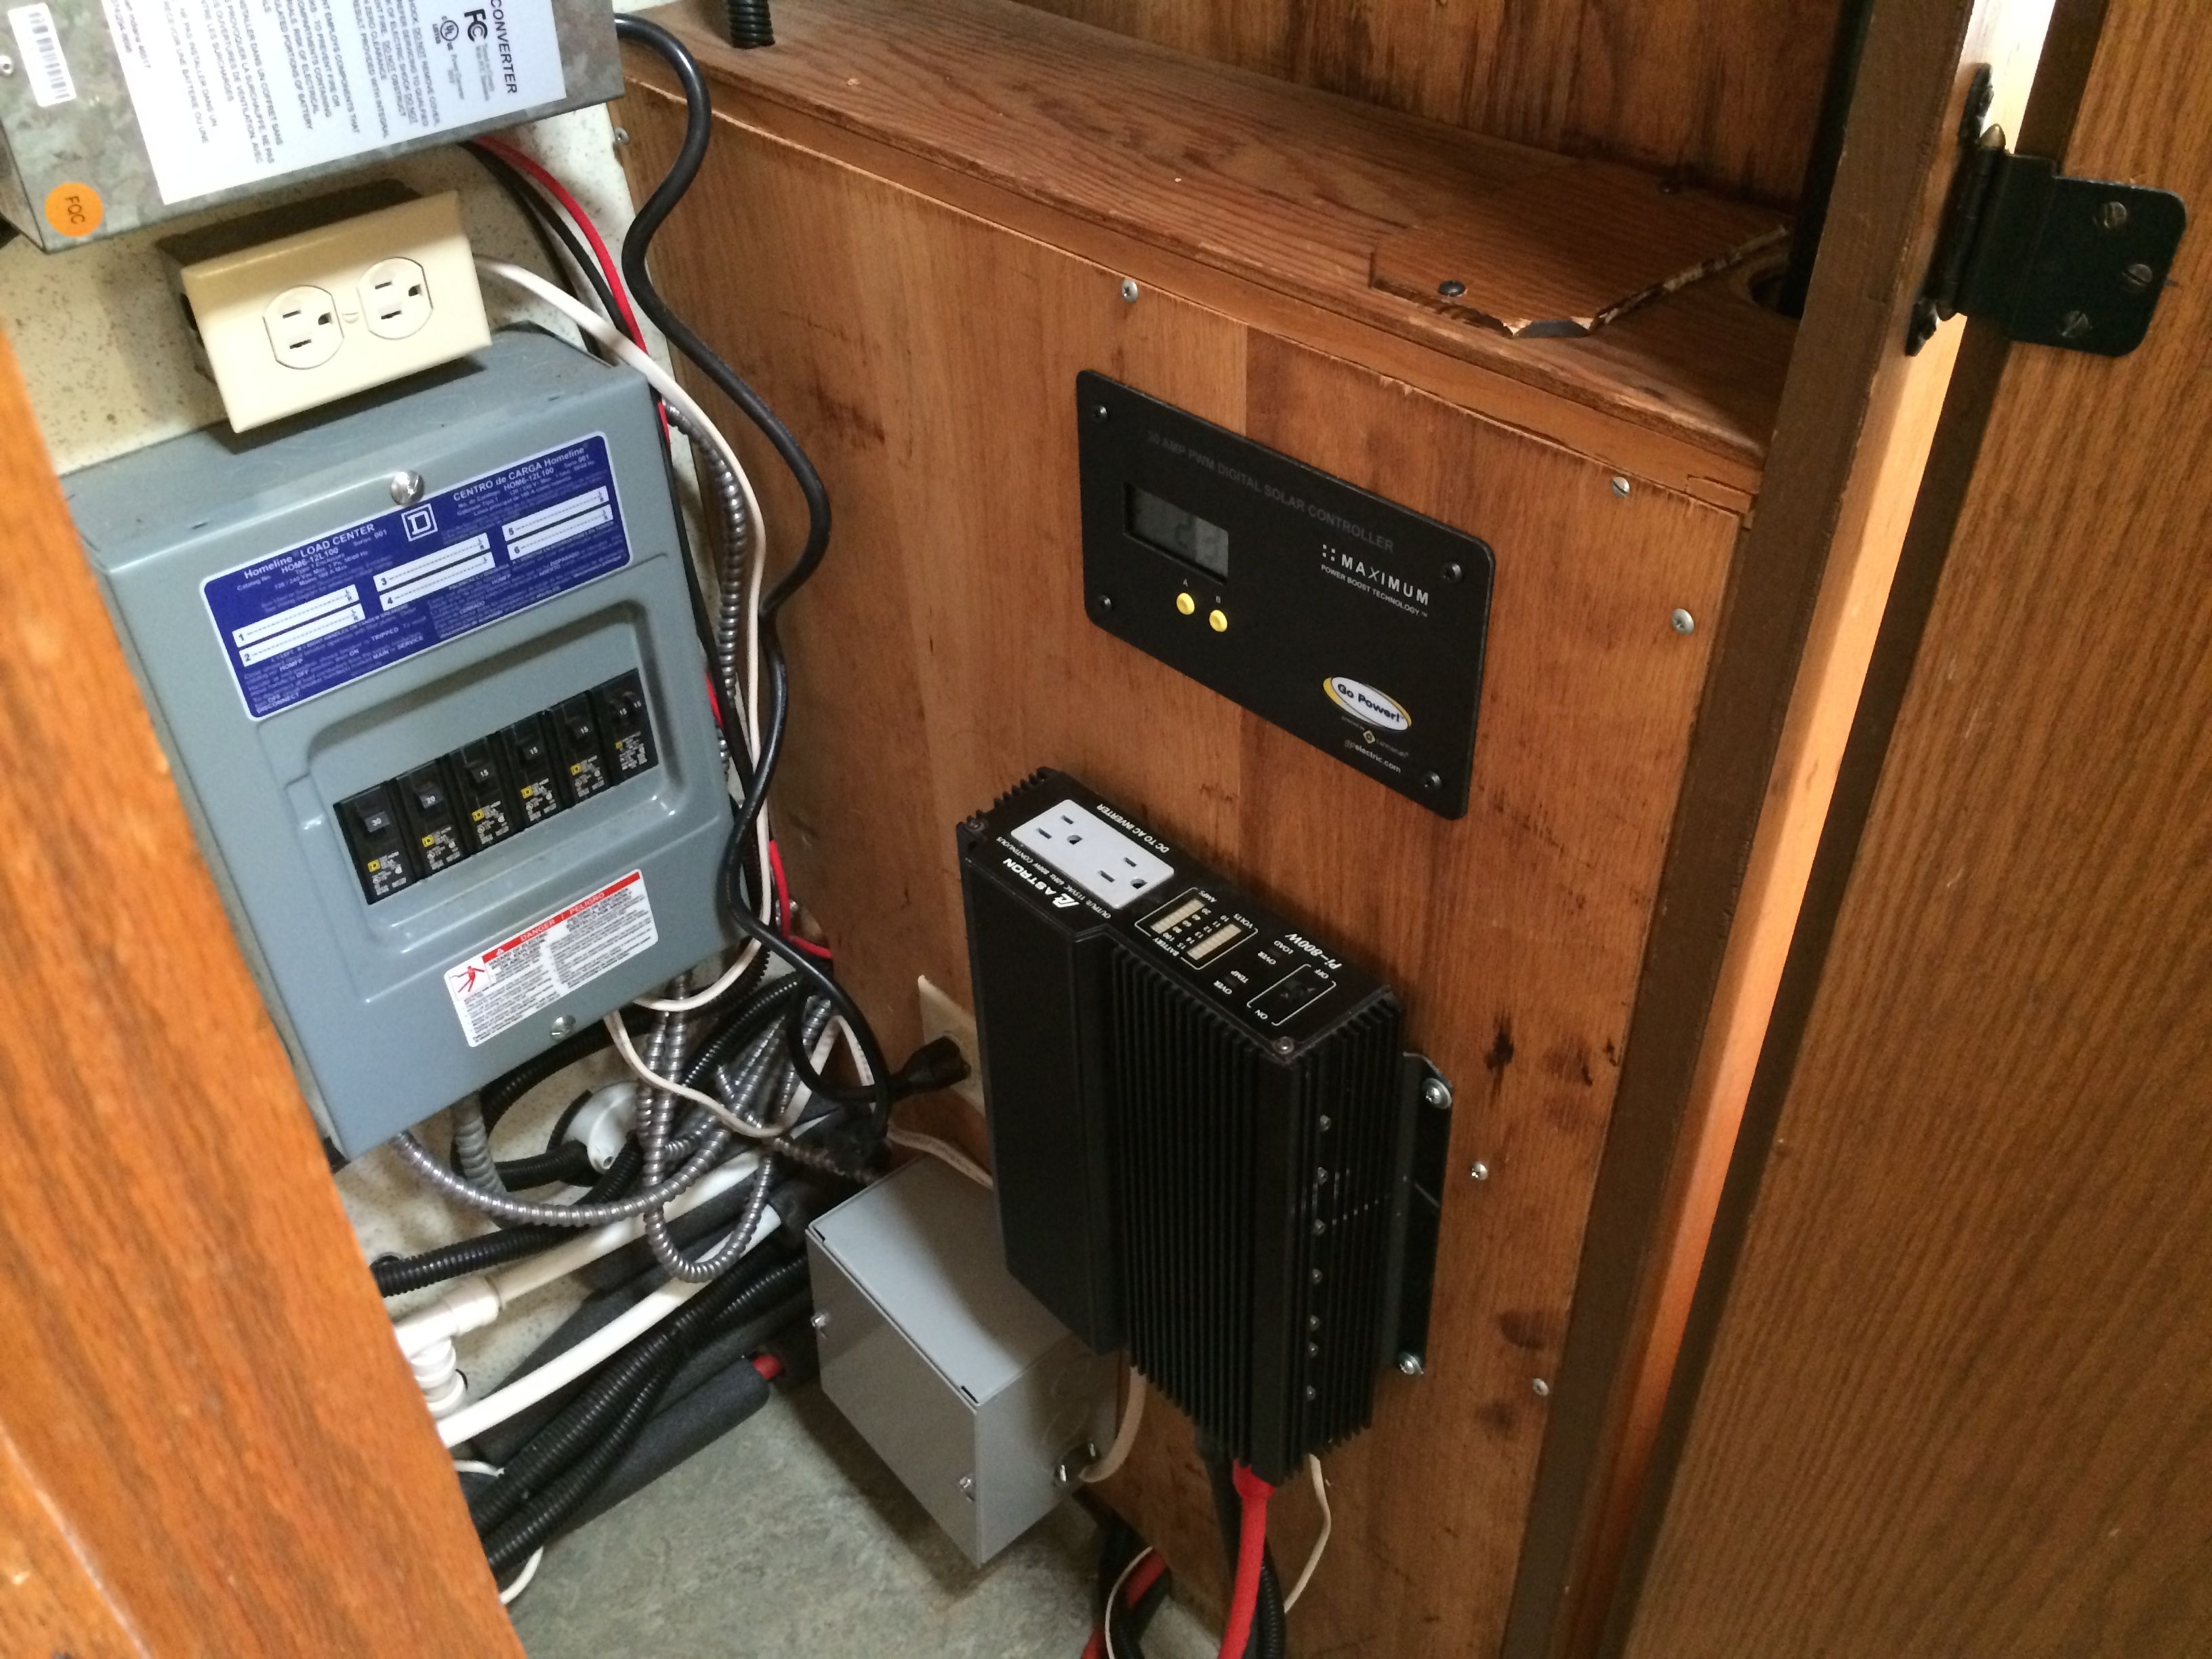
The inverter and transfer switch had to be moved as well. Inverters need to be with in a few feet from the batteries. Depending on the wattage, they can draw 80 amps, no problem. My inverter is a 800w modified sine wave model. Just moving the inverter and transfer switch is a major project, but it was just a small part of this one!
I put them in the street side closet, along with the converter, that I also had to move and rewire. Notice the solar controller now mounted. The controller is made to be mounted in plain view, but I want to keep my 1960 interior with the technology hidden. I still have some split loom and tie wrap work, but its coming along.
Now comes the big issue. Getting the trimetric and inverter remote wiring to the opposite closet. As you probably know, there is a complete bathroom separating the two closets. There is no way I’m pulling the tub out to run new wire!
Just then I had a brain storm. I had some PEX tubbing running from under the vanity to the space under street side bed. This was left over from my hydronic heating system that I removed. This PEX made the perfect conduit for pulling the new wire I needed. Keep in mind that I had run extra wiring during the restoration, but over the years I used them for the Wi-Fi Ranger, control of my Atwood water heater, and other things.
So here is a new tip. Run an extra PEX tube from closet to closet during the restoration, just for that extra wire you will need!

PEX turned to conduit.
The only issue was getting from the vanity to the curbside closet that has the trimetric and inverter remote cables. Between the vanity and the closet there is the black tank and toilet. Once again, disassembly of the toilet and tank was not an option! I poked my bald head under the bathroom sink and felt the wire entry I made from the bathroom space to the tank space. Once again, another issue. I made the hole for the wires, just the right size for the installed cable.
Tip 2. Make these unseen cable routes with larger than needed holes for expansion!
It was a lot of blind work. I could barely reach my hand back to the opening and push a nylon fish tape. It barely fit. I only really had one shot at this. I struggled and struggled. Once I could not get any more in, I went to the curbside closet. I pushed my hand in as far as I could and low and behold, I got the fish tape! Happy dance! I was able to pull my cables, including another extra one, just in case.
So the rest of the day was a wiring marathon. Unfortunately, the eBay seller with my fuse blocks delayed my shipment so I had to go the entire memorial weekend w/o them. Ugh.
The two batteries are now connected with 1/0. Overkill really. I wouldn’t do it again. You only need to go as big as your biggest load, which is my inverter. Next time I would just go with #4. Of course, fused right at the positive terminal on each battery. Always!

I added this platform to hold my terminals for ground, power, and of course the trimetric 500a shunt. The ground block takes its ground from the battery via the shunt. Every other ground is connected to this block. This way, any power drawn from the battery bank can be monitored via the shunt. The #4 red wire is waiting for my eBay fuse blocks.
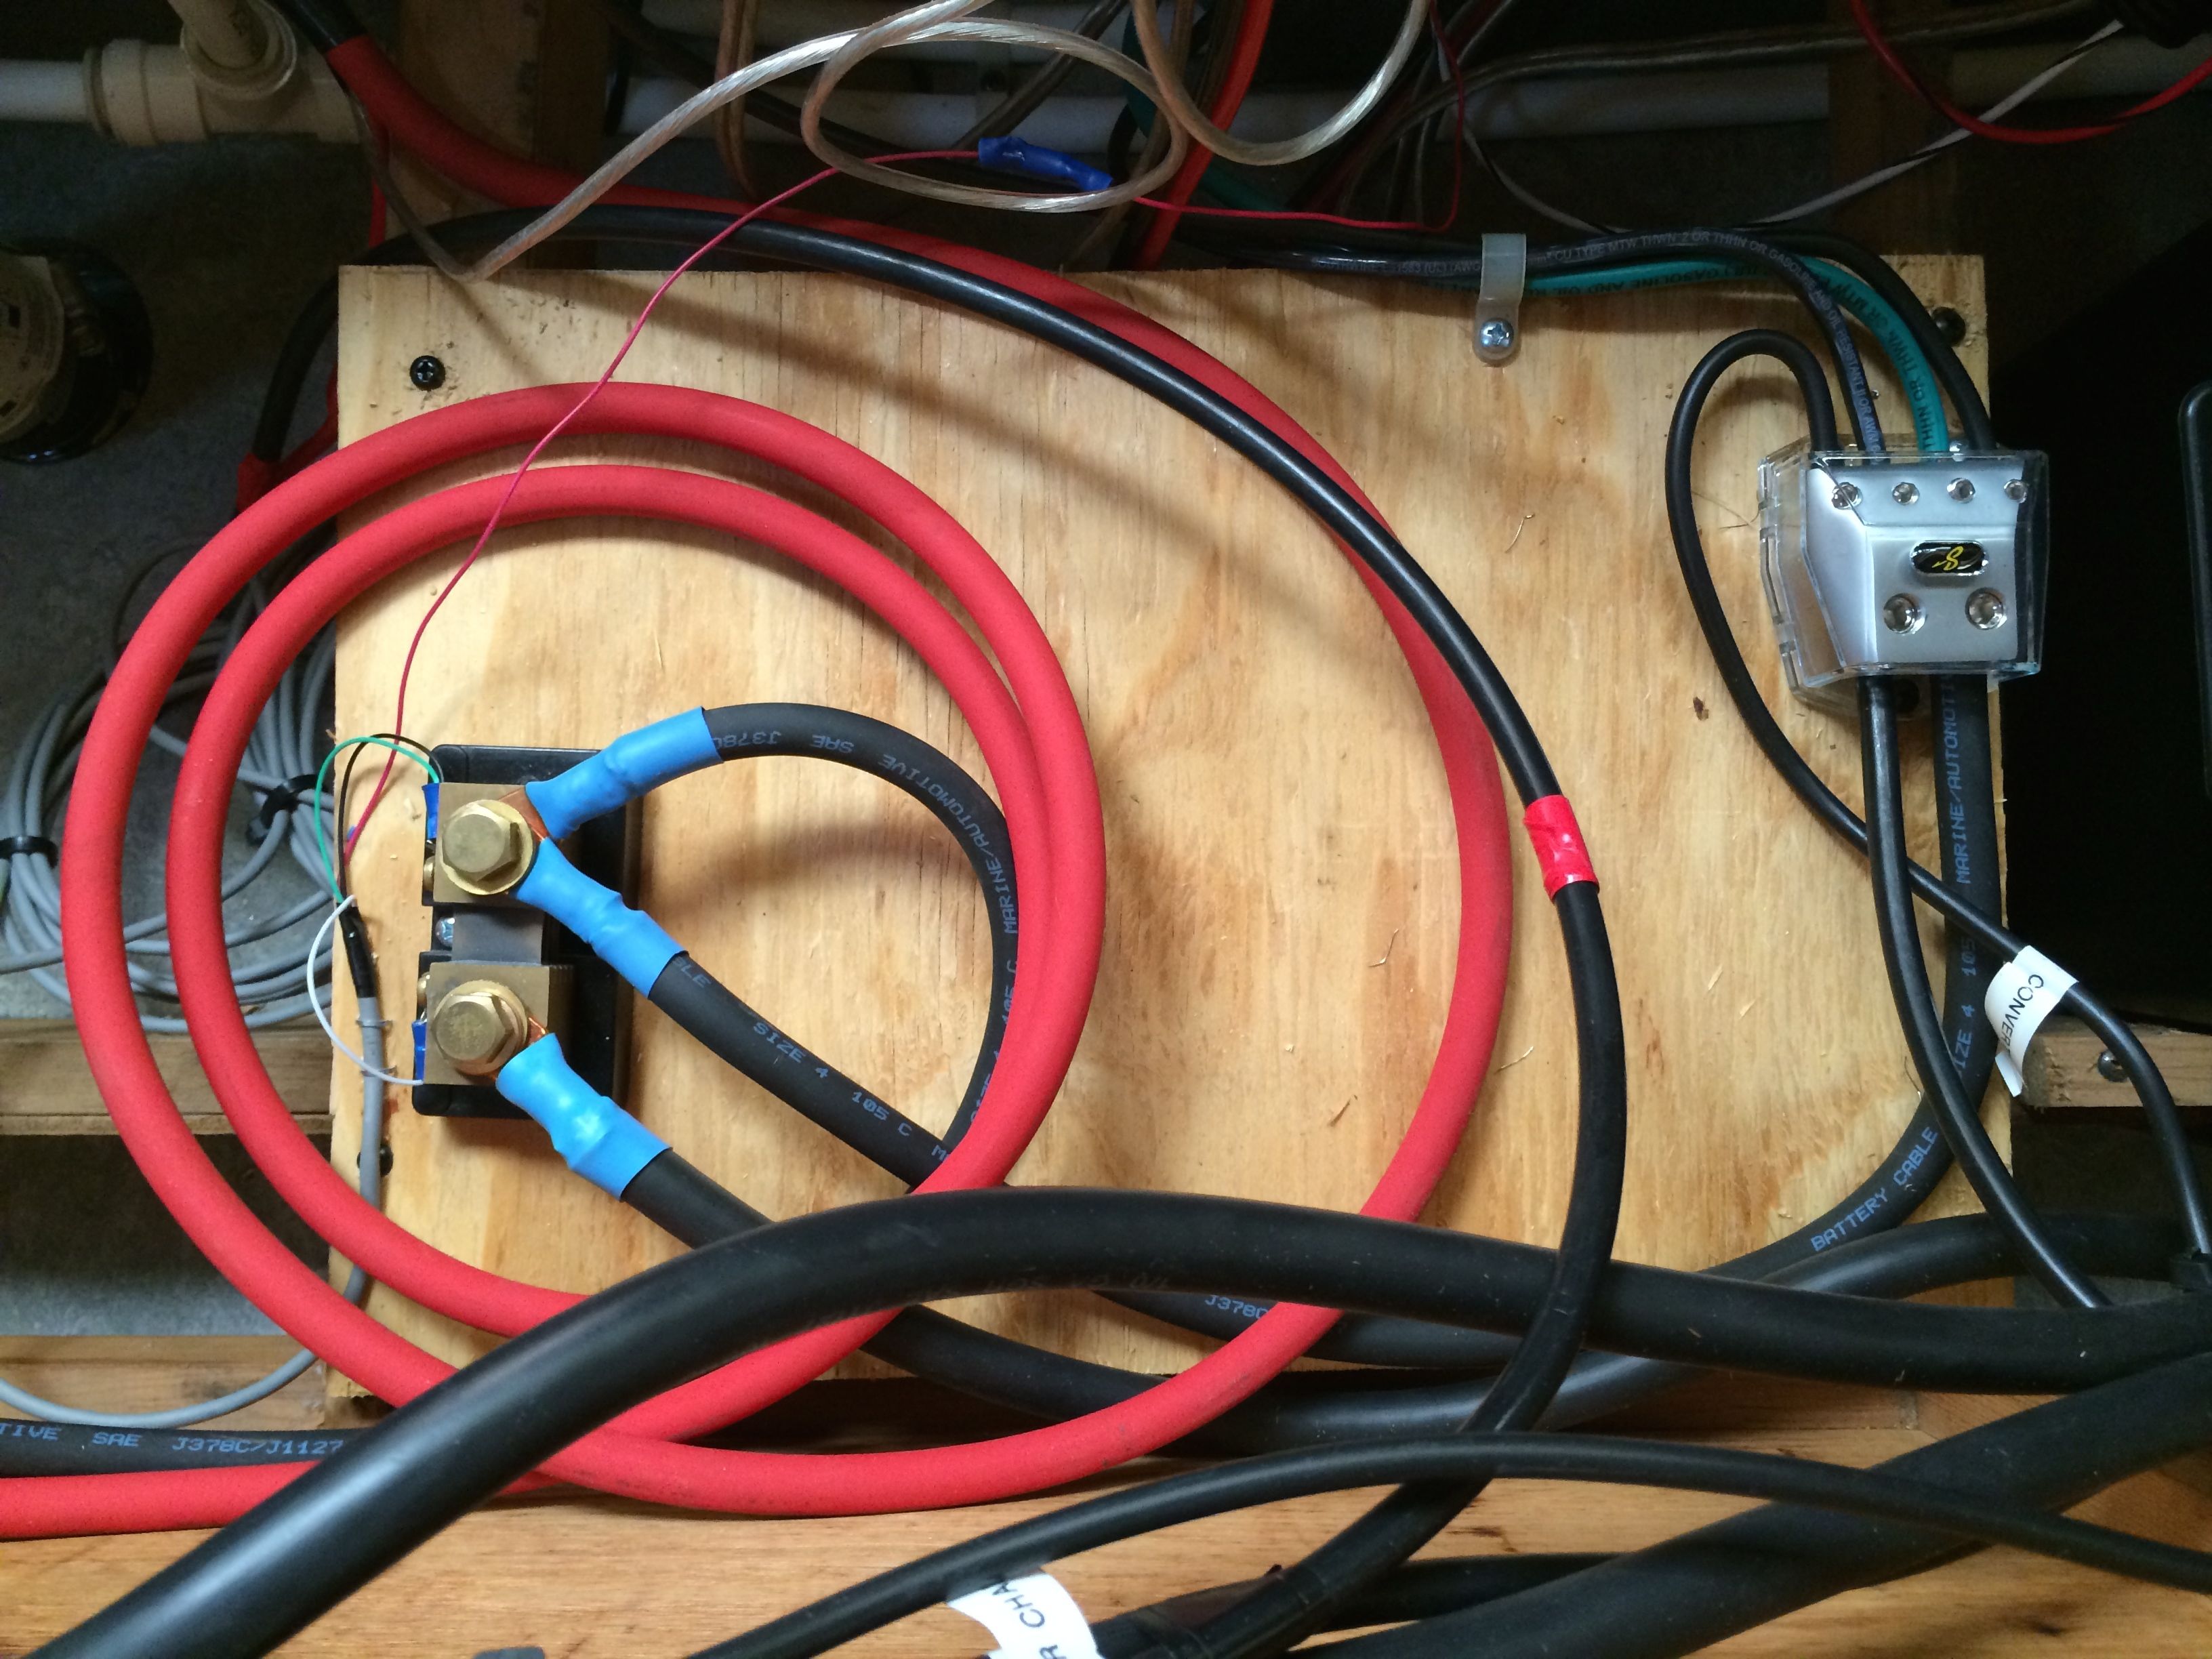
Waiting for fuse blocks.
Since I do not have the fuse blocks yet, my converter is not wired in. So I’ve been living completely off of solar. I did hot-wire the power so I could run my fantastic vent and test some other loads. It was fun to watch the controller deliver up to 5.6amps during the day. I had the fan running and the fridge on, which needs DC power, and the solar had enough energy to run both of those and still deliver 1.5 amps to the batteries! This is with only one 100w panel installed.
This was later in the day around 5:30pm when I was done for the day. I took a photo of the solar controller that was still delivering 1.5 amps.

Free power!
The trimetric measured 1.1 amps because it does a net current display. If some current is going out and some coming in, that’s what it shows. There must have been a ,4 a draw on something.

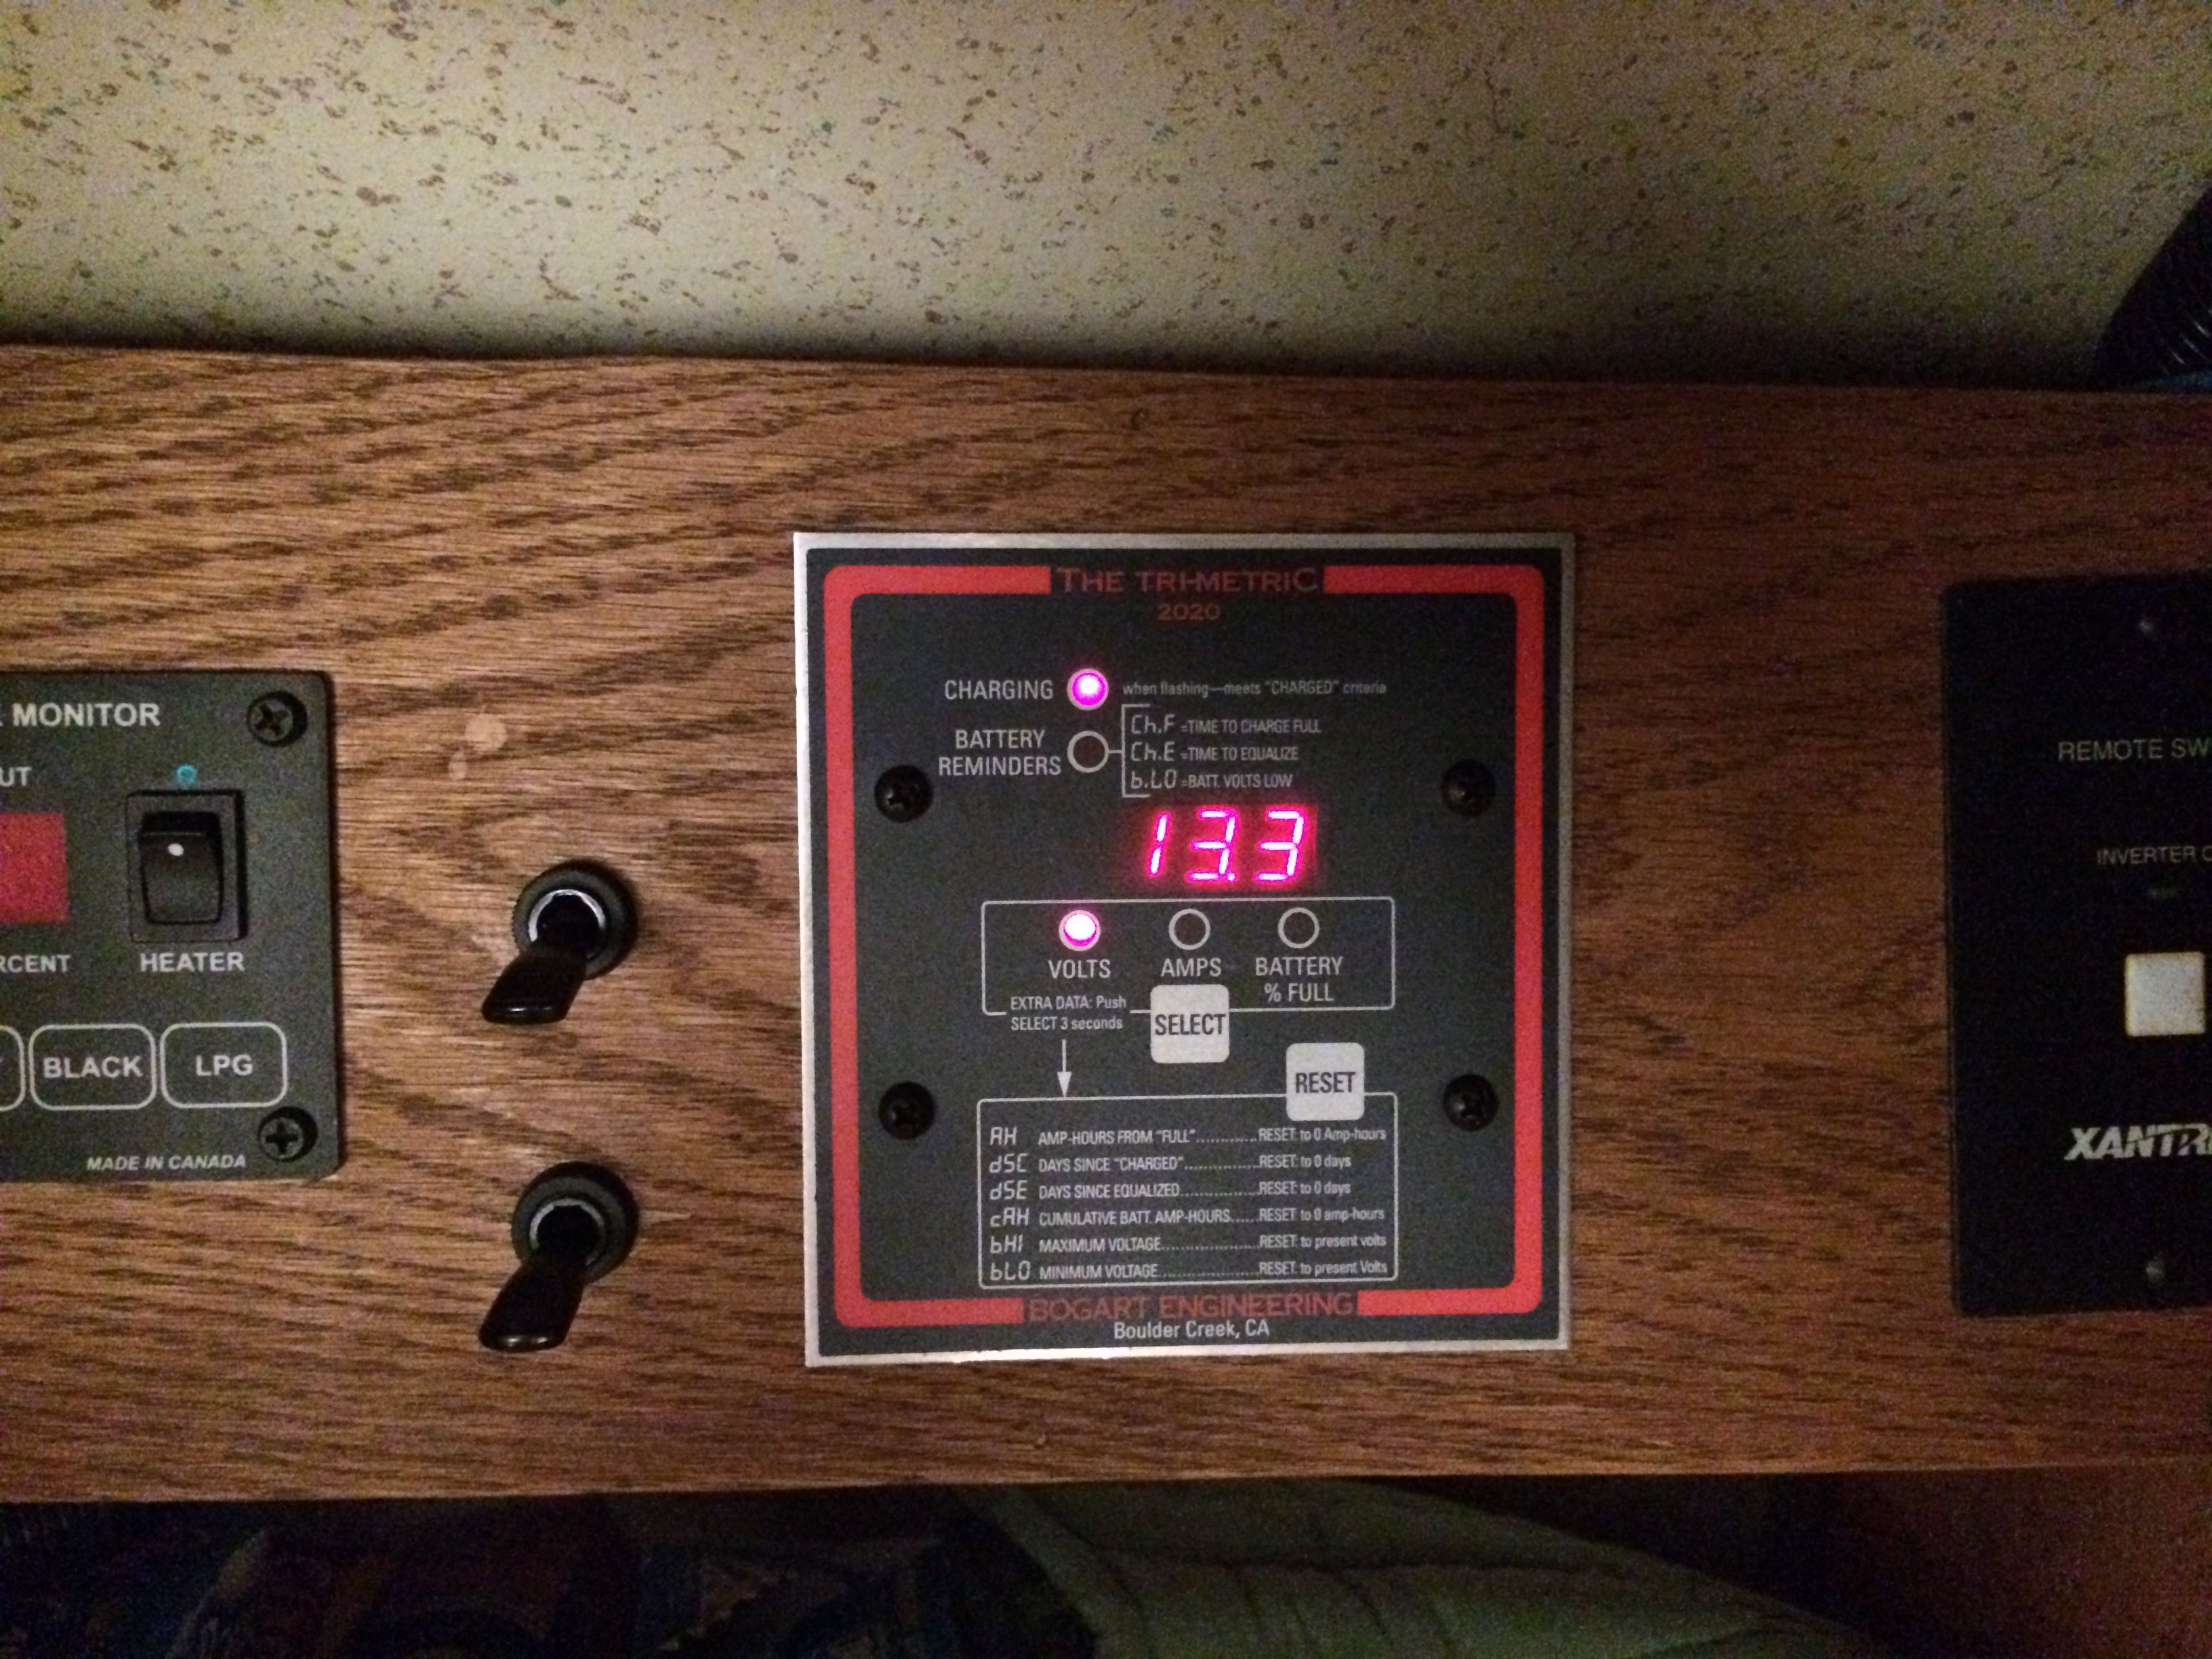
And this is without a converter connected! Not bad having run the fridge and fan all day. Here’s the most important photo. A full bank of batteries by nightfall. Perfect!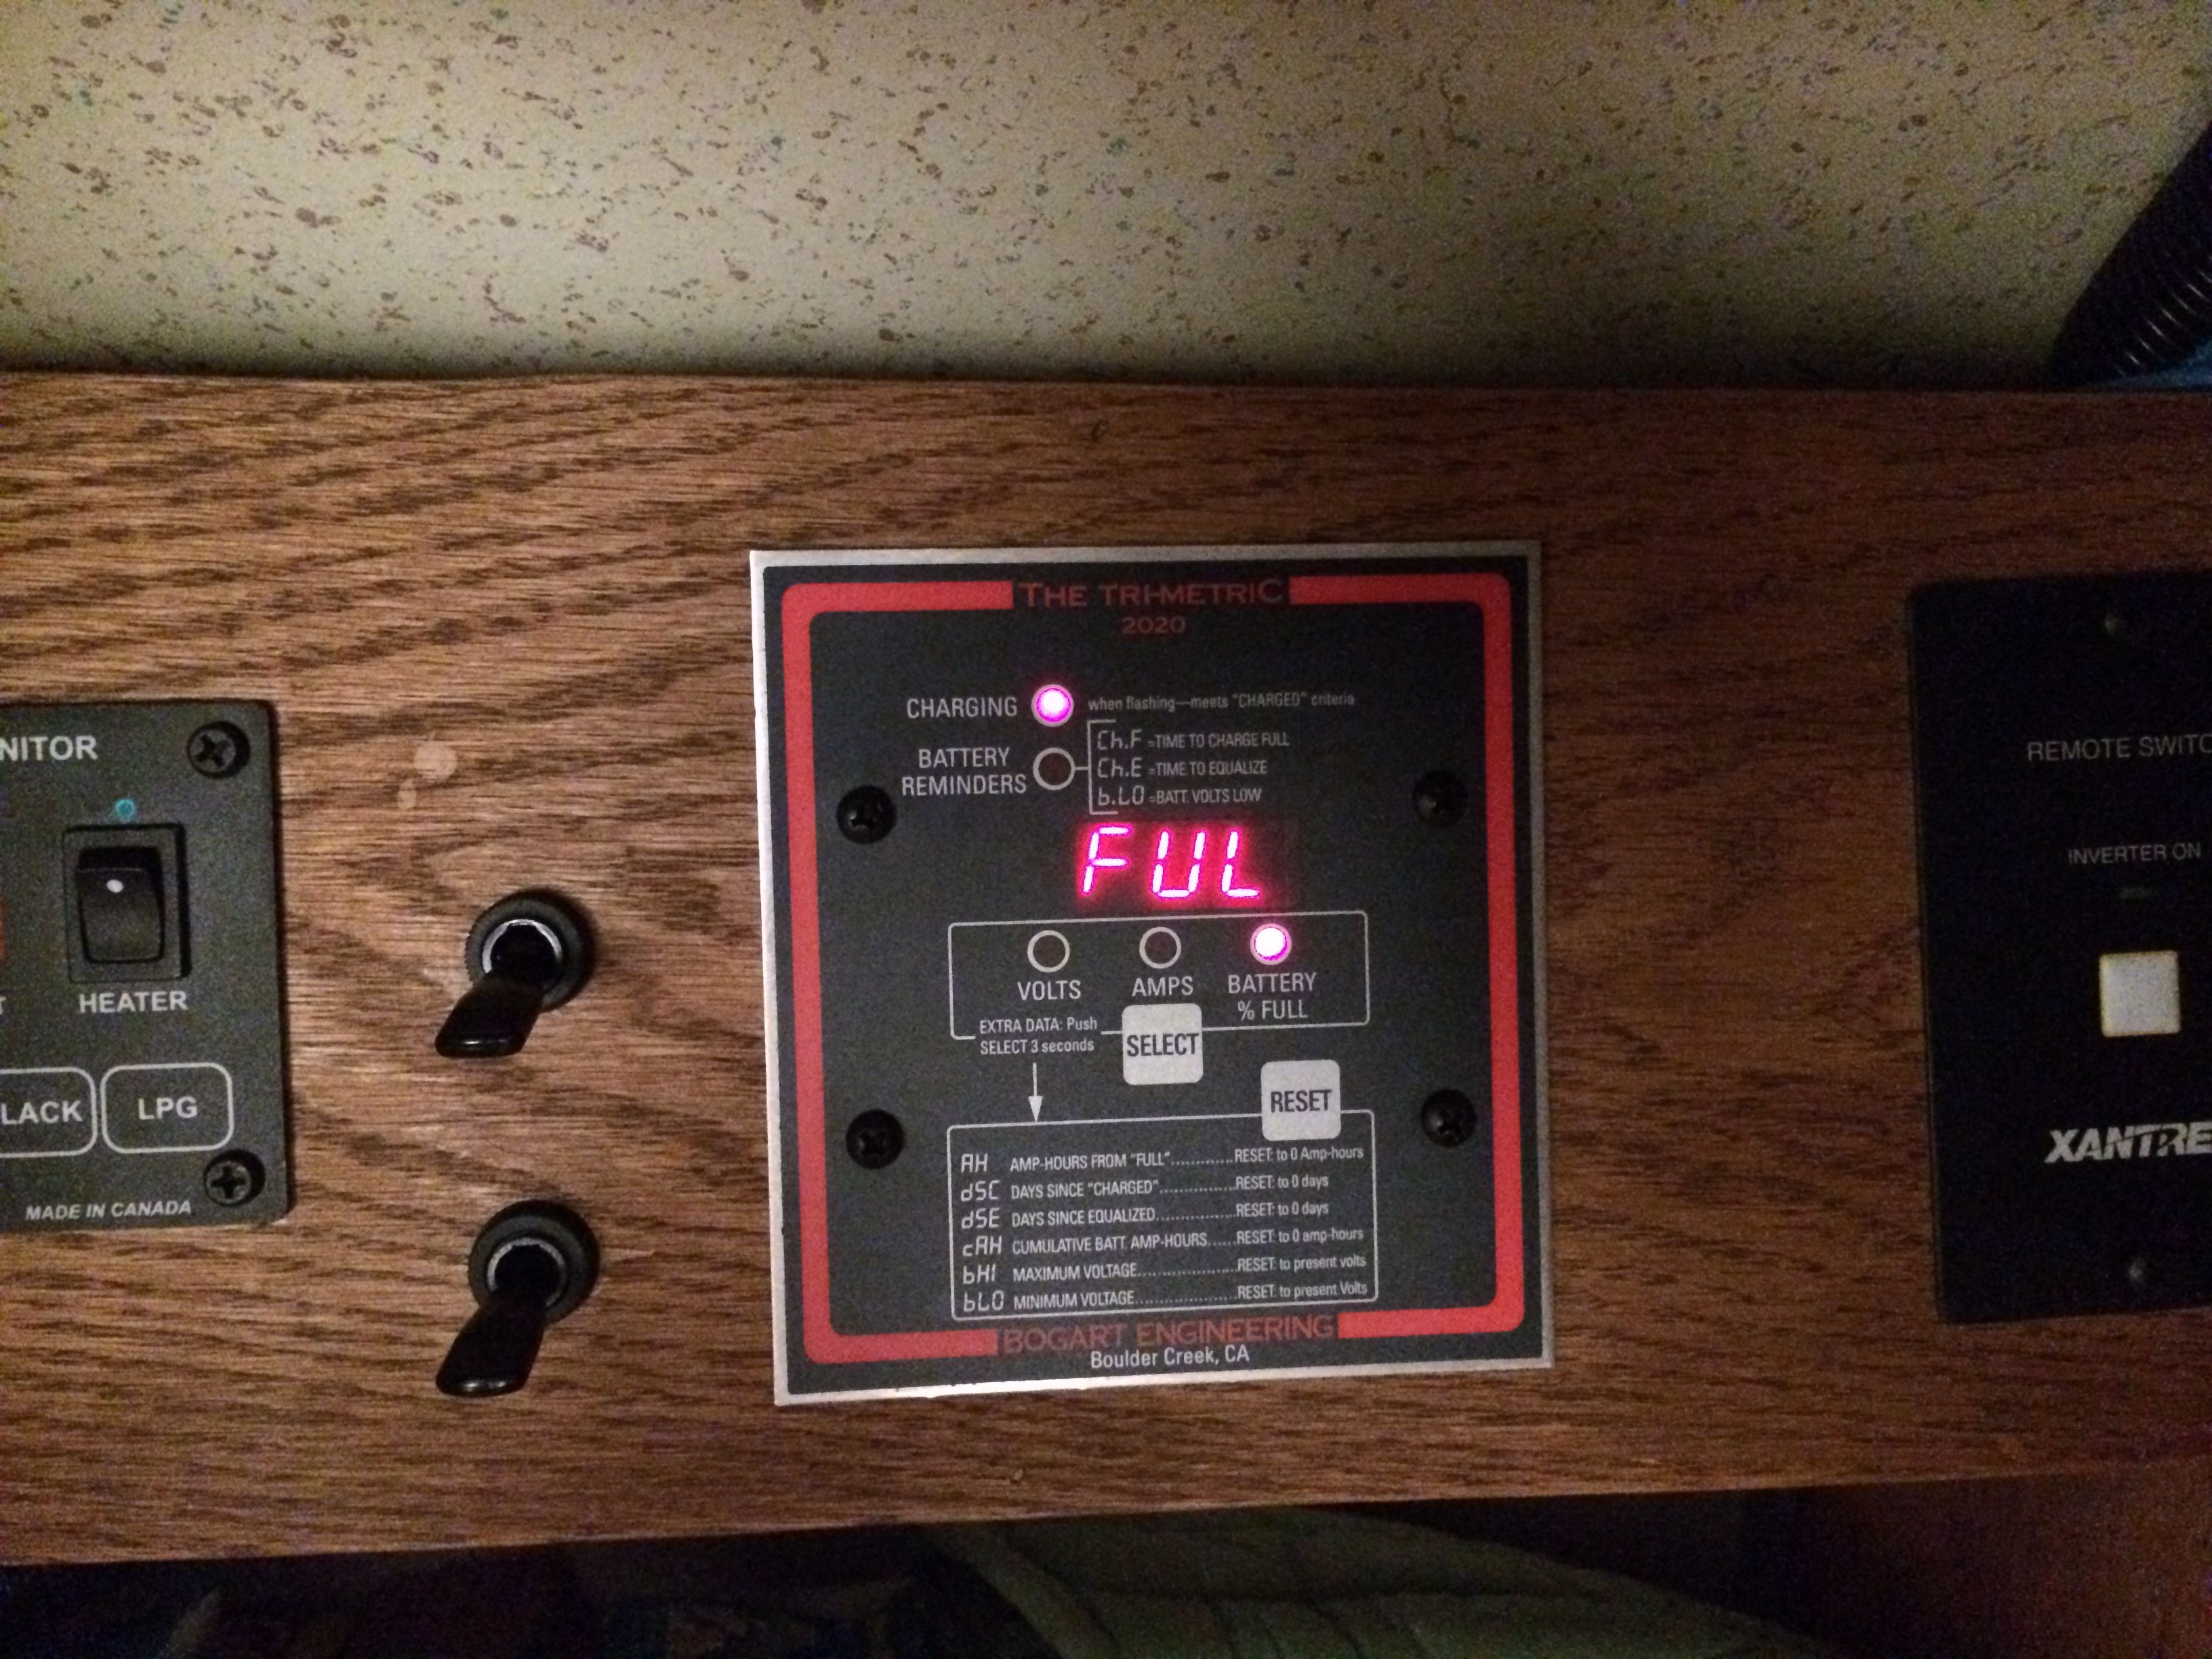
Keep in mind you do not normally need to do all of this work to add solar. This is just me going thermonuclear on my power situation. YMMV!
OK, I’m pretty well set. I survived the move. I just need the fuse blocks to finish up. The batteries are together, the trimetric and inverter remote work. The inverter and transfer switch are happy.
Don’t forget there are three more panels coming too….
All is good for now, and I’m tired!