Pure Power! – (Part 3 of 3)

Caution: Electricity can be dangerous, consult a professional.

In the first installment we talked about why I chose to go with a pure sine inverter.  In part two we talked about why I chose the GP-SW2000-12 Inverter from GoPower.

Now were are going to talk about the actual installation.  Big inverters require big amounts of power!  I have two 100aH AGM Lifeline batteries giving me a total of 200aH of capacity.  I’d say thats an absolute minimum for this size inverter.  I’d really like to have 400ah of battery.  This just means I have to use my inverter for shorter amounts of time.  Of course the solar installation really helps out.  When wiring multiple batteries together, be sure and use a wire rating as big or bigger than what’s required for your inverter.

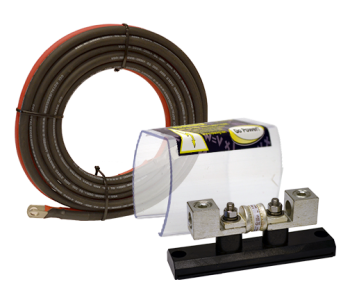
GoPower makes inverter installation kits that supply the right size wire and fuse for the inverter you selected.  You do not have to use their kit, but you should use the size of wire and fuse they recommend.  I also suggest using a high-quality multi-strand wire that is flexible.  Like a marine type cable, sometimes referred to as welding cable.  These have many fine strands that make the wire bend easily.  When you are trying to fit the inverter into a small space, you’ll be glad you have flexible wire!  This is exactly what comes in the GoPower! installation kit.

GoPower Inverter Install Kit

GoPower Inverter Install Kit

On my installation, I decided to pick two circuits to power when the inverter is on.  Personally I don’t think it’s a good idea to run the whole trailer’s power off an inverter that isn’t capable of running everything.  If you have an air conditioner, you’re already out.  Add an electric heating element on your water heater, and you just doubled down.  You’d also have remember to unplug your converter because you don’t want to generate power from the battery/inverter combination to try and charge the battery.  That’s just a loosing combination.  I know it’s a lot easier to just plug the trailer cord and and “manage” the devices, but I don’t like it.  I know that sometimes dealers even install them this way.  Just say “No”!

So the best way to do this is with a transfer switch.  Now we start talking about the need for an electrician. You have to dabble in your breaker boxes and get things configured properly the first time.  No room for learning here.  Sorry!

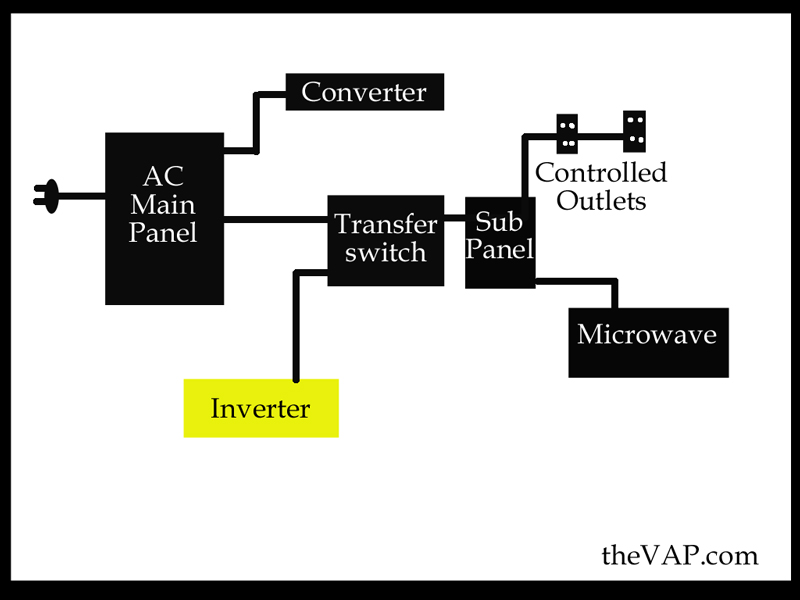
Just so you know what to talk to your electrician about, I’ve made a little diagram of a transfer switch installed in the trailer electrical system.

Transfer Switch Diagram

Transfer Switch Diagram

In a normal connection to shore power, the energy flows from the AC Main Panel through the Transfer Switch to the Controlled Outlets via the Sub Panel.  These outlets can be anything your inverter can handle, like my microwave and TV’s.

When the inverter is on, the Transfer Switch is engaged, and physically moves the wires off of the AC Main Panel, and to the Inverter.  Now the inverter is supplying power to the Controlled Outlets and Microwave.

Notice the Converter is only connected to the AC Main Panel, along with other high power devices not shown, like the air conditioner, water heater, etc…  This way, the inverter cannot supply power to those appliances.

Now you have an idea of what I did, lets have a closer look.

Below is the installed inverter next to the transfer switch.

Transfer Switch

Transfer Switch

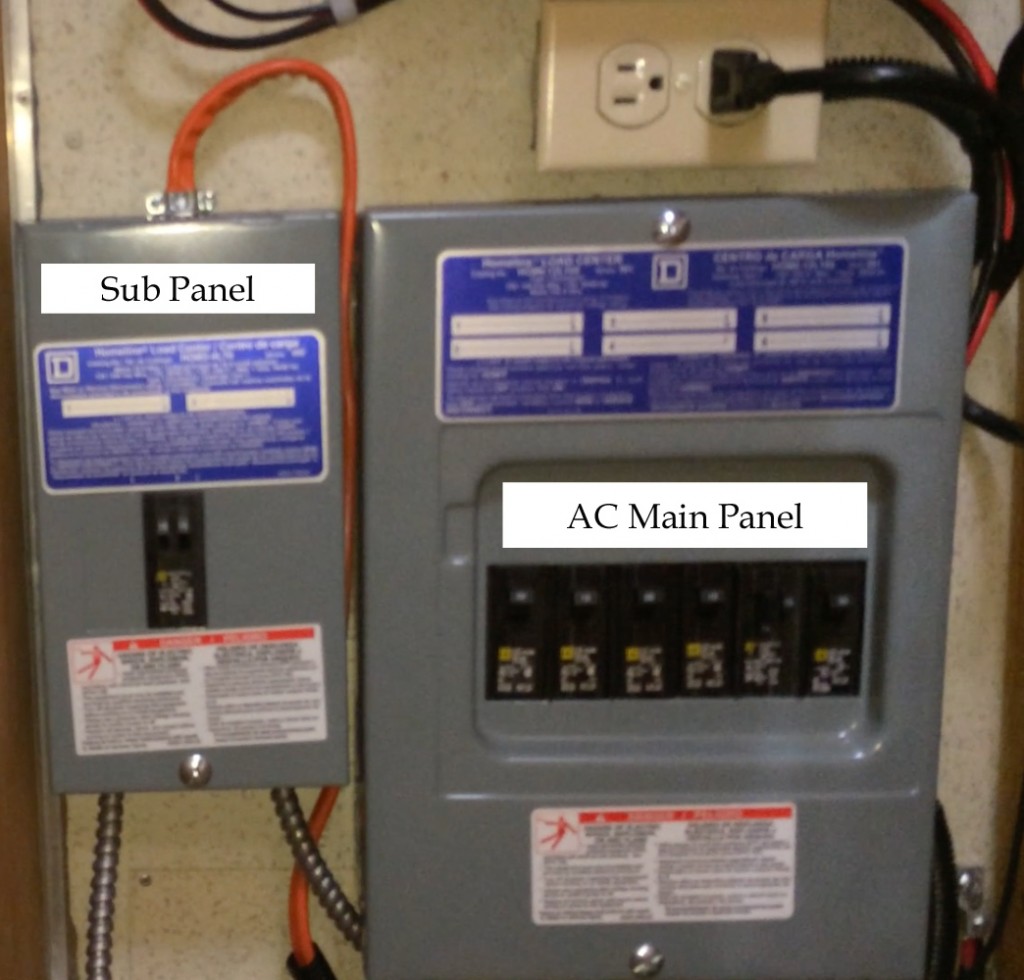
Here is the AC Main Panel and Sub Panel.  The reason for the sub panel was to be able to have independent circuit breakers for the microwave and outlets with my TVs.

AC Main Panel and Sub Panel

AC Main Panel and Sub Panel

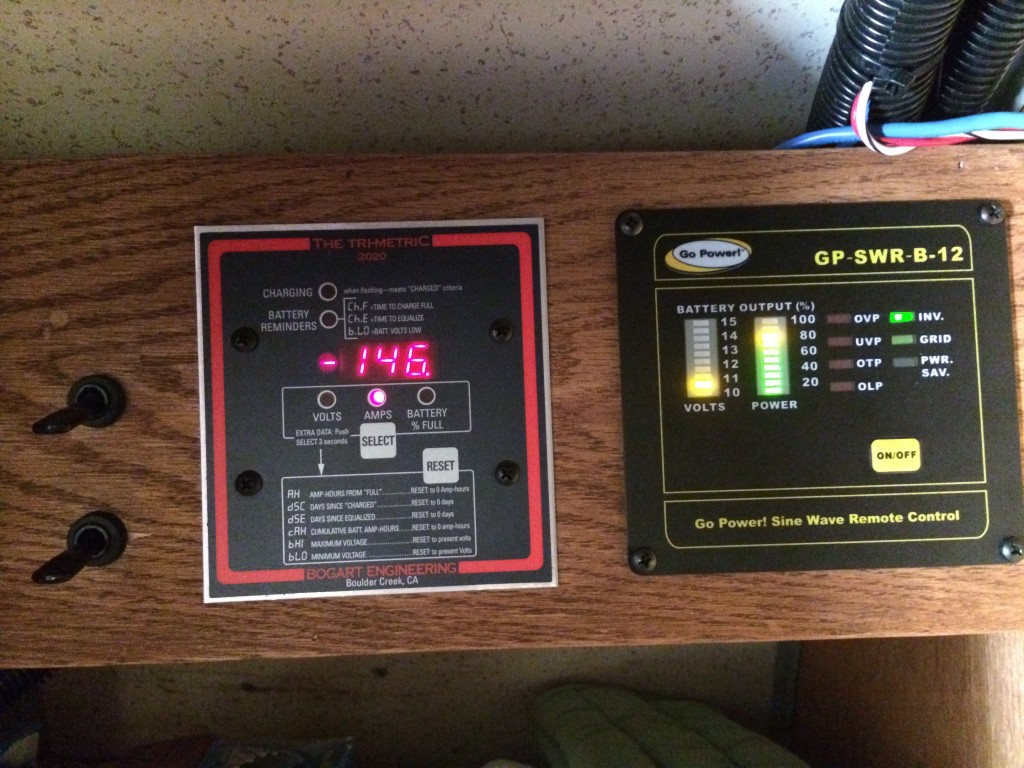
The installation was a success in that I’m able to run my microwave from the inverter.  Without sun present, the inverter draws 146 amps from the batteries to run the microwave.  When there is full sun, my solar panels deliver 20 amps, and batteries make up the difference at around 120-130 amps.  When the microwave is finished, the solar continues to dump 20 amps back into my batteries to fill them back up.  Sweet solar!

Here is the tri-metric showing the 146 amp draw (without sun), and the GP-SWR-B Remote Monitor running at 80%.

High current draw when running the microwave

High current draw when running the microwave

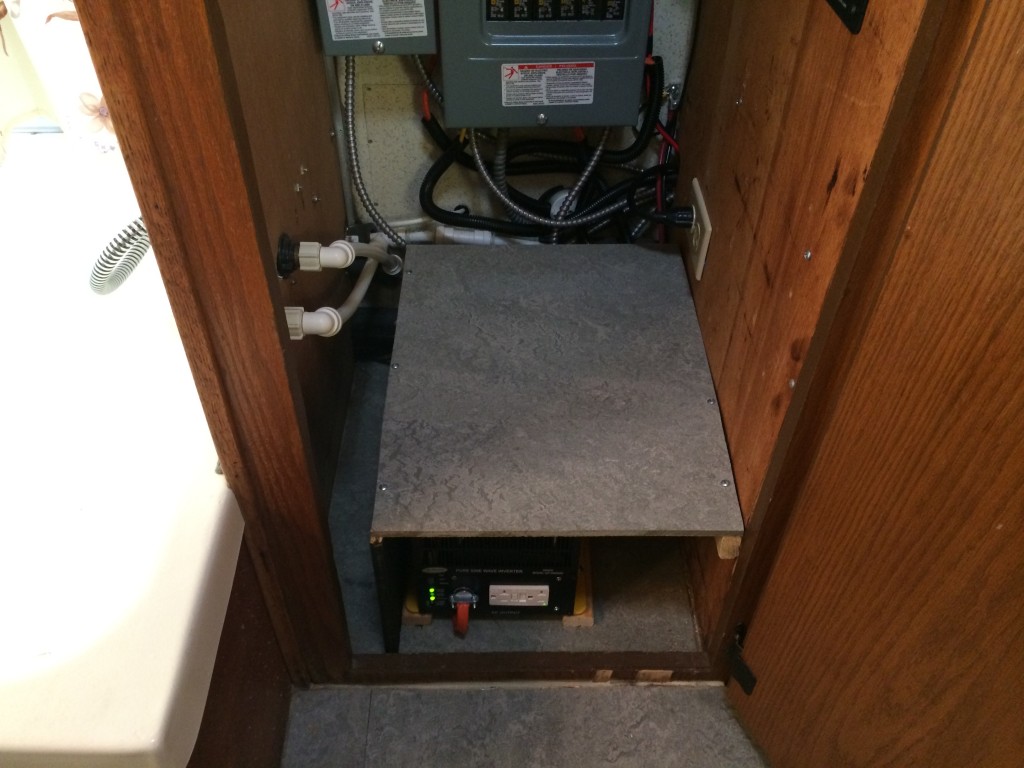
I completed the installation by adding a small shelf over the inverter.  There is plenty of room around it for ventilation, and it will keep us from stacking items directly on the inverter.

Inverter Shelf

Inverter Shelf

Here is a video walk through of my GoPower! GP-SW2000-12 Inverter installation.

That about covers it.  I’d like to thank GoPower for their assistance in this project as well as the solar project.

Here are links to some helpful items.

Amazon link for the GP-SW2000-12 Inverter
Amazon link for the GP-SWR-B Remote
Amazon link for the Go Power! GP-DC-KIT4 DC Installation Kit
Amazon link for the Go Power! GP-TS 30 Amp Prewired Transfer Switch for Quick Connect

Airstream Adventures Books

misc.php

Facebooktwitterredditpinterestlinkedinmailby feather

Sine of the Times – (Part 2 of 3)

As I mentioned in the first installment, I wanted to upgrade my inverter to a pure sine model capable of running my microwave.

Microwave’s are tricky because the number of watts is marketed heavily.  My 900w convection microwave is pretty typical for RV use.  Mainly because it is the smallest model you can get that can be built-in to a cabinet.  Low power is desirable for an RV because of the sometimes questionable power available at the pedestal when you’re hooked up.  30amp service isn’t always the same.

The tricky part of the microwave is that the 900w rating is what it’s cooking power is, not the AC power requirement is takes to generate that.  Pay special attention to your specific appliances to make sure you pick the right inverter.  It turns out that my 900w microwave draws 1450 watts of AC power!

This is an important point.  If you buy a 1000 watt inverter thinking it will power your 900w microwave, you’ll be in for a sad awakening.  You may also think, “well, I’ll just run my microwave at half power so it will work with my inverter.”  Not so fast there.  It turns out that microwaves merely change their duty cycle to run at anything less than full power.  In other words, they run at full power, cycle off for a time, then run full power again.  The result is you still need an inverter capable of powering the full load of the microwave.

Another consideration is you should never run electronics consistently at 100% of their capacity.  My choice of a 1500w inverter to supply the 1450 watts of input power I need for my microwave would be a poor decision.  This is why I went with the 2000w pure sine inverter from GoPower.

GoPower 2000w Pure Sine Inverter

GoPower 2000w Pure Sine Inverter

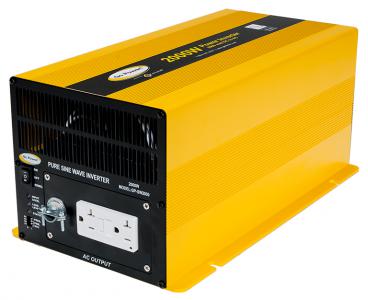
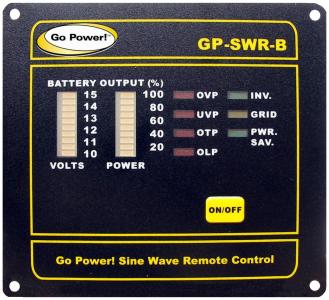
The GP-SW2000W Inverter has a continuous duty of 2000 watts.  It features a GFI protected outlet, hardwire output, and an optional remote panel.  The remote panel is handy because you usually mount the inverter out of the way near the batteries.
GoPower Remote Panel

GoPower Remote Panel

There are dip switch settings on the inverter that allow you to switch between 60hz (US) and 50hz operation.  The remaining switches adjust a power-save mode.

Power-save mode helps to lower the standby current of the inverter when its turned on, but not in use.  Typical on power draws about 2.6 amps and the power-save can lower it to around .3 amps.  The power-save mode can be confusing.  The power draw needs to be a certain, programmed amount before the inverter turns the full power on.  Make sure you understand this completely before using the feature.  My suggestion is to disable it and just turn the inverter on when you know you need it.

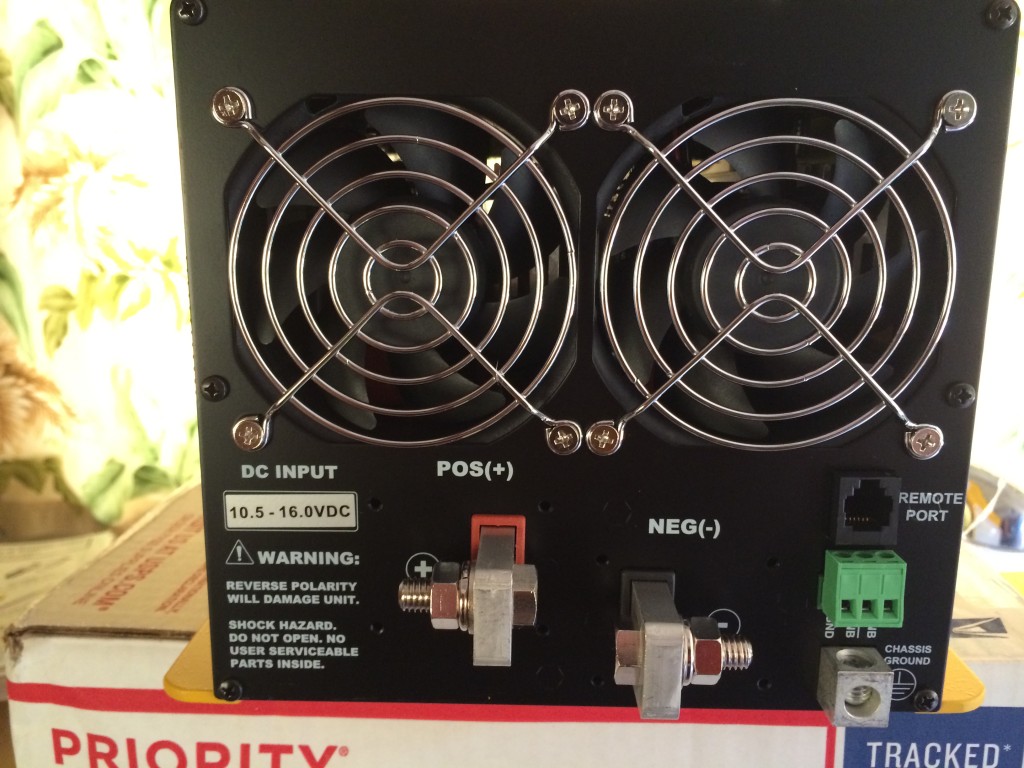
Check the specifications of the inverter you intend to buy.  One key spec is the lower operating voltage.  When running high current loads, the battery voltage will tend to drop.  This is normal, even for fully-charged batteries.  If the low voltage cut-off is too high, you will have a problem.  Typical low cutoff voltage for RV use is 10.5 volts.  Of course your battery is completely dead if it reads that under no load, but as I said, it’s normal for voltage to drop during high current situations.  So a higher cutoff voltage will sound unnecessary alarms or shut down your inverter.

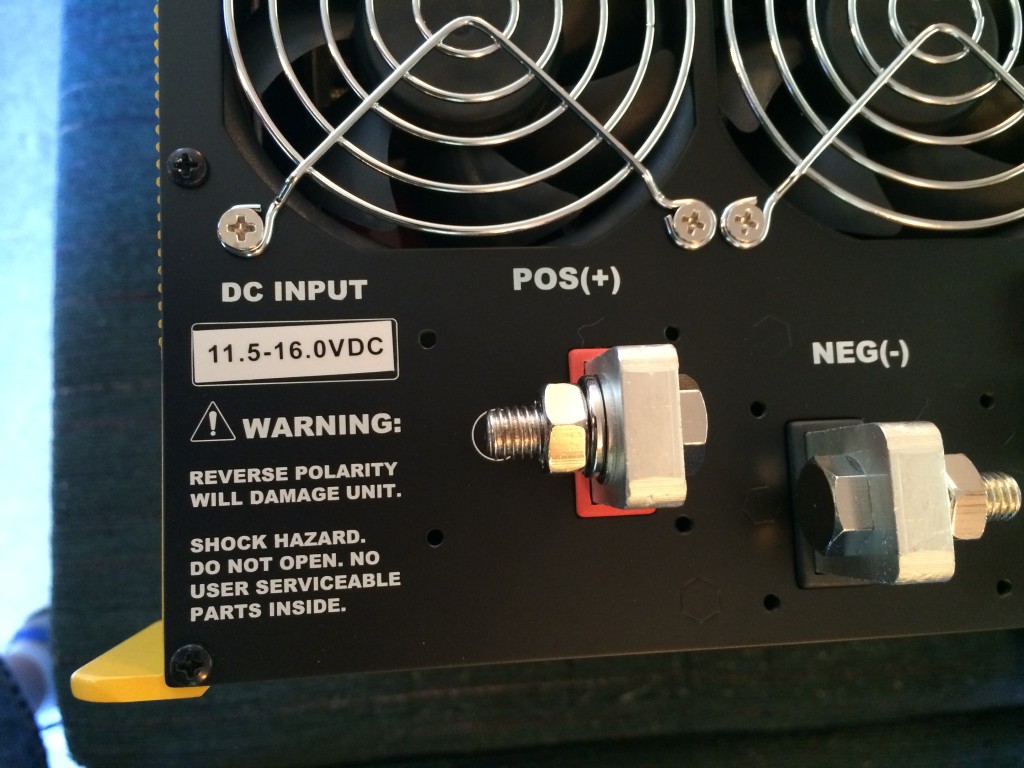
GoPower made a line of “Fleet” inverters with a higher cut off voltage of 11.5v.  This was a special request of a fleet owner to help keep his crew from running their batteries down.  These should not make their way to the general public.

"Fleet" inverter with 11.5v low voltage cutoff

“Fleet” inverter with 11.5v low voltage cutoff

Every effort is made to keep these from the general public.  I just wanted to make you aware in case you wind up with one, or someone tries to sell you a used one.

Here is the proper model for RV use.

RV model with 10.5v cutoff

RV model with 10.5v cutoff

The last installment will talk about the installation into my 1960 Airstream Ambassador.

Amazon link for the GP-SW2000-12 Inverter
Amazon link for the GP-SWR-B12 Remote


Airstream Adventures Books

misc.php


Facebooktwitterredditpinterestlinkedinmailby feather

Modified Sine vs Pure Sine Inverters – (Part 1 of 3)

What’s an inverter?

An inverter turns 12vdc battery power into 110vac capable of running devices that require household voltage.  Household voltage, in the US, is 110v alternating current.  Alternating current means the power alternates or changes between plus and minus.  In the US it does it 60 times a second.  The result is termed a sine wave, which is illustrated as a smooth transition between the two extremes.

Alternating Current Sine Wave

Alternating Current Sine Wave                                             Image from commons.wikimedia.org

When I restored my trailer seven years ago, I included a inverter that could power my LCD TV’s whenever we were without hook ups.  We rarely boondock, actually we’ve only done it once, but it’s come in handy now and again.

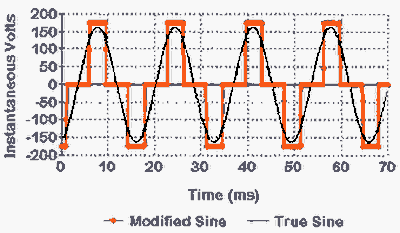
Inverters use various design techniques to turn 12vdc into 110vac.  Back when I bought my inverter the big technology at the time was termed Modified Sine Wave inverters.  Before that, they were square wave inverters.  Basically a rapid transition from positive to negative.  This type of transition was terrible for equipment.  The modified sine wave inverter added some filtering to the electronics to smooth out the edges of the square and simulate the pure rounded nature of household current.

Modified Sine Wave

Modified Sine Wave                                                          Image from highfields-arc.co.uk

Although improved over the square wave, the modified sine is still not ideal.  It is ok for certain loads like motors and light bulbs.  It may run other devices, but at less efficiency.  Newer electronics use more sophisticated power supplies and rely more heavily on a pure sine wave.

Cost is the major issue going from modified sine wave inverters to pure sine.  Modified sine inverters are relatively cheap when compared to pure sine inverters that require a lot more engineering the achieve correct wave pattern.

One caution to pay attention to is the really cheap modified sine inverters can actually be wired unsafe.  Some of them put half the power out of the neutral line to trick the load into operating at full 110vac.  This is an unsafe condition, especially if you try and wire it into your RV panel.

If you want to go with a modified sine wave inverter, go with a quality brand, and check that your loads will work properly on a inverter of this type.

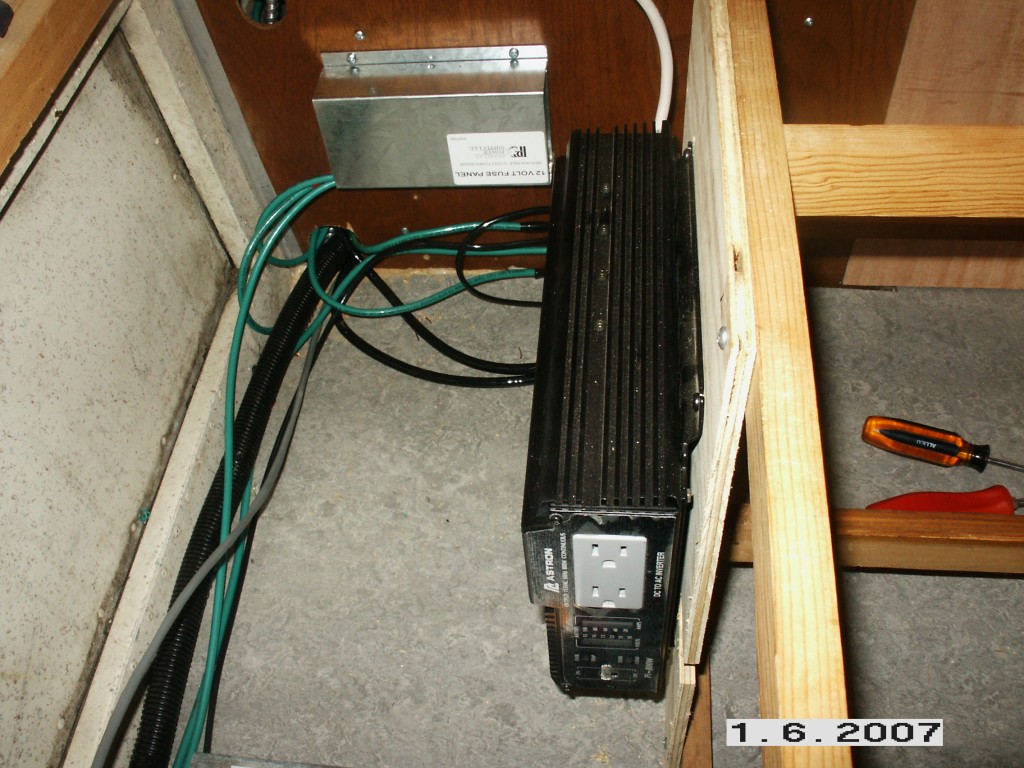
My Astron modified sine inverter installation

Photo during my Astron 800w modified sine inverter installation

Appliances like microwaves, may run on a modified sine inverter, if it’s large enough, but they run less efficient because of the poor sine wave.  They run better on a pure sine inverter that truly mimics household power.  In the end, they use less battery power to do it.

My old modified sine inverter ran my TV’s ok, but not much else.  I really wanted to be able to run my microwave in addition to the TV’s.  I also wanted to be able to use complex power supplies like those used in my macbook charger. So it was time to upgrade to a pure sine inverter.  I decided on a model from GoPower!

GoPower! makes a line of pure sine inverters of various sizes including, 1500w , 2000w, and 3000w models.

GP-Logo-LG

GoPower! 1500w Pure Sine Inverter

GoPower! 1500w Pure Sine Inverter

GoPower 2000w Pure Sine Inverter

GoPower 2000w Pure Sine Inverter

Like anything else, you get what you pay for.  Check out carefully before you buy.  Some manufactures typically over-rate what their products can do.

In the next installment, I’ll talk about why I chose the inverter I did and some of it’s features.

Amazon link for the GP-SW2000-12 Inverter

Disclaimer: Although my inverter was sponsored by GoPower, the experience and opinions expressed here are my own.

Facebooktwitterredditpinterestlinkedinmailby feather

Solar Show!

We are going to have GoPower on the show this week to talk solar, along with the Snowmads.

 Jason and Kristin Snow recently installed solar on their ’65 Airstream to help them while they full-time.  We will ask them about their new lifestyle and how solar plays a part.

We need your help.  Call in and give us your questions or comments on solar so we can play them on the show.

Call Now! 707-533-4827.

Call Now! 707-533-4827.

Don’t forget to enter the GoPower giveaway for a 100w Flex-Solar kit!  Click on the image below.

Click banner to enter!

Click banner to enter!


Facebooktwitterredditpinterestlinkedinmailby feather

HooToo Review!

I mentioned the original HooToo TripMate device on Episode 211 and talked about how we used it on our trip.  I contacted HooToo about their new Elite model and they sent it to me to review.

Either TripMate will do several things for the road warrior.

1. First it will create a wifi network and stream media to tablet and smart phone users.  Perfect for keeping the kids happy on those long driving days.

2. Secondly it will share an internet connection via it’s wifi.  If there is a internet connection near, either wireless or wired, the HooToo can connect to that service and rebroadcast it via it’s own network.  Many times increasing range and security.

3. Thirdly the HooToo is a battery bank and can charge phones and some tablets on the go.

Great device for the road warrior!

Amazon links:
HooToo TripMate Elite
HooToo TripMate

Here is a video review of the HooToo TripMate Elite.

Some times hotels or campgrounds require getting access through a permissions or what they call a splash page.  When I asked HooToo support if their device can handle that, here is their response.

“Yes you can connect the tripmate to a wireless network which has a splash page.
i.e. the hotel wifi network which need you to login with the room# and pw.
You can follow the below steps to set up:
– ask hotel front desk to get the wifi user name and password of your room
– connect your phone with Elite, login its webend 10.10.10.254
– setting -> internet -> wireless access -> scan -> select your hotel’s wifi name (SSID), leave the password empty, save.
– open another page on your phone browser, the hotel restrict page pops up, login with the username & password you asked from front desk
– your Elite’s mac address has been registered by hotel wifi system, then your other devices could access the network bridged by Elite.”


Airstream Adventures Books

misc.php

Facebooktwitterredditpinterestlinkedinmailby feather

Sunny Side Up

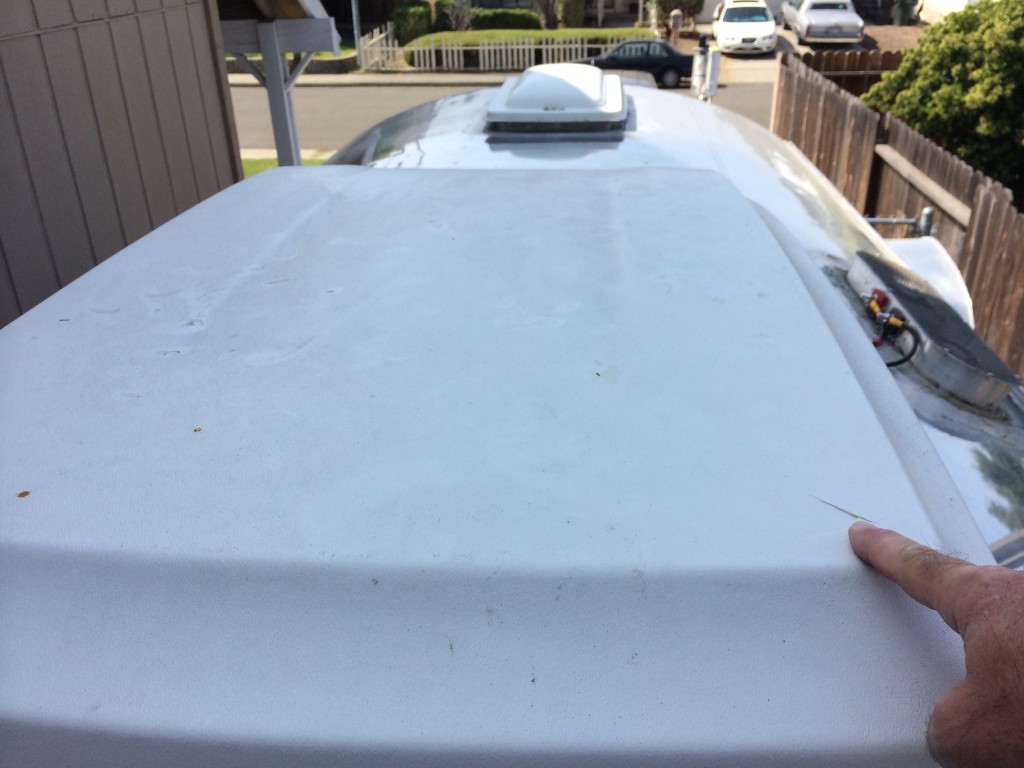
The sun damaged Dometic heat pump shroud finally gave up the ghost.  You may remember it breaking even more during the solar installation.  After about 7 or 8 years of sun burns, it got so brittle, it cracked if you stared at it too long!

Cracked when I leaned on it lightly.

Cracked when I leaned on it lightly.

IMG_4454IMG_4454

I found the best place to get the replacement was directly form Dometic.  My heat pump is just old enough every dealer had to order it anyway.  So might as well go to the source.  Your best option here is to call them with the model number of your a/c unit.  The model is on a sticker under the cover.  It’s kind of a pain to get, but you should make the effort.  They have many different models and there are no refunds on special orders!  The cost was $89 plus $35 for the over-sized shipping.

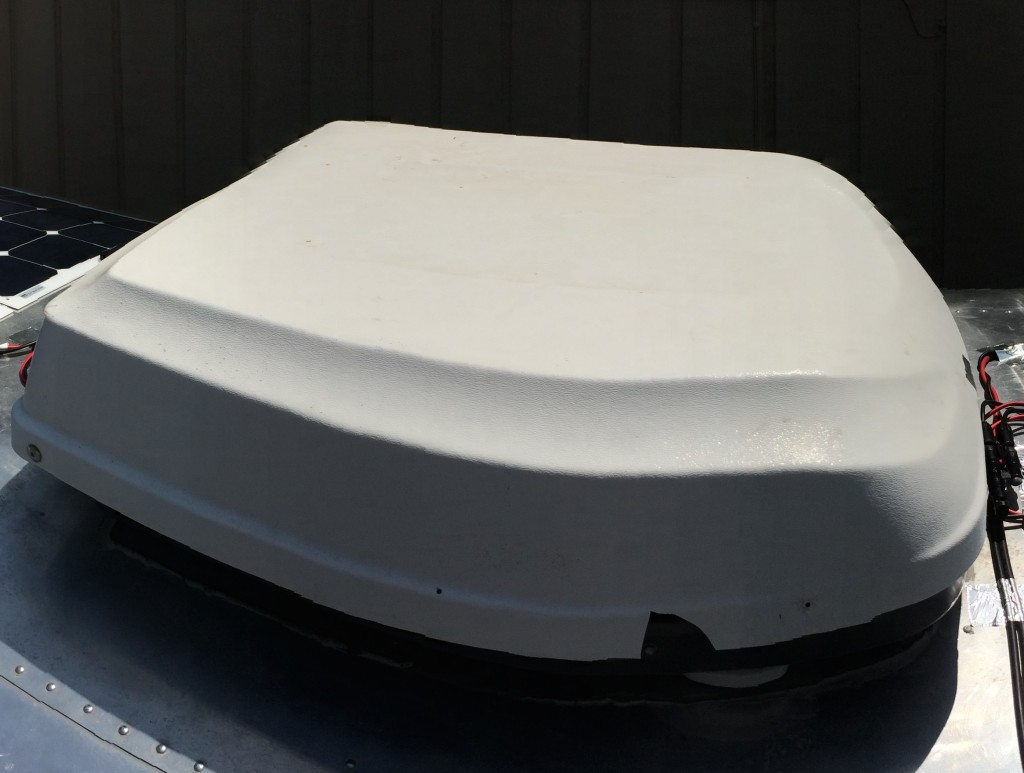
Here is the old shroud removed.  Notice how deteriorated it really is.  I wonder if one of those winter covers would extend its life.  If you know, leave me a comment.

Sun damaged shroud

Sun damaged shroud

You may notice the small black lines around the edges.  That is from repairs that I did a last year using Q-Bond (Amazon Link).  The repairs actually held up great, however the overall plastic was too far gone.  Every time you touched the shroud it would crack again.  Check out my video series on using Q-Bond.  You may have a vintage shroud to repair.  (YouTube Link)

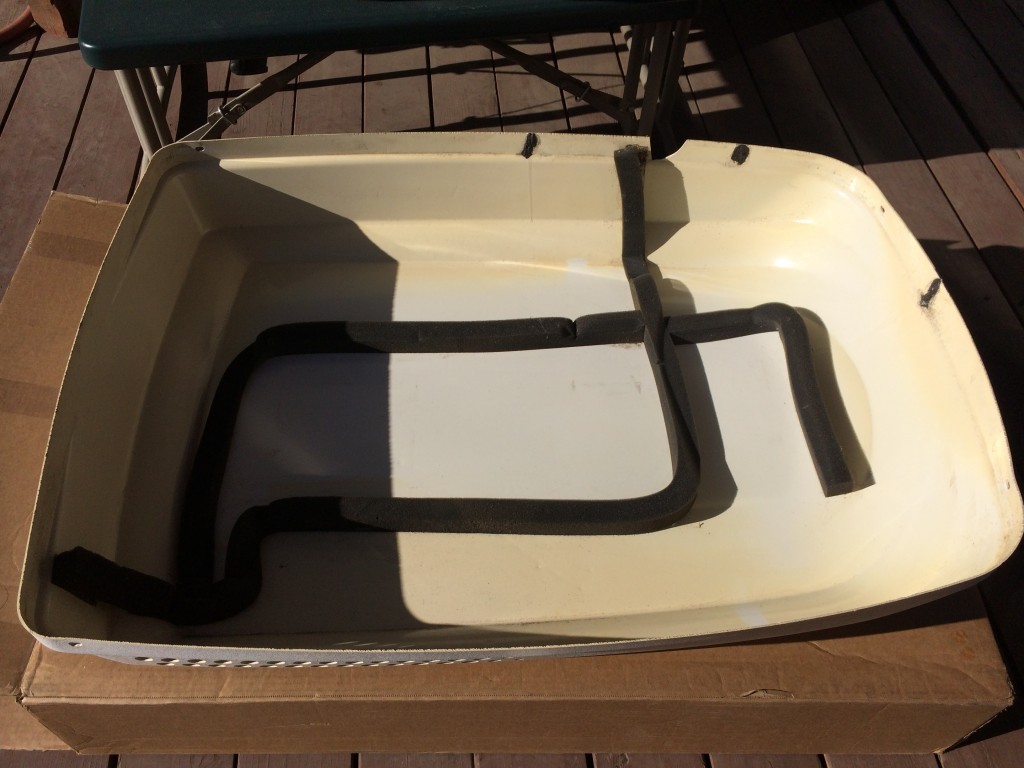
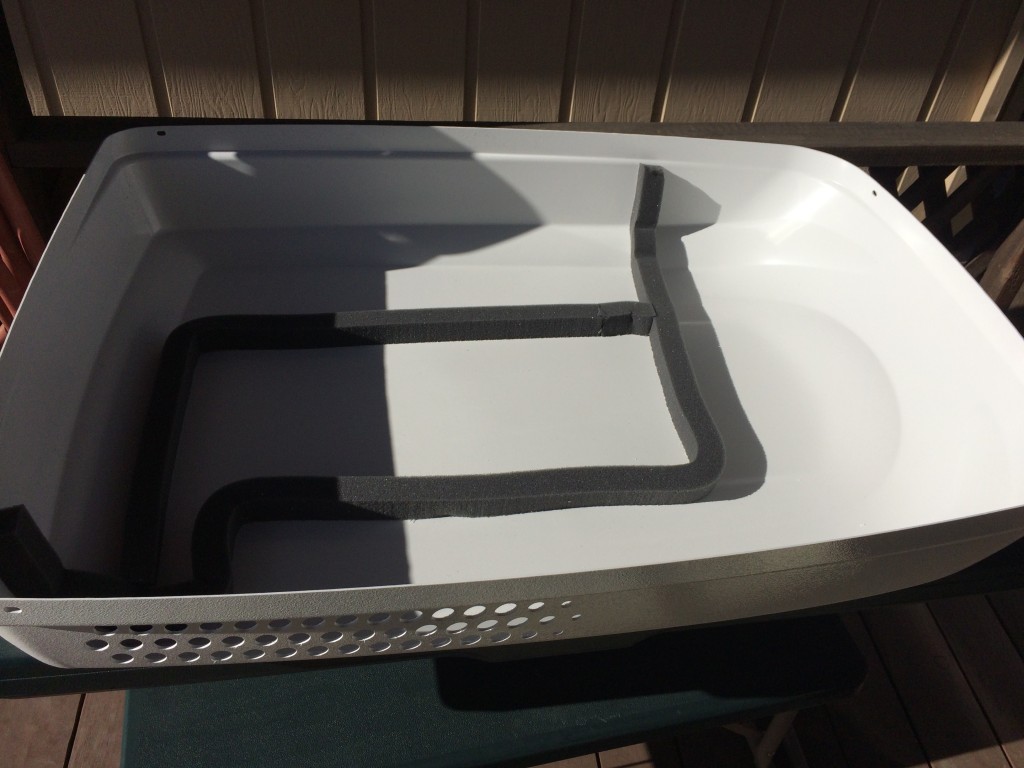
When the new shroud comes, the foam gaskets are not installed.  So be sure to keep the old shroud and  use it as a pattern to install the gasket.  Unfortunately, Dometic didn’t included enough foam material, so I had to reuse some from the old shroud.

Missing a short piece of gasket.

Missing a short piece of gasket.

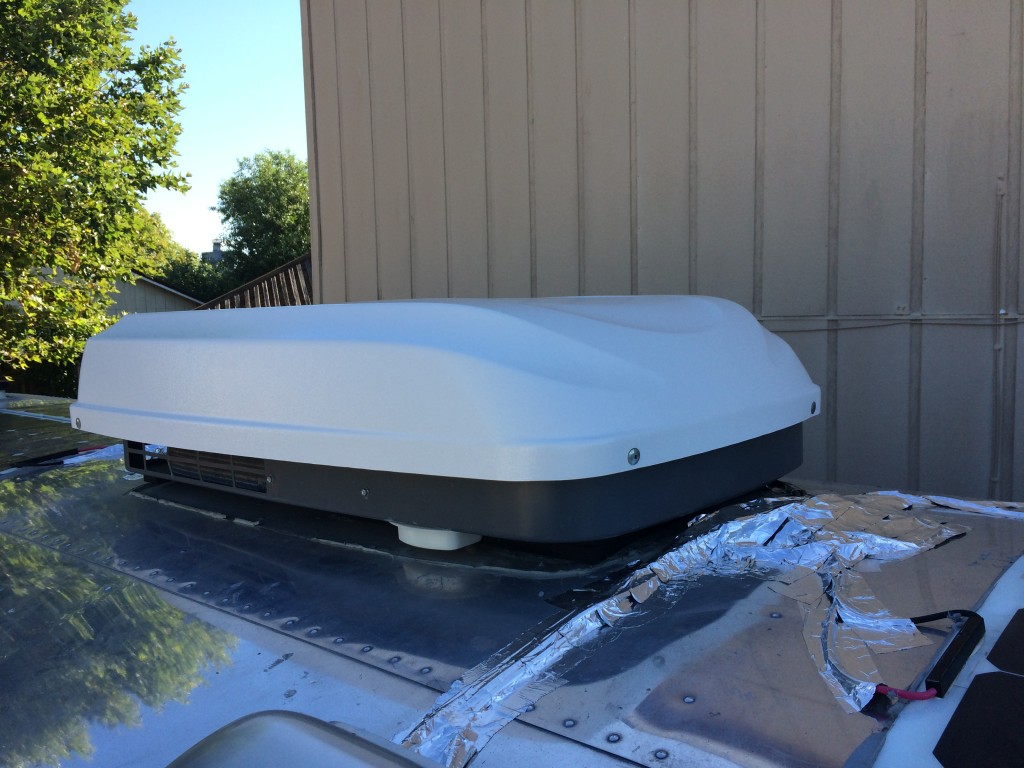
Here it is back on the roof.  Simple job really.  Hopefully I can get it to last a good number of years.  It maybe hard to find a replacement the next time.

IMG_4682

Ain’t it purdy?


Airstream Adventures Books

misc.php

Facebooktwitterredditpinterestlinkedinmailby feather

GoPower! Solar Flex Installation- Part 3

Starting June 9th, Enter to Win a 100W Solar Flex kit from GoPower!  The kit includes a 100W flex panel, 30amp charge controller, and an MC4 cable.  Click the banner to enter.  Good luck!

Click banner to enter!

Click banner to enter!

Go to part one of the install
Go to part two of the install


400 Watts of of pure sun power from GoPower!

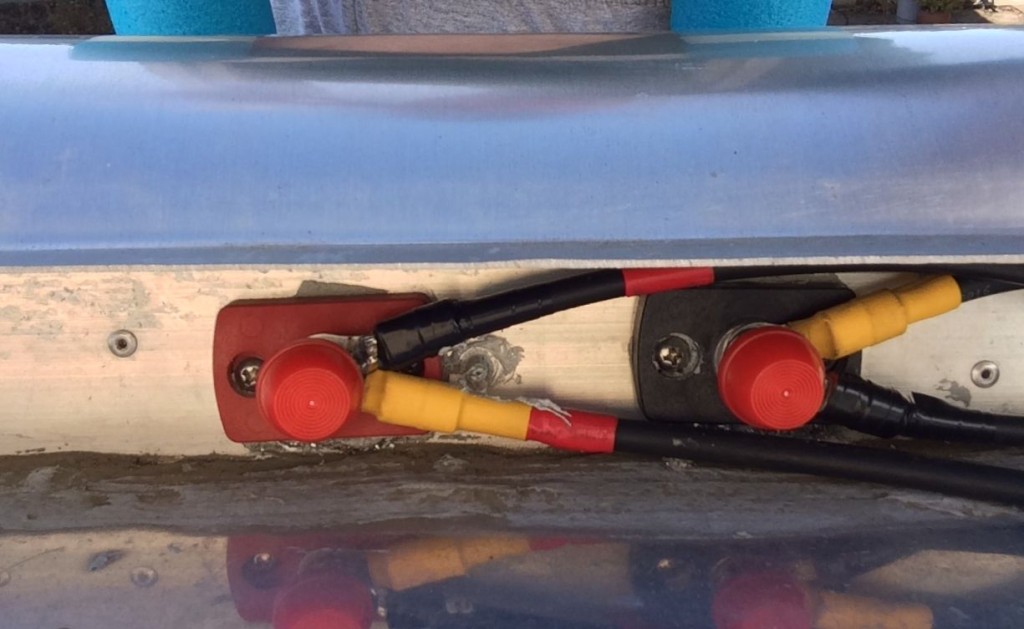
In part 2 of the solar install, I was short one MC4 cable that I needed to wire in the front two panels.  GoPower! quickly sent me what I needed and I got it wired in easily using my fridge vent Blue Sea feed-through terminals.  Then I mounted the fridge vent cover.  I put on these little plastic caps to keep the terminals from shorten out from something hitting them at the same time.  Not that there should be any issue on the roof…

Solar wiring junction on fridge vent

Solar wiring junction on fridge vent

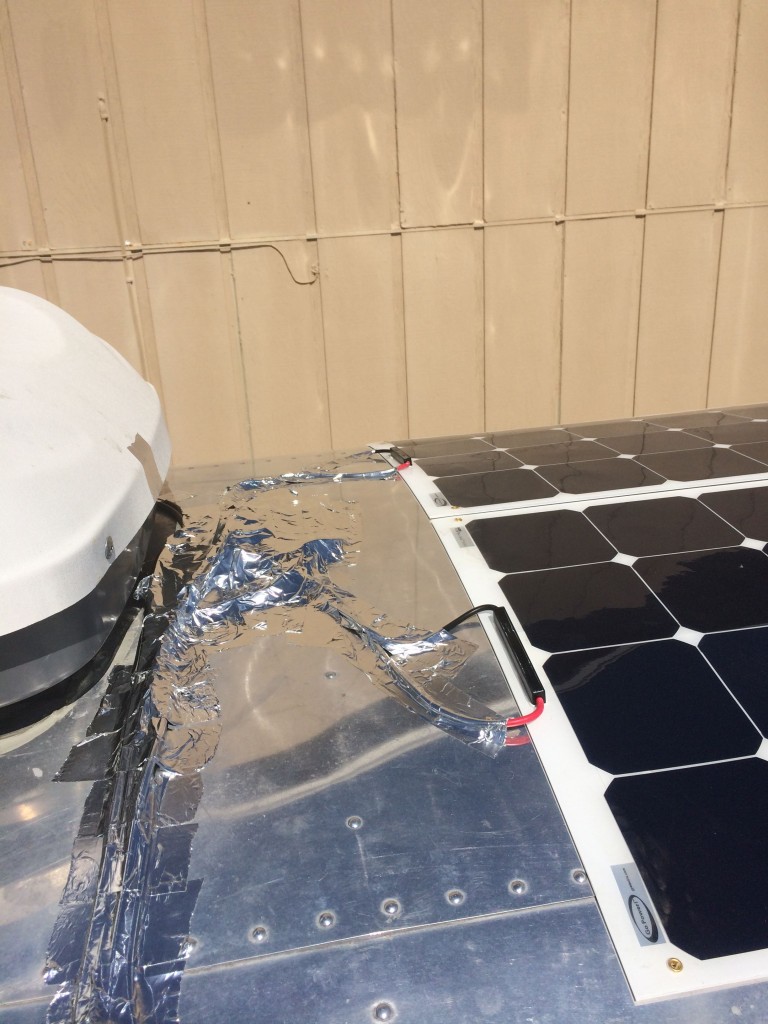
I decided to hid all the wires with aluminum tape.  I probably went a little overboard covering the MC4 bridge plugs.  Now it looks like there is a “Jiffy Pop” on my trailer just waiting to vent some fresh popcorn!

IMG_4482

IMG_4492

IMG_4496

I called up 3M about their VHB tape and my application.  I asked them if the tape needed to be sealed against water or UV radiation and they answered, no it does not.  So with that, I may not even seal the edges.  They look so clean now with just the tape.

The tape does have a very strong hold that after 72 hours, total adheres at some crazy scientific molecular level.

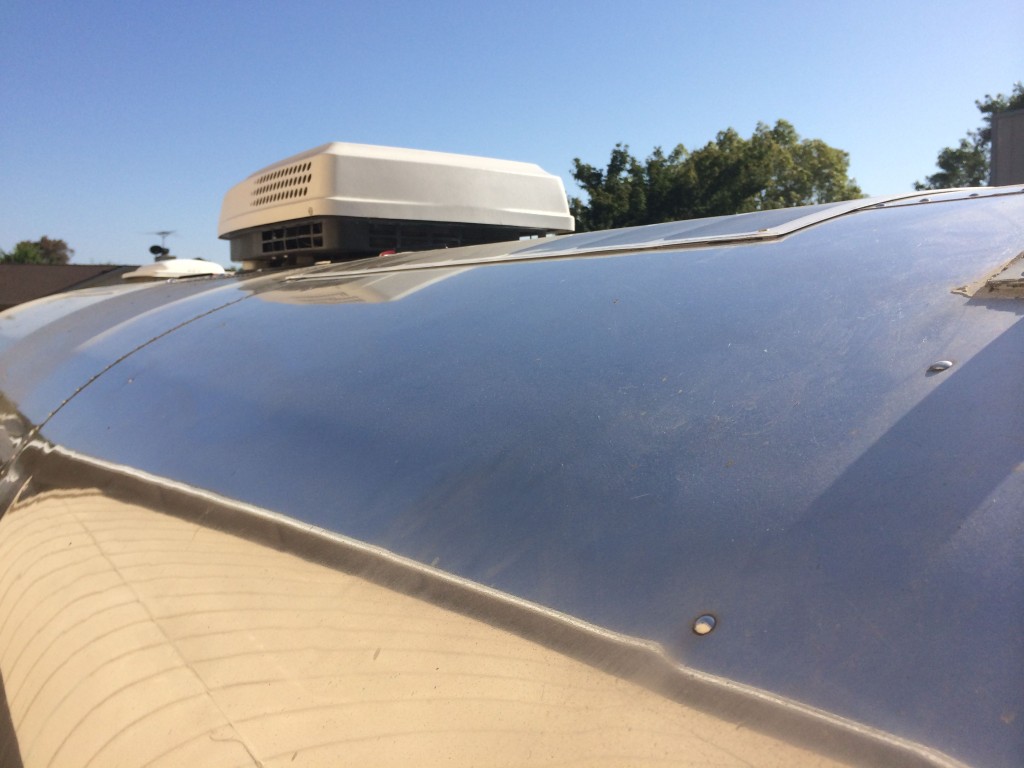
Here is a profile shot of the clean edges.

IMG_4497

You can’t even see these panels standing next to the trailer….

IMG_4498

Update: I decided to go ahead and put Sikaflex 221 around the edges of the panels.  Mostly to keep any water from getting behind them.  Turned out fine.

Added sikaflex 221 on the panel edges.

Added sikaflex 221 on the panel edges.

Today I was able to do some more testing to see how much I can get out of the panels.  Keep in mind that my battery is fully charged, so the panels don’t want to give up much.

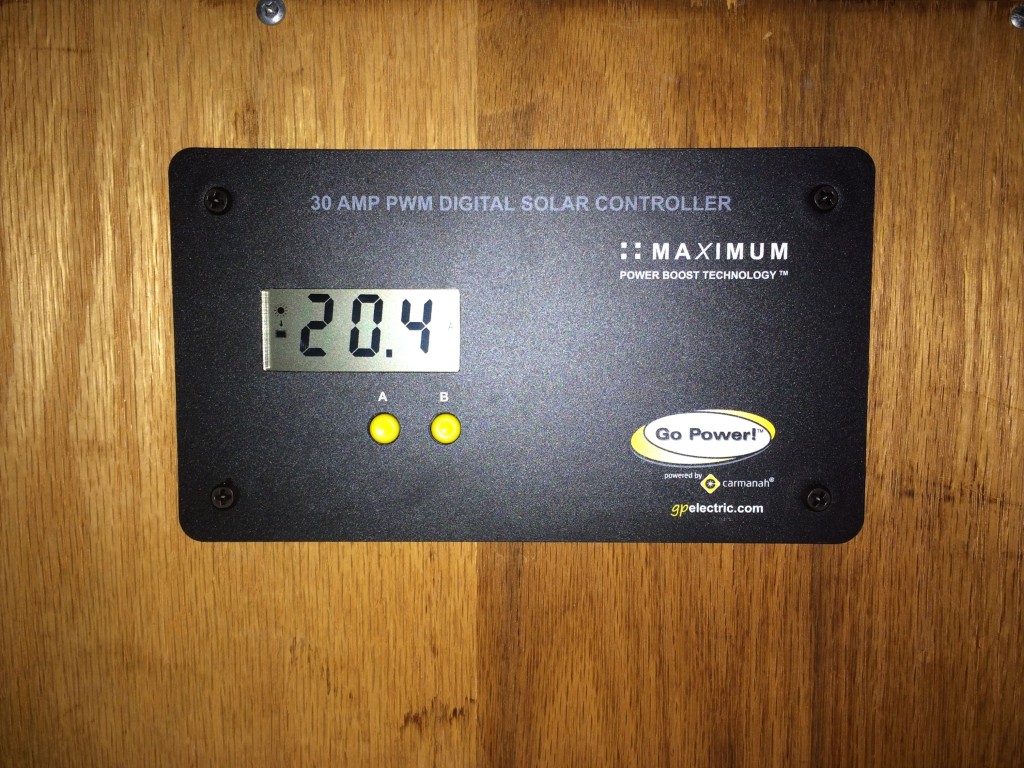
I turned on my inverter, powered the TV’s and some lights, the fantastic vent, and finally got the solar up to over 20 amps!  Wow, pretty sweet.  I was drawing over 30 amps, but only 11 were coming from the battery bank.  Not bad at all!

Nice.  Over 20 amps from the four panels.

Nice. Over 20 amps from the four panels.

Go to part one of the install
Go to part two of the install

Here are the Amazon links to the flexible panels I used if you want to research them further.
1 – Go Power! (GP-FLEX-200) 200W Flexible Solar Kit with 30 Amp PWM Solar Controller
3 – Go Power! (GP-FLEX-100E) 100W Flexible Mono Crystalline Solar Expansion Kit


Airstream Adventures Books

misc.php

Facebooktwitterredditpinterestlinkedinmailby feather

400W of Sun Power… almost : Part 2

Go to part one of the install
Go to part three of the install

The long awaited three 100 w GoPower! Solar Flex panels arrived.  Well, not really that long, it just took a week.

Expansion Kits

Expansion Kits

Each box contains a 100w flex panel, mounting hardware, and  a special MC4 bridging connector to parallel two panels together.  Once you go over two panels you need a combiner box of some sort.  I did it with Blue Sea bulk head connectors on my fridge vent.  The odd thing is the manual says the expansion kit also comes with a 50′ MC4 cable, but the box does not and it was missing.  I need one to wire in the second set of panels.  I’ve contacted GoPower! to sort it out.

I’m going to mount the panels with 3M VHB (Very High Bond) 4941 tape.  I know it sounds crazy, but this tape is specially formulated to bond plastic and metal.  A typical use is to hold nameplates on vehicles.  I followed 3M’s technical bulletin to install the tape.  This is in place the rivnut installation I did on the first panel.  I didn’t like it because the panel did not lay flat.  Plus why drill more holes in your Airstream than you need?

I gathered my supplies and set out to get started.  I have 15 yards of 3M tape, microfiber towels, soap to clean the roof, and isopropyl alcohol.  You may also notice the black MC4 parallel adapters in the photo.  These are used to parallel two panels together.  More on that later.

IMG_4432


After cleaning the roof with soap and water, and allowing it to dry, I wiped down the area with my 50/50 water-alcohol solution.

IMG_4437

While the roof was drying, it was time to prepare the panels.  The first step is to lightly sand, in a circular pattern, the back surface of the panel.  This will allow the tape to adhere more completely.

Sand in small circles.

Sand in small circles.

Then used my 50/50 water-alcohol solution and cleaned the edges of the panel that I just sanded, and let dry.

Clean off the residue left from the sanding.

Clean off the residue left from the sanding.

The next step is to apply the 3M VHB tape.  I just slowly worked it around the edges then used a J-roller to secure it in place.

3M VHB at Amazon

IMG_4436

Next I marked off where the first panel would go on the roof of the Airstream. I used the edge of the top aluminum panel as my reference and laid out blue painters tape to my desired location.

Measure twice.  Stick once!

Measure twice. Stick once!

I got up on the roof and peeled off the backing tape and carefully lowered the panel toward my reference marks.  The stuff sticks quickly.  If you are VERY light with it, you can shift it somewhat, but you’d better be sure where its going before you lay it down.  Don’t forget the direction the power wires need to go before you lay the panel down!

After the panel was in place it was time to J-roll the edges.

Securing the panel with a J roller

Securing the panel with a J roller

Repeat for the next three panels.  I left about 1/2″ between panels on the roof because I intend to use SikaFlex 221 around the edges of the panel to help secure them even more and keep water off of the tape.

IMG_4440

Yes,  you can walk on them.  It’s almost necessary on my Airstream just to get around the narrow roof.   Here I am J-rolling the set.  Ain’t they pretty?

BTW – here is a tip.  Don’t lean on your sun rotted A/C shroud while maneuvering around the roof.  – OUCH!

I've needed a new one for a while anyway.

I’ve needed a new one for a while anyway.

With my existing cable I’m able to run these two panels into the charger controller.  I just need another MC4 cable to hook up the front to panels.

It’s very easy to wire two panels together.  Each panel has a positive and negative connection. Using the bridging adapters, you hook both negatives into one adapter, and both positives into the other.

IMG_4443

Both negative leads from the panels into one adapter

Both negative leads from the panels into one adapter

Both adapters wired into the cable that feeds the charge controller

Both adapters wired into the cable that feeds the charge controller

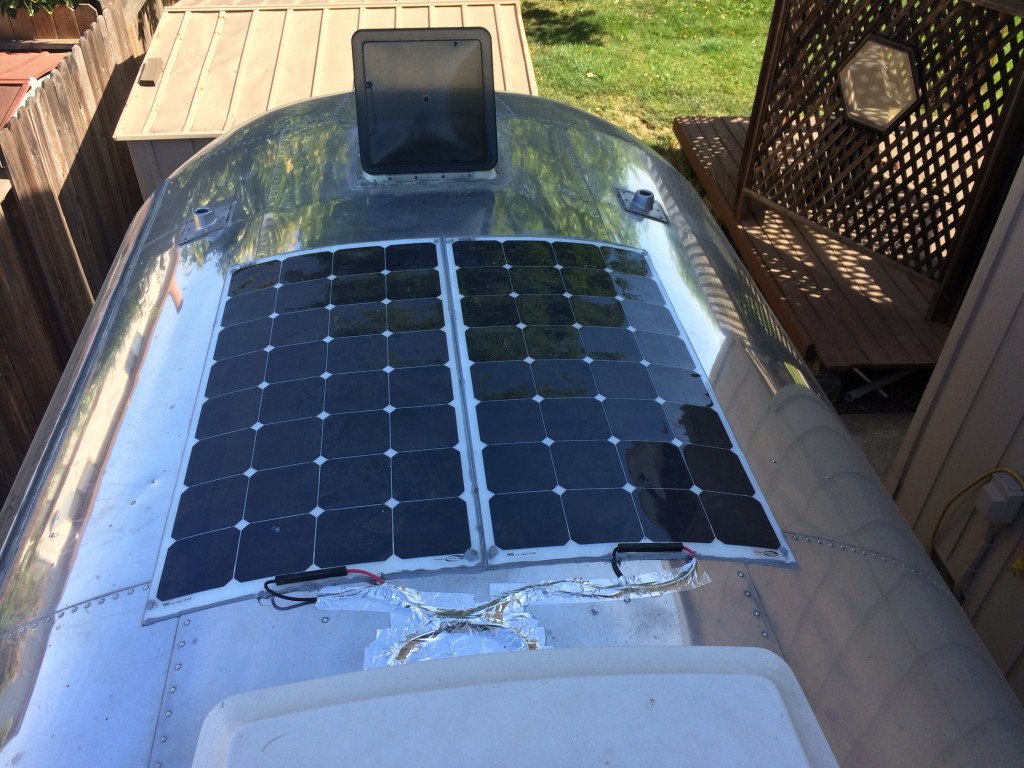
That’s it for now until I get the MC4 cable and Sikaflex that I need.  With these two panels I was able to easily pull in over 10 amps.  The only hard part is that my battery is always charged now, so I have to turn on a bunch of stuff to get the solar to ramp up. 🙂 What a problem to have. 🙂

10amps from the rear two panels

10amps from the rear two panels

It’s hard to tell with the trailer parked next to my house, but it doesn’t look like you will notice the panels very much.  I cheated on the centering a little bit by allow more to show on the street side than the curb side of the trailer.  I just thought that when you’re camping, you don’t spend too much time on the back side of the trailer.

As long as it holds, I can tell you the 3M VHB tape is the way to go.  Much easier to install than trying to mark and center rivnuts all over the place.  It even beats just drilling screw holes since these mounts won’t cause any leaks.  Time will tell, but from my research its commonly used on the aluminum/glass solar panels, and those are much heavier and are mounted with brackets.  That’s right, only VHB tape and sikaflex on the brackets.

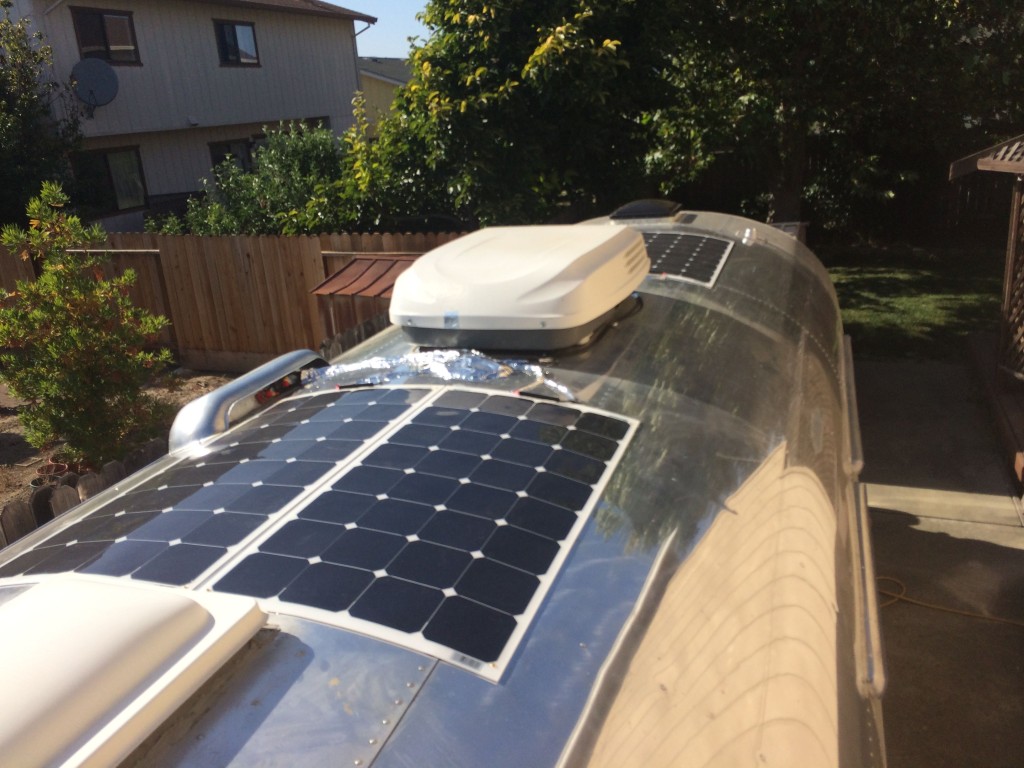
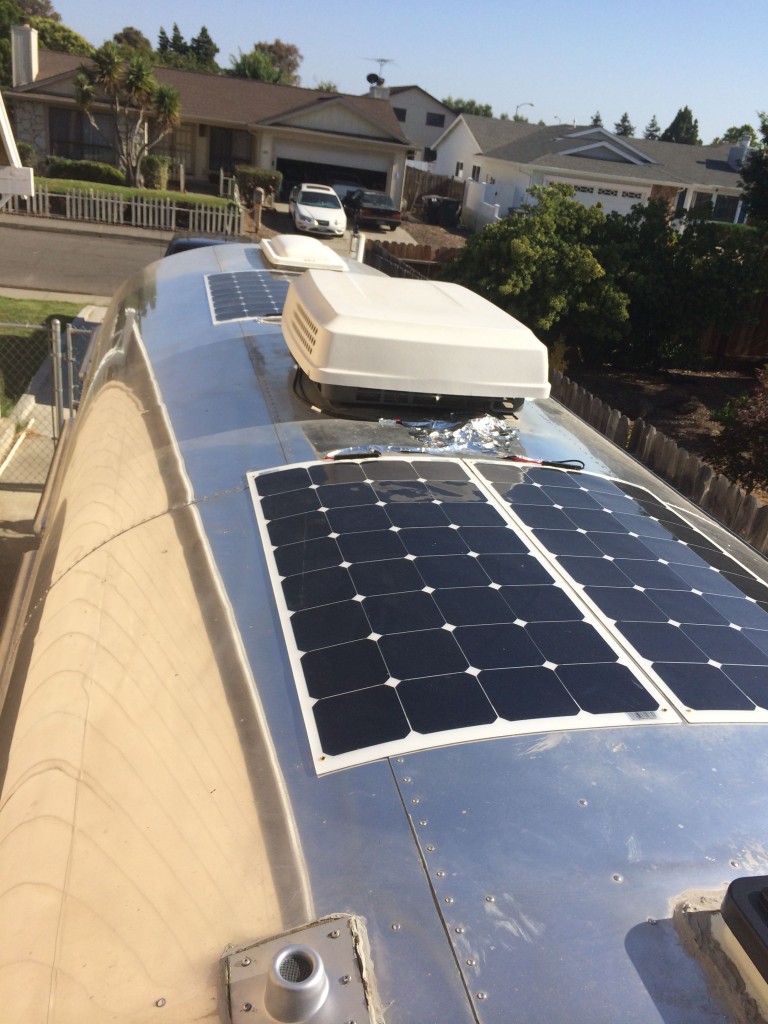
I’ll end with some more photos of the panels.  They look great curved to the stylish roof of my Airstream!

IMG_4451

Rear two panels

Front two panels

Front two panels

Overview shot

Overview shot

Low profile edge.

Low profile edge.

aspano


Go to part three of the install
Go to part one of the install


Here are the Amazon links to the flexible panels I used if you want to research them further.
1 – Go Power! (GP-FLEX-200) 200W Flexible Solar Kit with 30 Amp PWM Solar Controller
3 – Go Power! (GP-FLEX-100E) 100W Flexible Mono Crystalline Solar Expansion Kit


Airstream Adventures Books

misc.php

Facebooktwitterredditpinterestlinkedinmailby feather